Overview
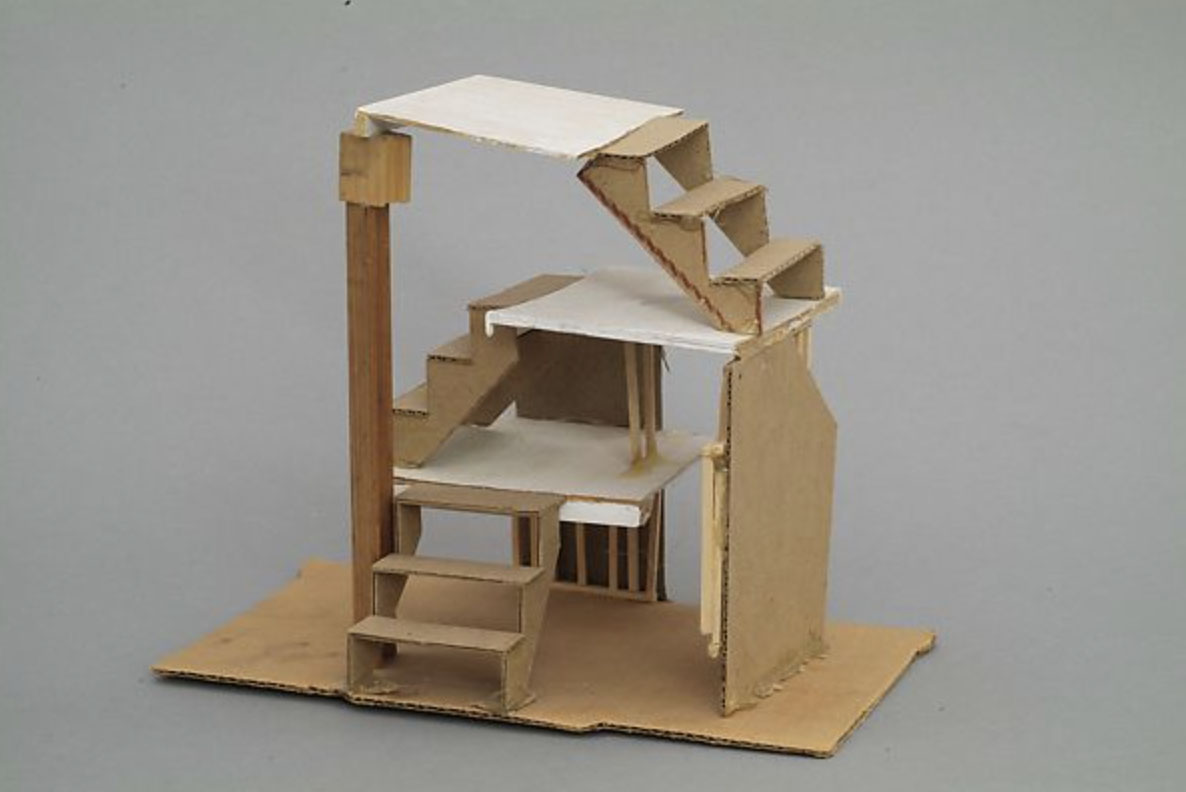
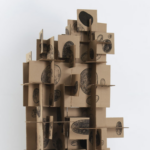
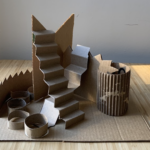
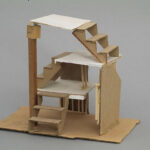
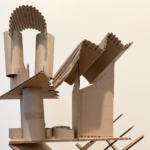
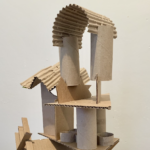
In this unit, students will transform paper and cardboard into three-dimensional forms by tearing, folding, and rolling. They will compare materials and learn construction techniques like slot-joining and stacking to create an imaginative play space and structure.
Lessons
Materials and Tools
- Sheets of different colored paper
- White paper or Sketchbook
- Glue or tape
- Pencil
- Corrugated cardboard (from shipping boxes)
- Thin cardboard (from paper towel rolls or cereal boxes)
- Flat cardboard
- Scissors
Objectives
- Students will be able to demonstrate how to change paper and cardboard from two dimensional to three dimensional
- Students will be able to identify building techniques, such as slot-joining, leaning, balancing, standing, and stacking and apply these to build their structures
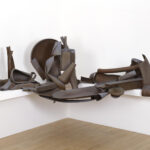
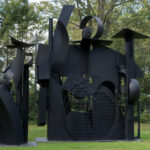
- Students will identify how artists use form and space to create sculptures and structures and apply that knowledge to create their own imaginary structures
Student Outcomes
Students will understand that:
- Two-dimensional paper and cardboard can be transformed into a three-dimensional-building material
- Different materials (paper, cardboard) have different properties (light, heavy) which influence how you can build with them
- Arranging and rearranging creates different spatial relationships (positive and negative space)
Students will be able to:
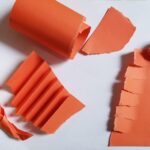
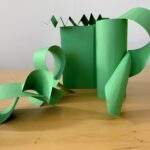
- Demonstrate how to transform paper from two dimensional to three dimensional by folding, rolling, twisting, crumpling, and fringing
- Apply knowledge of different techniques to build a free-standing sculpture by standing, stacking, leaning, and balancing forms, as well as using slot-joining to create secure attachments
- Create an inventive play space and structure using their imagination and problem-solving skills
Resources
Metropolitan Museum of Art
Siah Armajani: Follow This Line exhibition overview:
https://www.metmuseum.org/exhibitions/listings/2019/siah-armajani-follow-this-line
The Bronx Museum of the Arts
Terrence Gower’s Super Puesto, a public art installation
http://www.bronxmuseum.org/exhibitions/terence-gower-superpuesto
Kohl Children’s Museum
A simple paper sculpture art lesson
Center for Architecture and Pedagogy, NYC
Free, online architecture and design activities for K-12 students
Museum of the City of New York
New York City skyscraper lesson
Imaginary Playgrounds
A playground equipment system that is made for building
Adaptations
For Students with Disabilities
- Use hand motions or body movements to act out different of changing the material (tear, fold, twist, crumple, roll, fringe) and build with it (stand, stack, lean, balance)
- Use technology to create drawings on an iPad or in Google Classroom
- Use manipulatives or found objects to create arrangements and practice different ways of building (stand, stack, lean, balance)
- Use audio with visuals in the student-facing Google Slides
For Multilingual Learners
- Use supplemental vocabulary sheets to pre-teach content-specific words and concepts
- Use images paired with vocabulary words to help with meaning
- Emphasize repetition of new art vocabulary. Re-cast and spiral vocabulary: repeat vocabulary and concepts in lessons so that students gain familiarity
- Activate students’ prior knowledge
- Use icons or symbols to provide visuals for lines and geometric shapes
- Use Total Physical Response (TPR) to show building techniques in the air with fingers or hands
- Signpost: tell students what you are going to do next
- Chunk information and keep instructions concise
- Elicit information: ask open-ended questions and give students time to think about an answer. Extend wait time
- Use multiple entry points: speak, show, and do
- Use audio with visuals in student-facing lesson guides
Extensions
Abstract Collage with Layers
After exploring abstract sculptures, try making an abstract collage.
- Start by tearing or cutting small, medium, and large shapes from each of your three different colored papers. Which geometric shapes will you make? Which organic shapes will you create?
- Next, arrange some of your big and medium shapes onto your paper to create a base layer for your collage. Are any of your shapes overlapping? Are there any negative spaces between shapes?
- With your medium and small shapes, create another layer
- Finally, with your smallest shapes, add a final detail layer
- Reflection: Where did you overlap shapes? What new shapes did you create in your collage? Did you create any interesting negative spaces?
Materials: at least three different colors or kinds of paper, scissors, glue, or tape
Found Object Arrangements
Try balancing, leaning, standing, and stacking with found objects from around your house.
- Gather five non-breakable objects that you have at home and experiment by creating several different arrangements
- Choose your favorite arrangement to draw. Where can you see positive space? Where can you see negative space?
Materials: Five household objects (objects with at least one flat side will work best)
Drawing an Impossible Sculpture
One of the great things about drawing is that it allows us to create things that might not be possible in real life. Can you imagine an abstract sculpture that wouldn’t be able to stand up on its own in real life? Draw it! Which parts of the sculpture wouldn’t work in real life? Why?
Materials: Paper, pencil
New York Teaching & Learning in Visual Arts Standards
Art Making: 5th Grade Learning Indicators for Sculpture
Create a sculpture that demonstrates:
- Stable construction of a three-dimensional form
- Boxes, wood, tubes, found objects: ability to apply techniques of cutting, taping, and
- Slot joining that result in a unified balanced assemblage
- Placement of components that describe gesture, movement, and expression
Literacy in the Arts
- Looking at and Discussing Art
- Developing Visual Arts Vocabulary
- Reading and Writing About Art
- Problem Solving: Interpreting and Analyzing Art
Making Connections
- Recognizing the Societal, Cultural, and Historical Significance of Art
- Connecting Art to Other Disciplines
- Observing and Interpreting the World
Community and Cultural Resources
- Cultural Institutions
- Public Art and Design
- Online Resources and Libraries
- Community-Based Organizations (CBOs), Local Artists, and Studios
Careers and Lifelong Learning
- Awareness of Careers in Visual Arts
- Art for Enjoyment and Lifelong Learning
NYS Learning Standards for the Arts
Artistic Process: Creating
Anchor Standards:
- Anchor Standard 1: Generate and conceptualize artistic ideas and work
- Anchor Standard 2: Organize and develop artistic ideas and work
- Anchor Standard 3: Refine and complete artistic work
Artistic Process: Presenting
Anchor Standards:
- Anchor Standard 4: Select, analyze, and interpret artistic work for presentation
- Anchor Standard 5: Develop and refine artistic techniques and work for presentation
- Anchor Standard 6: Convey meaning through the presentation of artistic work
Artistic Process: Responding
Anchor Standards:
- Anchor Standard 7: Perceive and analyze artistic work
- Anchor Standard 8: Interpret meaning in artistic work
- Anchor Standard 9: Apply criteria to evaluate artistic work
Artistic Process: Connecting
Anchor Standards:
- Anchor Standard 10: Relate and synthesize knowledge and personal experiences to inspire and inform artistic work
- Anchor Standard 11: Investigate ways that artistic work is influenced by societal, cultural, and historical context and, in turn, how artistic ideas shape cultures past, present, and future
Credits
Writing Team
Nina Berinstein, Juanita Lanzo, Belinda Blum, Traci Talasco
Project Team
Belinda Blum, Nicola Giardina, Paul Urevitch, Andrea Burgay
Studio in a School NYC Team
Julie Applebaum, Senior Director
Hasna Muhammad, Ed.D., Chair, Board of Directors, Studio in a School Association
Alison Scott-Williams, President, Studio in a School NYC
NYC Department of Education OASP Team
Karen Rosner, Director of Visual Arts
Amber Lodman, Arts Program Manager
Kaitlin Trammell, Remote Arts Learning Partnership Project Coordinator
NYC Department of Education Visual Arts Teacher Team
Maria Bonilla, Amie Robinson, Susan Bricker, Lara Tyson
These educational materials were created through a partnership with Studio in a School NYC and The New York City Department of Education Office of Arts and Special Projects (OASP) and made possible by the generosity of The New York Community Trust.
Copyright © 2023 Studio in a School NYC LLC