Overview
Students will use the shapes that they created in Lesson 5 (or make new shapes, if needed) to explore different building techniques and create an imaginary play space.
Materials and Tools
- Saved cardboard pieces from Lesson 5
- Corrugated cardboard (from shipping boxes)
- Thin cardboard (from paper towel rolls, cereal boxes)
- Flat cardboard for base
- Scissors
- Glue or tape
- Imaginary Play Space video
- Imaginary Play Space student slides
Objectives
Students will understand that:
- Cardboard can be changed in a variety of ways to make it stand
- Different methods and techniques can be used to build with cardboard
- Artists can use their imaginations to create sculptural places
Students will be able to:
- Identify and demonstrate using the slot-joining technique to attach cardboard pieces together
- Apply knowledge of how to lean, balance, stand, stack, or slot join cardboard pieces and make choices about which techniques to use while building
- Use the idea of a playground or play space as inspiration while building
Activities
Note: The following steps are written with sample language you may use with your students as you go through the lesson. Explain to students that the slides and the video they see during the lesson will be shared with them so they can review the lesson on their own and continue to make more art.
Step 1: Introduction/Watch Imaginary Play Space video (14 minutes)
Welcome, artists! In the last lesson we learned how to create shapes with cardboard. We discovered that cardboard could be changed by peeling, rolling, and folding.
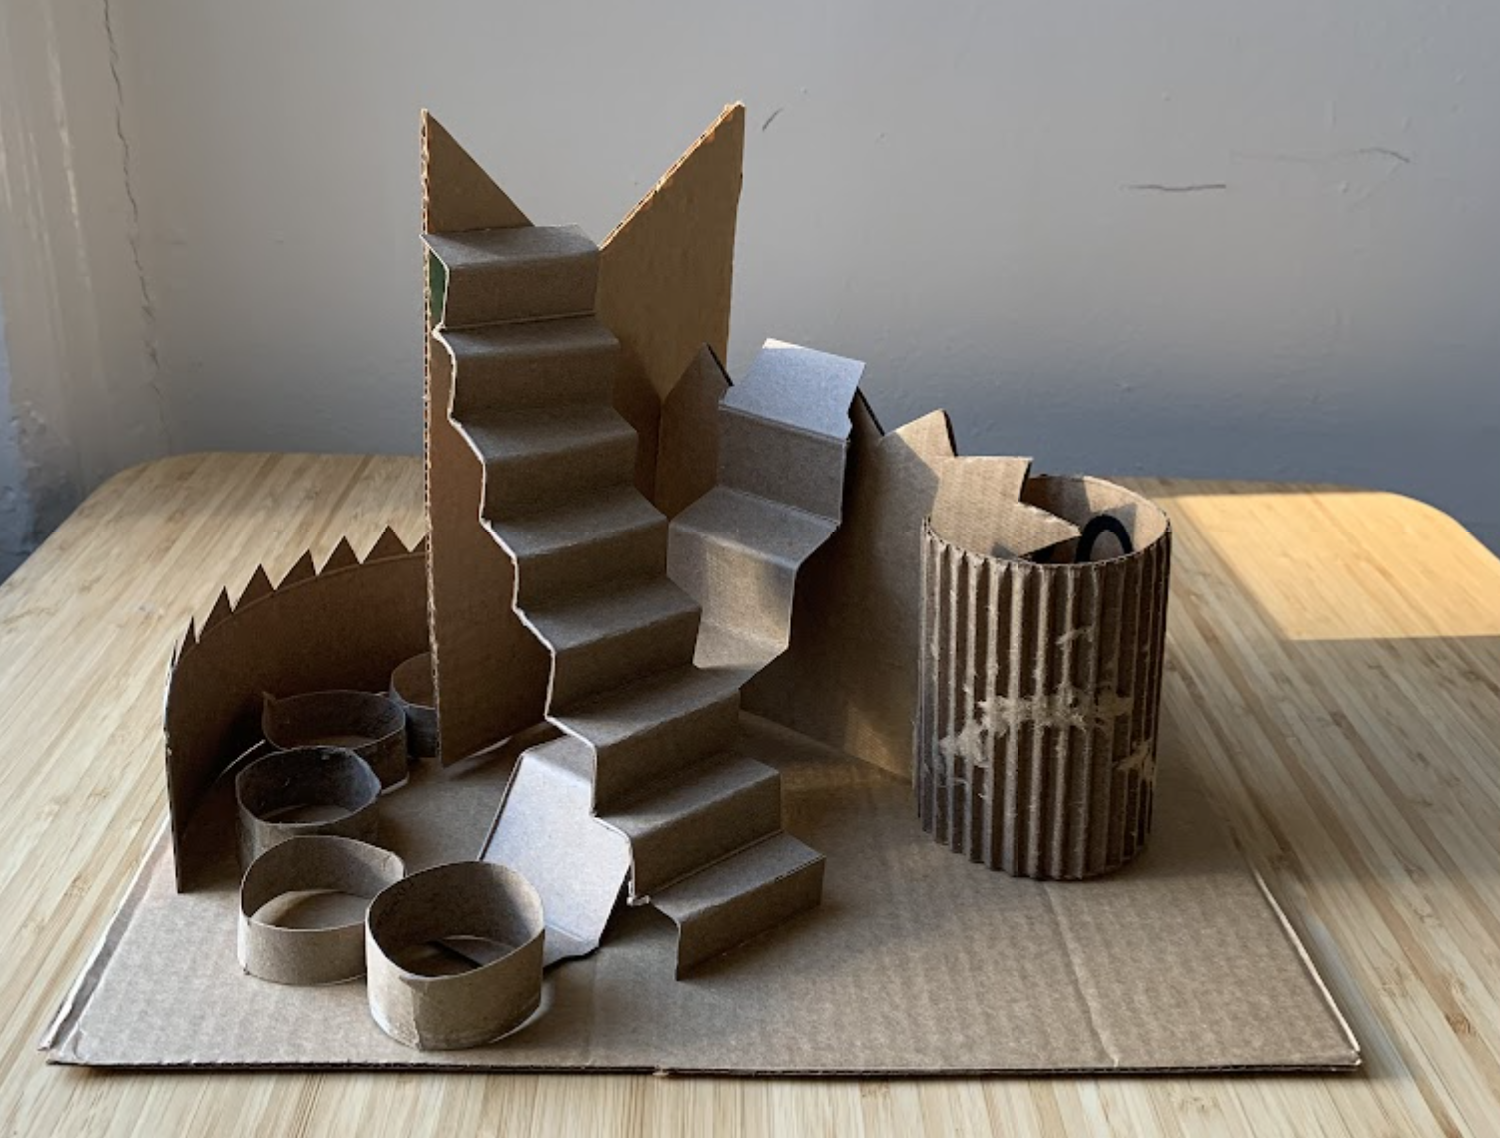
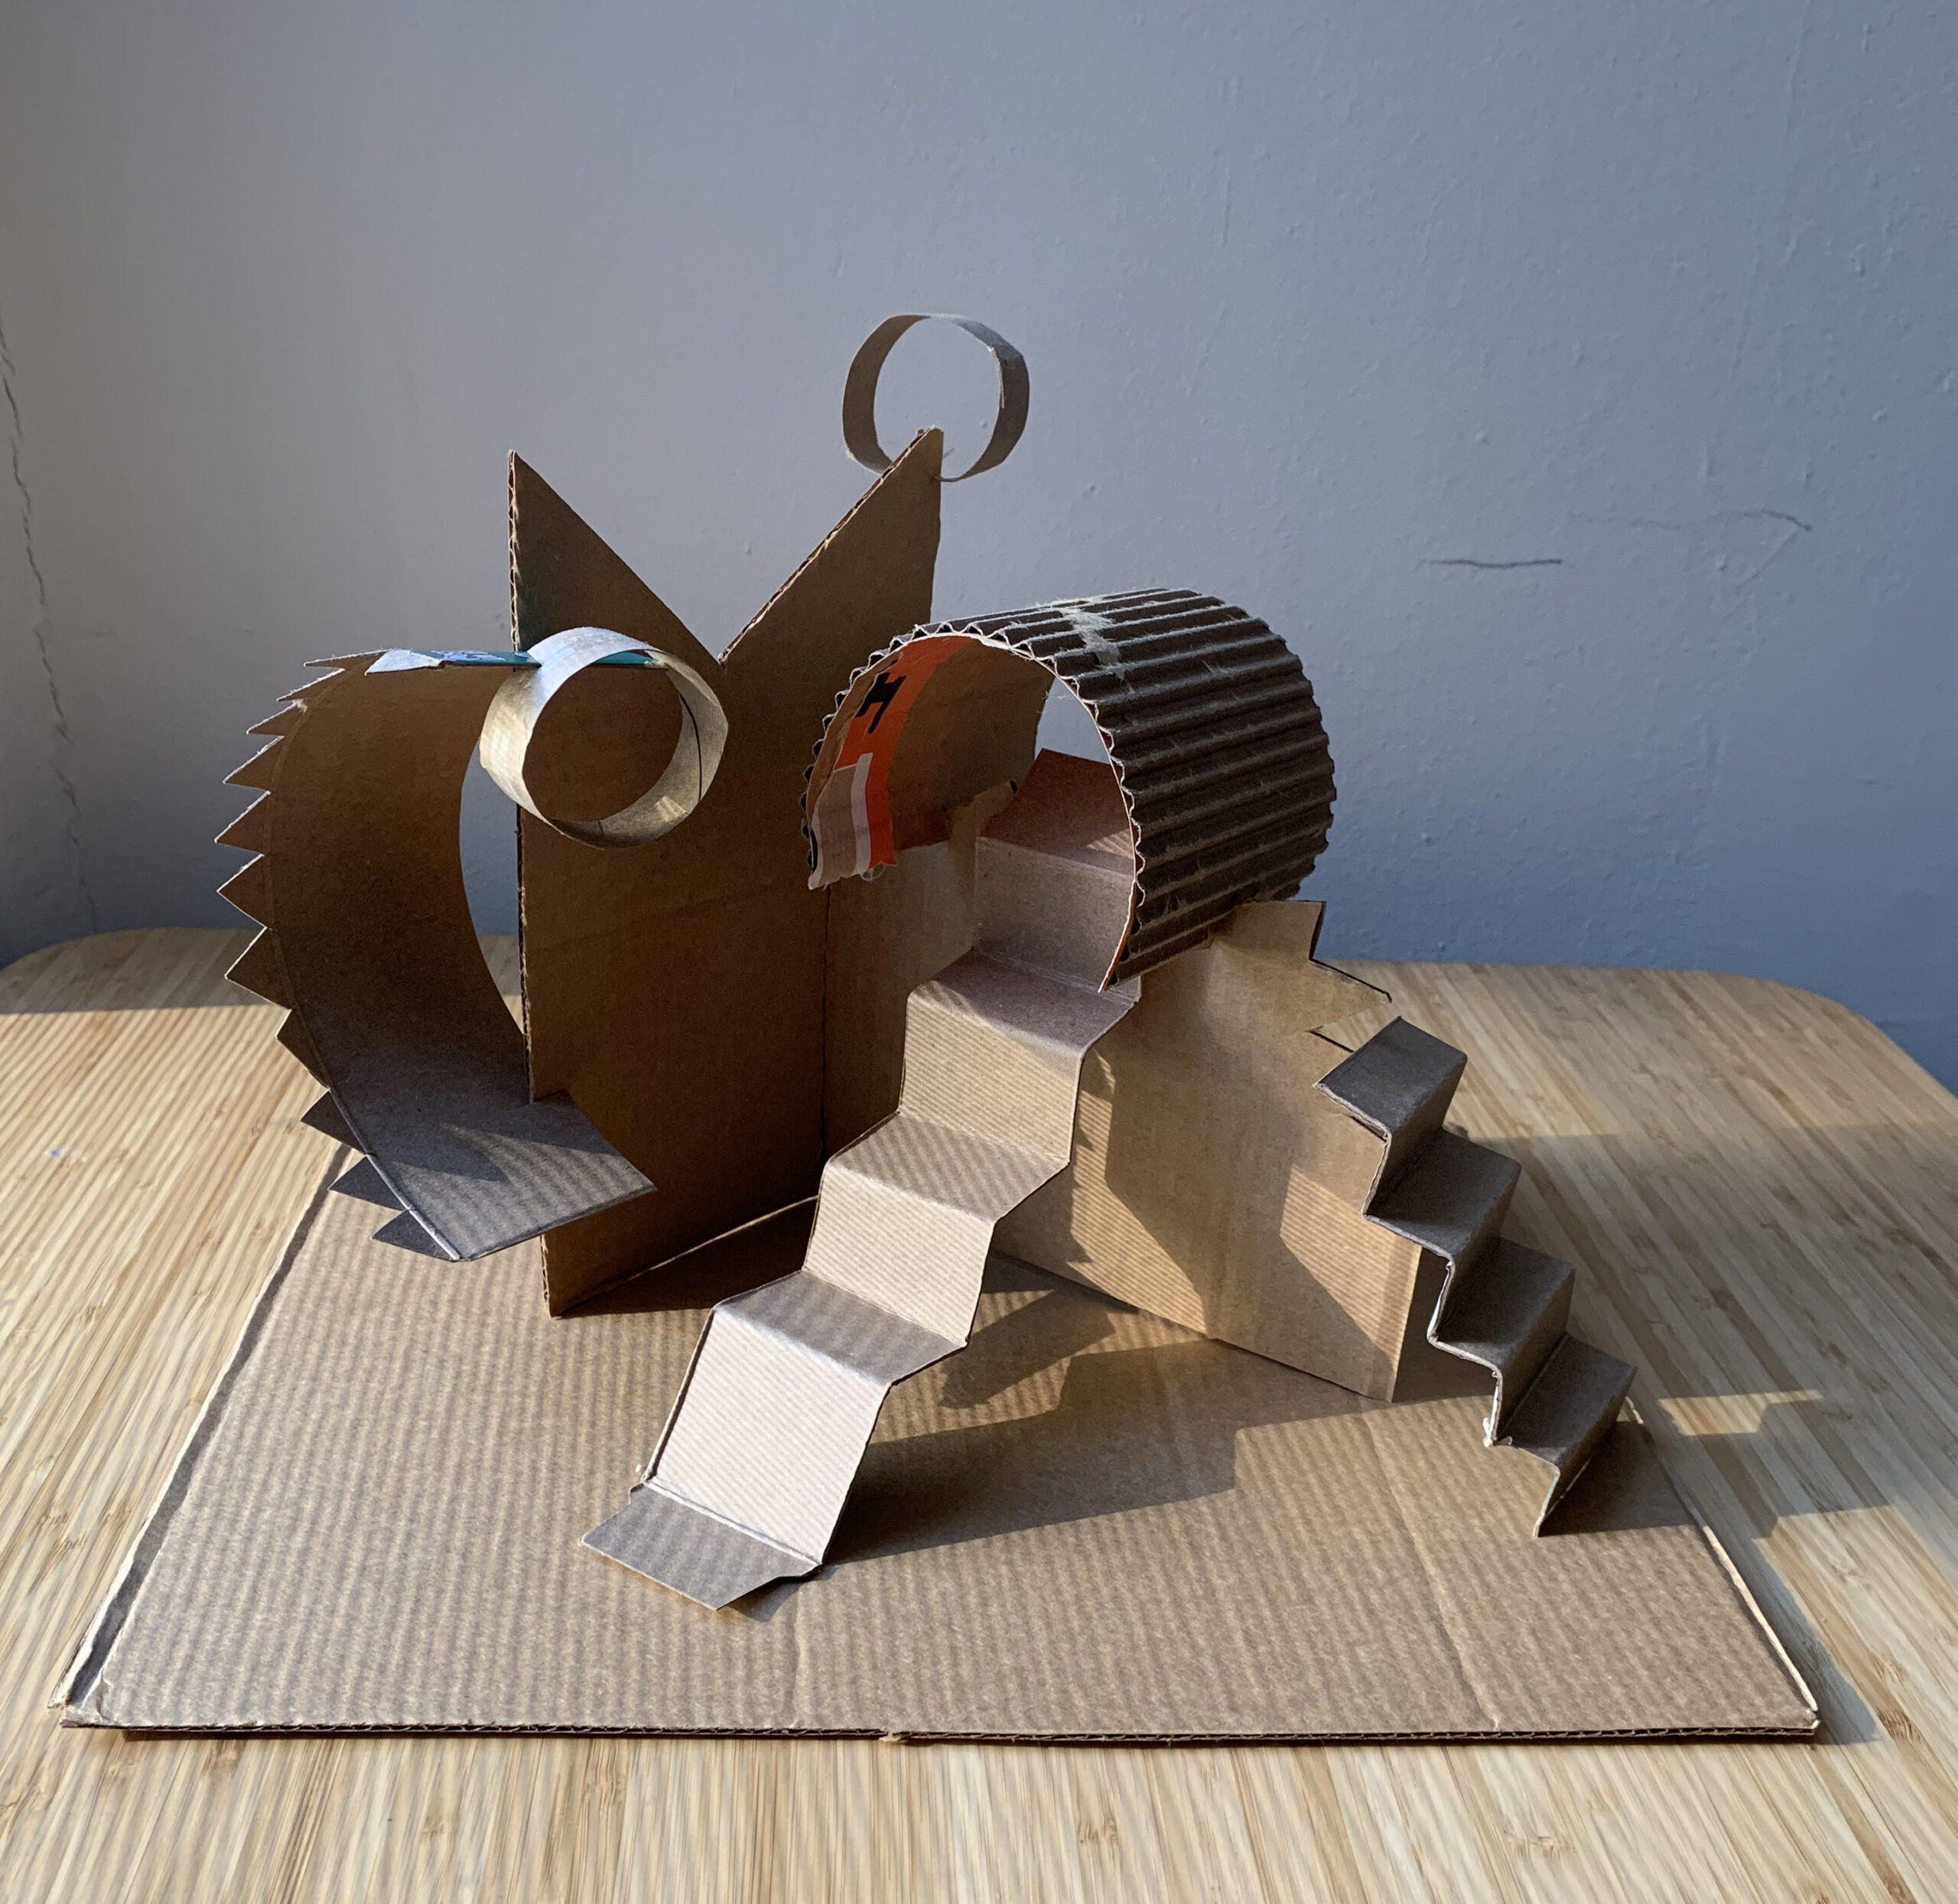
In your next sculpture, you will be putting all your knowledge to work to create an imaginary play space. Watch the Imaginary Play Space video to see how you will use your previously made shapes to create a free-standing sculpture.
Step 2: Close Looking, with Student Slides #2-5 (5-7 minutes)
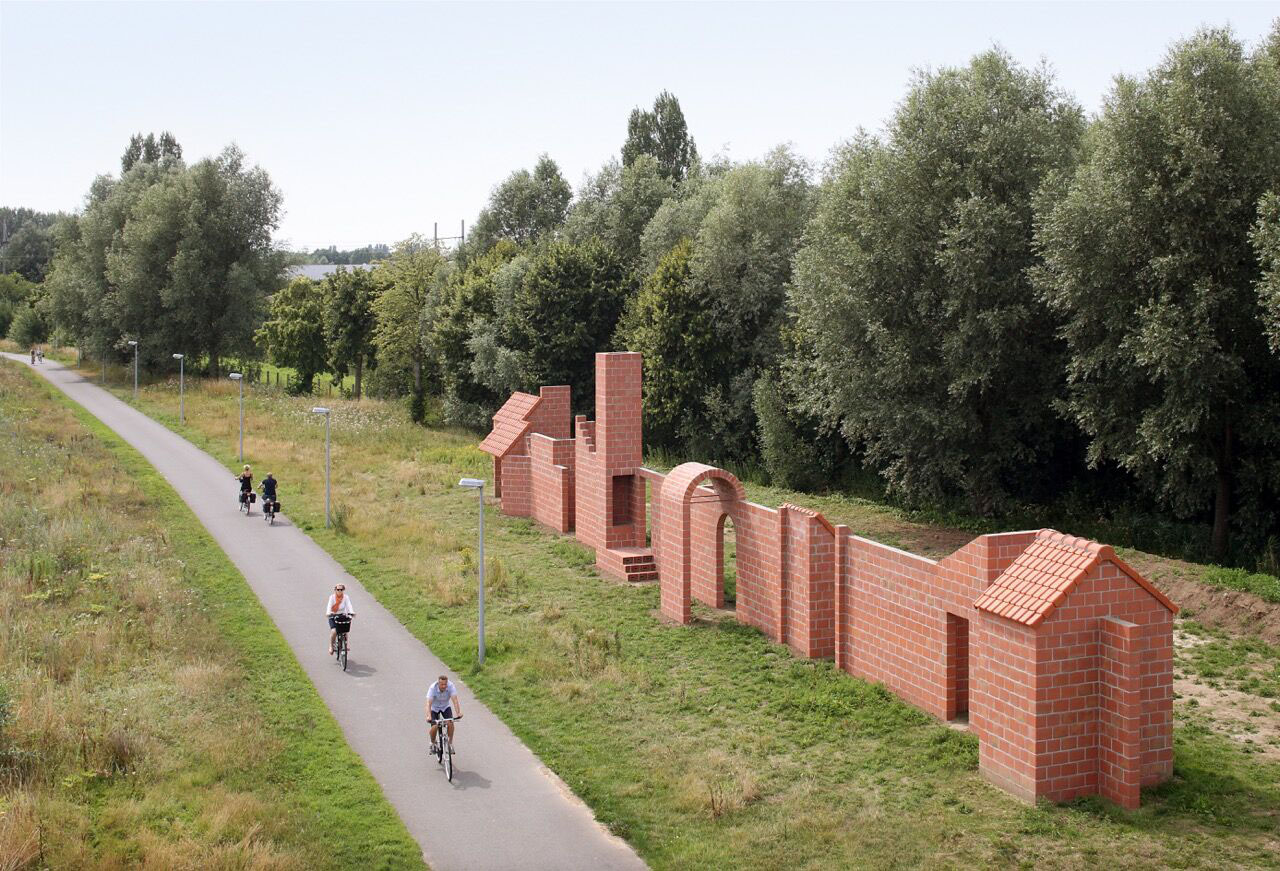
Let’s look at Student Slide #2 to begin collecting ideas for our play spaces. This sculpture by Filip Dujardin is interactive. That means you can walk and move around it. Closely observe the sculpture.

- What are some ways that you might interact with the piece?
- What parts of the piece could you run through?
- Where might you play hide and seek? What do you see that makes you say that?
Look at Student Slide #3.
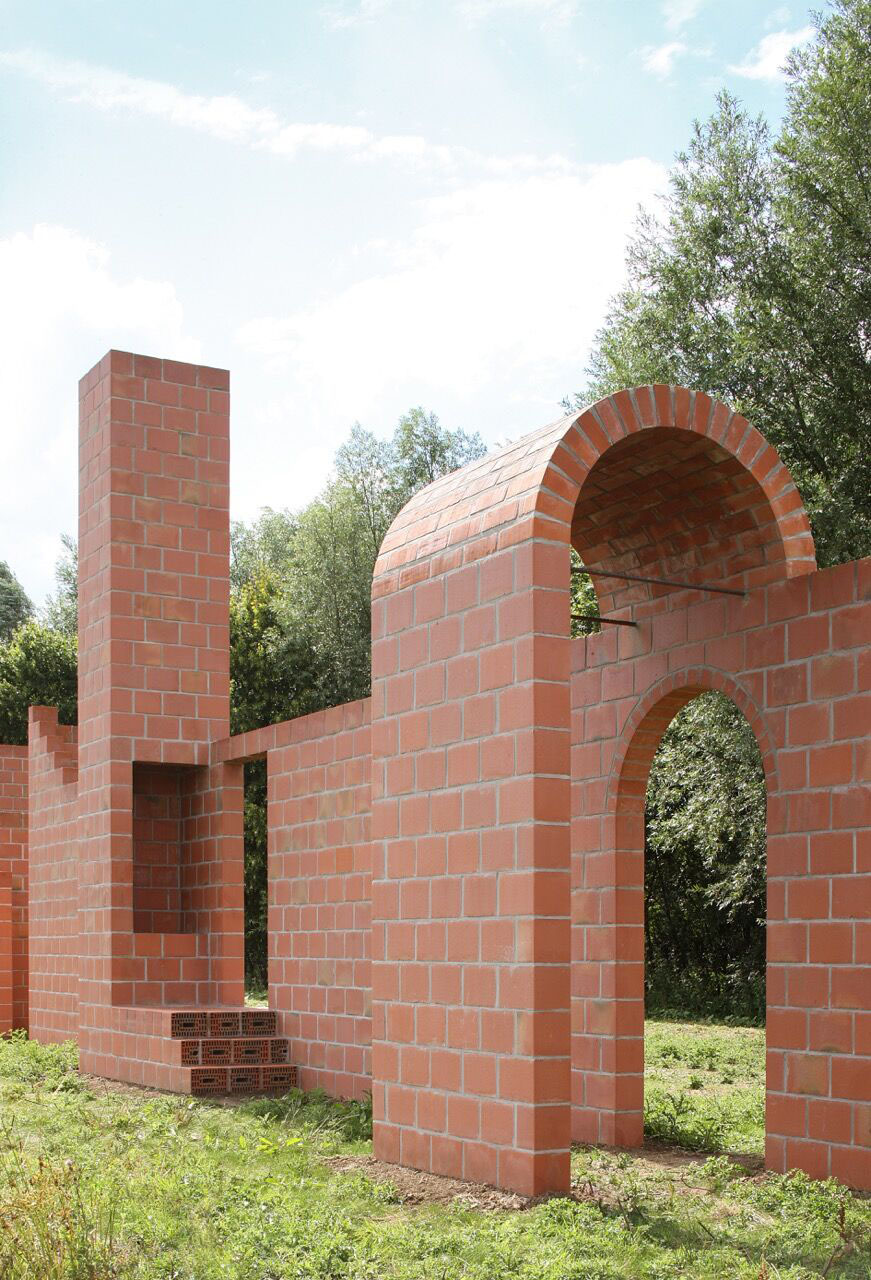
- Can you find a place where you could jump from or climb? Where do you see that?
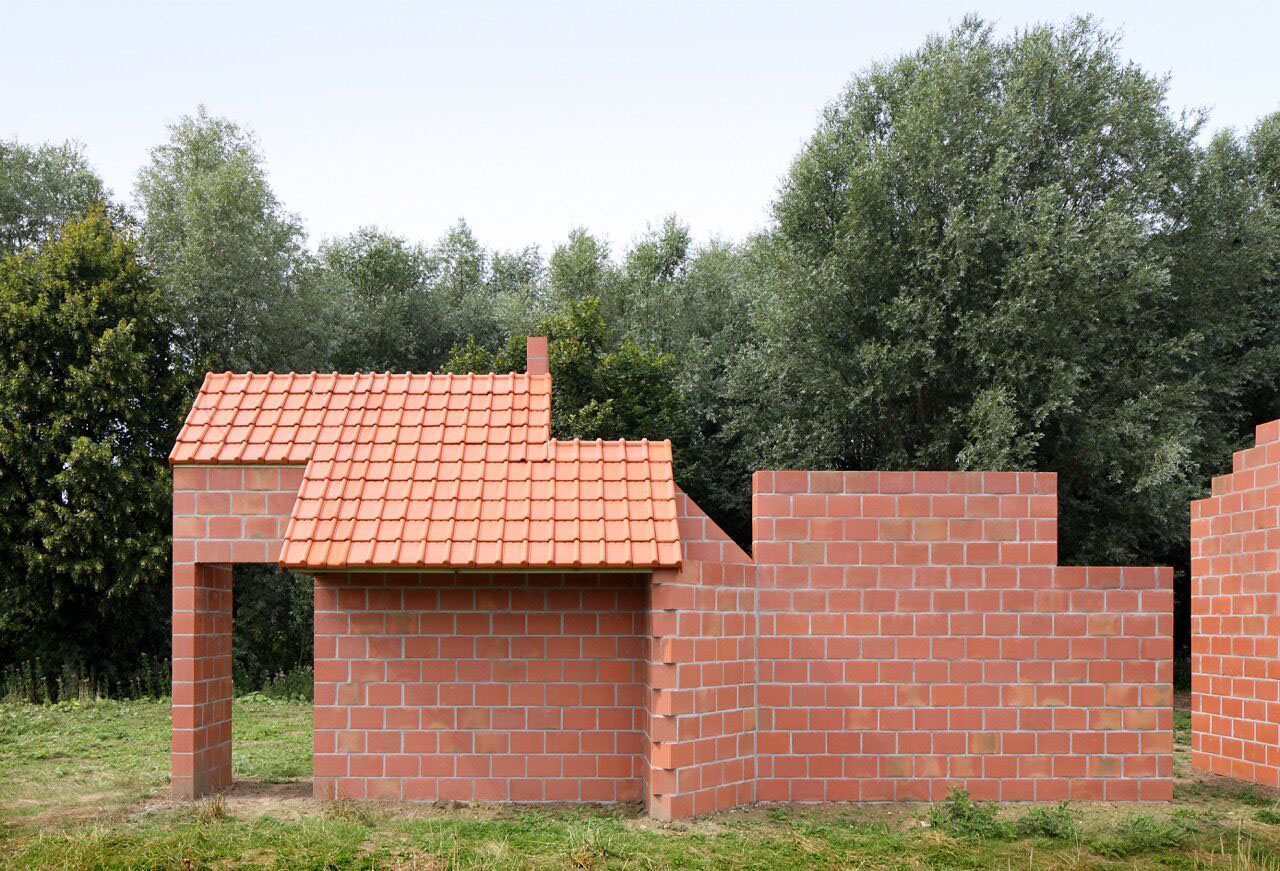
Let’s investigate more ways you could interact with this piece. Look at Student Slide #4 and answer the questions on the left side.
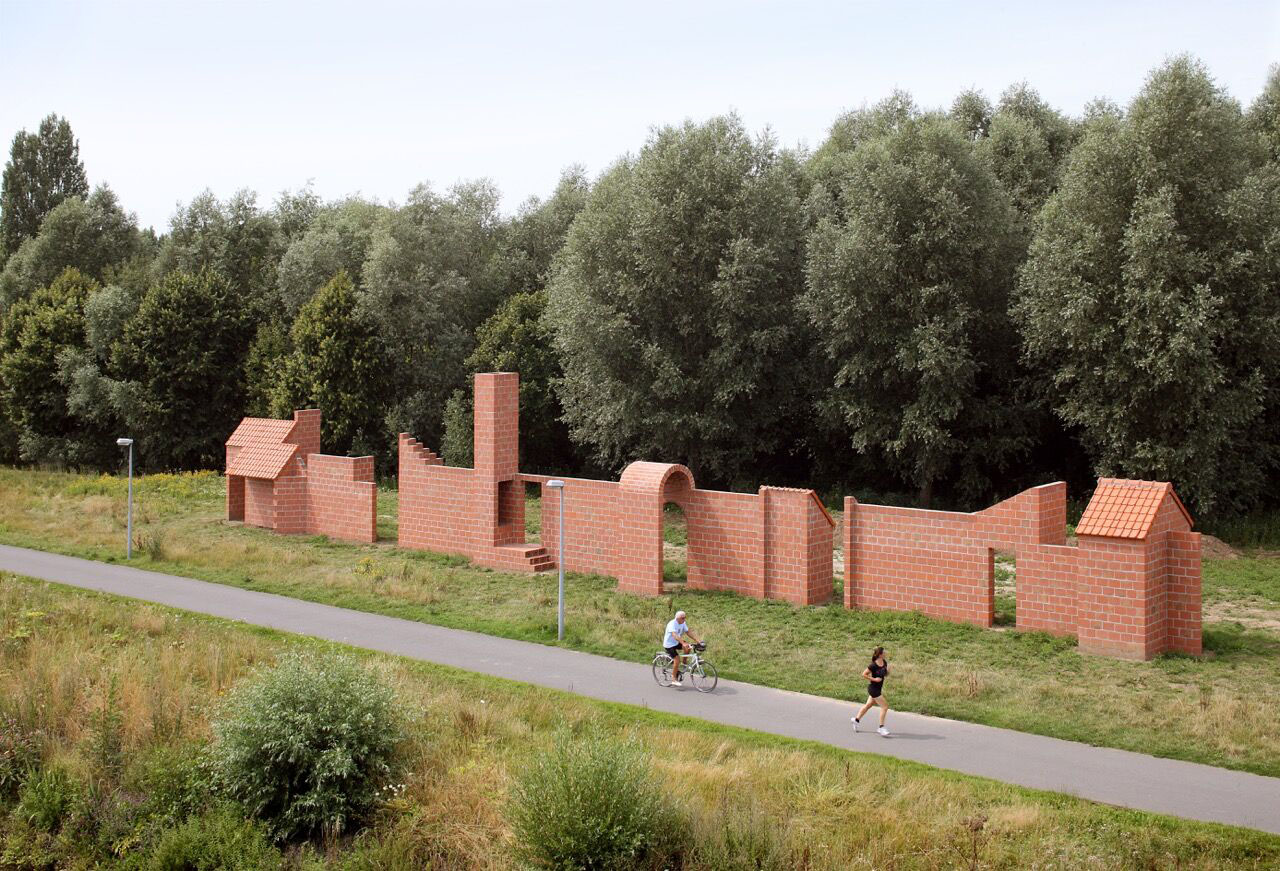
- What did you find interesting about this interactive sculpture? Why?
- What ideas will you borrow from the artist for your play space?
Step 3: Arranging and Securing Large Shapes, with Student Slides #7-9 (20 minutes)
Now that we have developed some ideas, let’s begin making a plan for our play space!
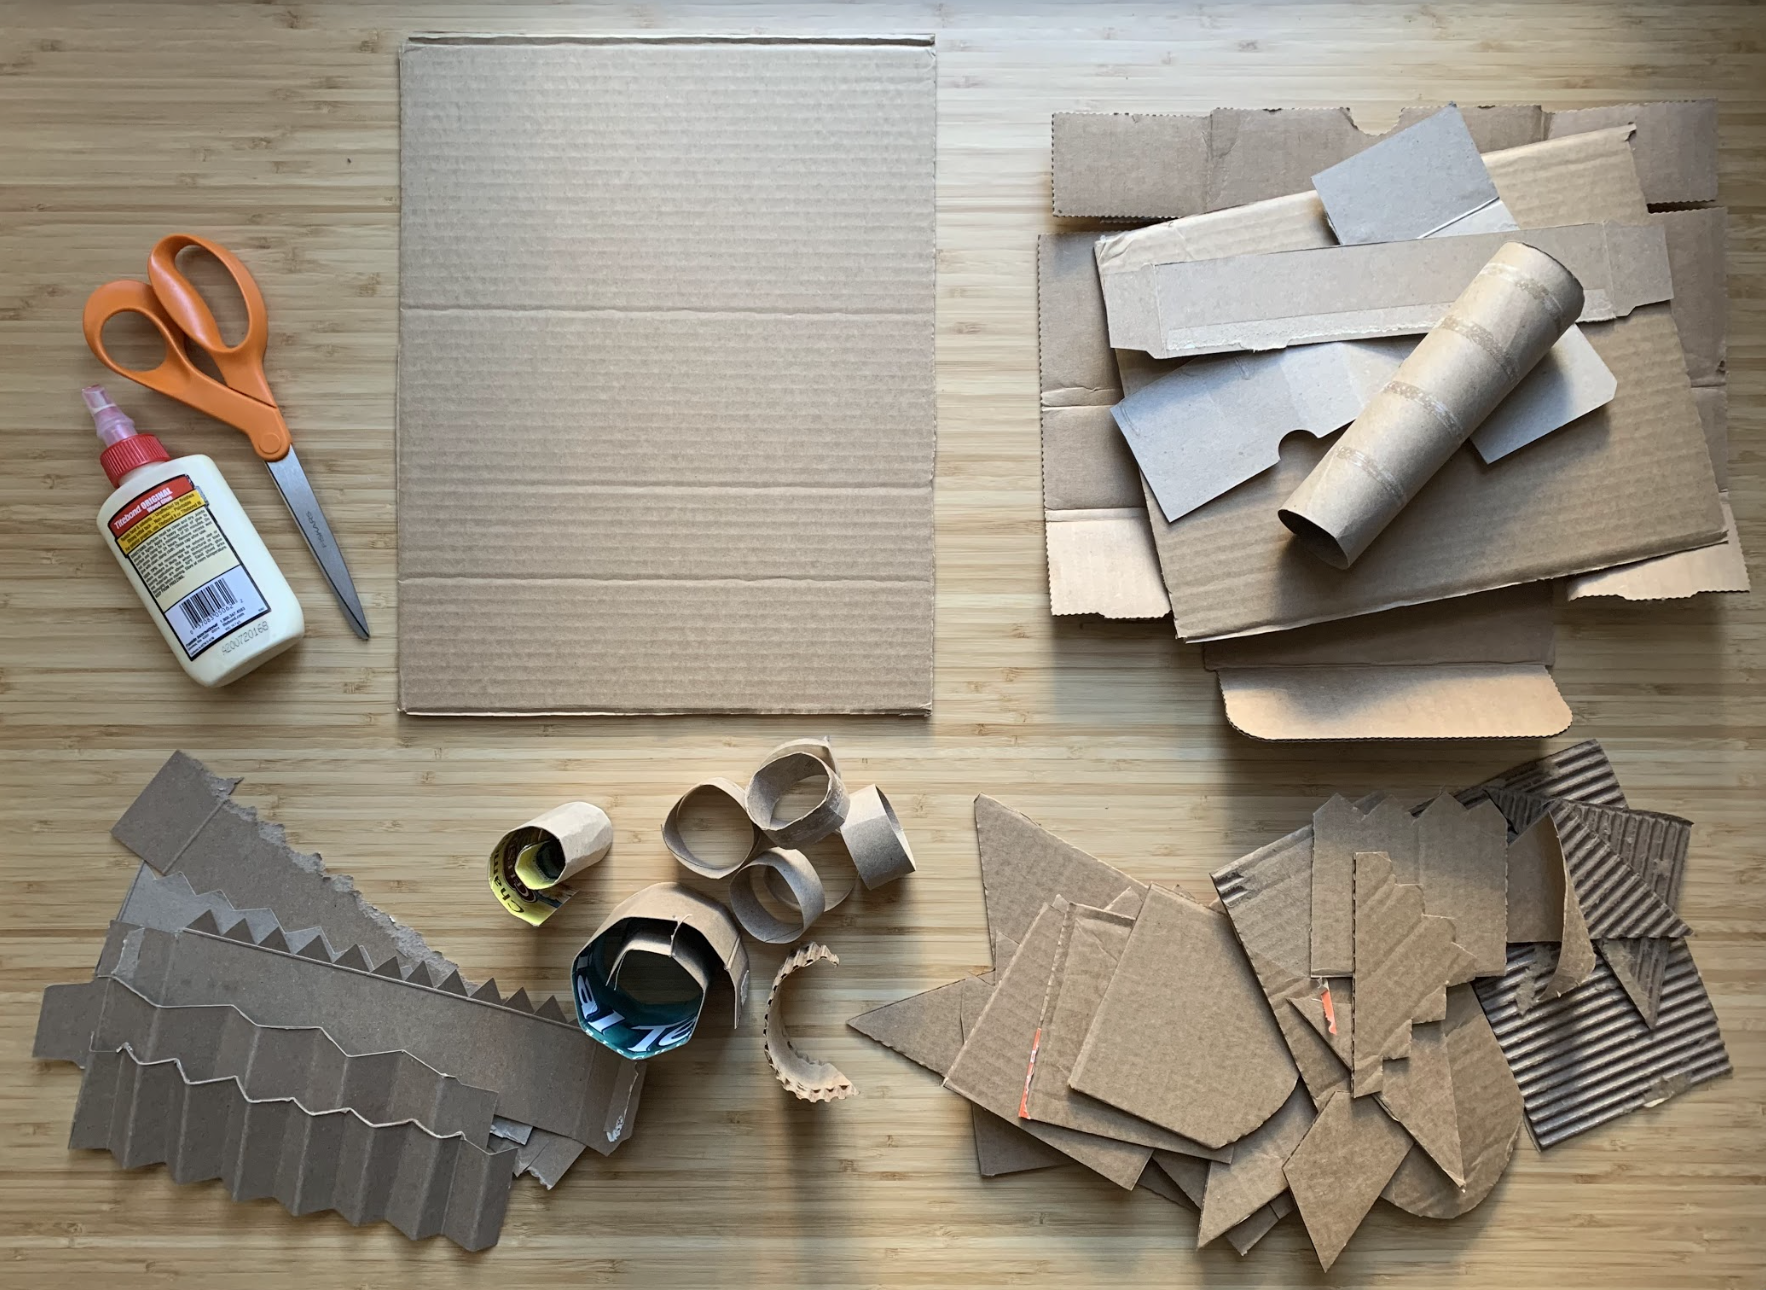
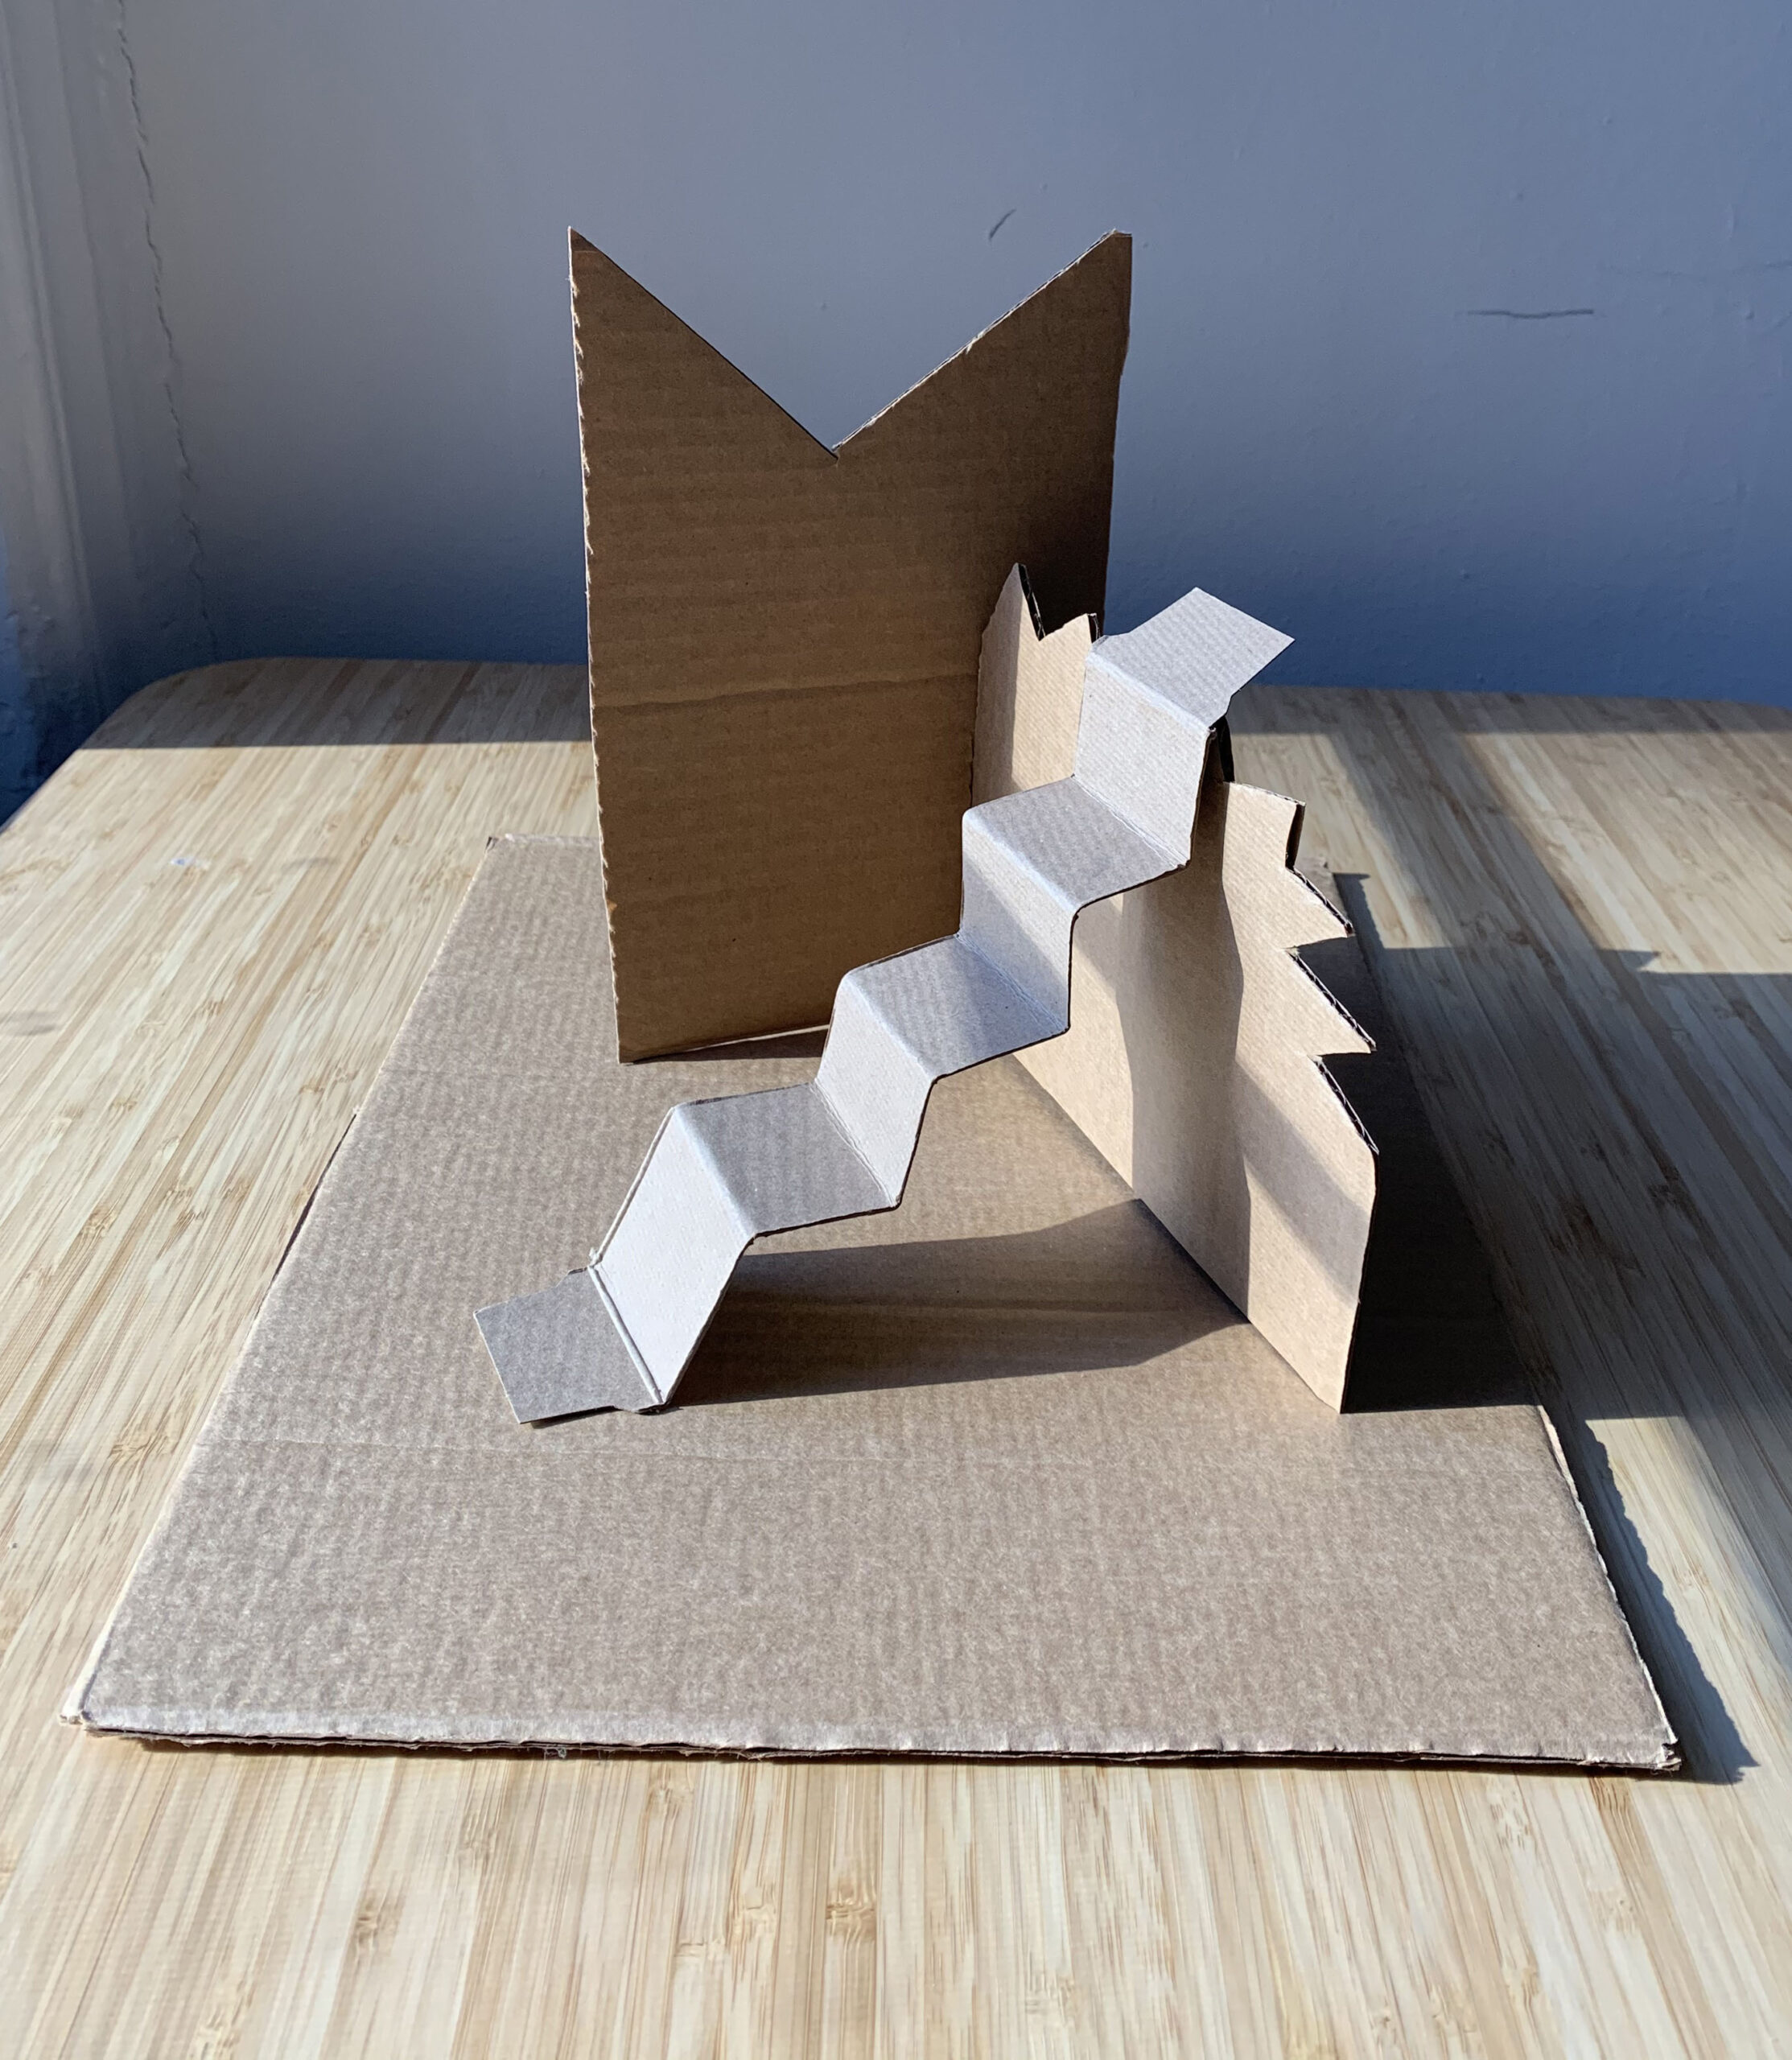
In the top photograph of Student Slide #7, notice how the artist has laid out their shapes.
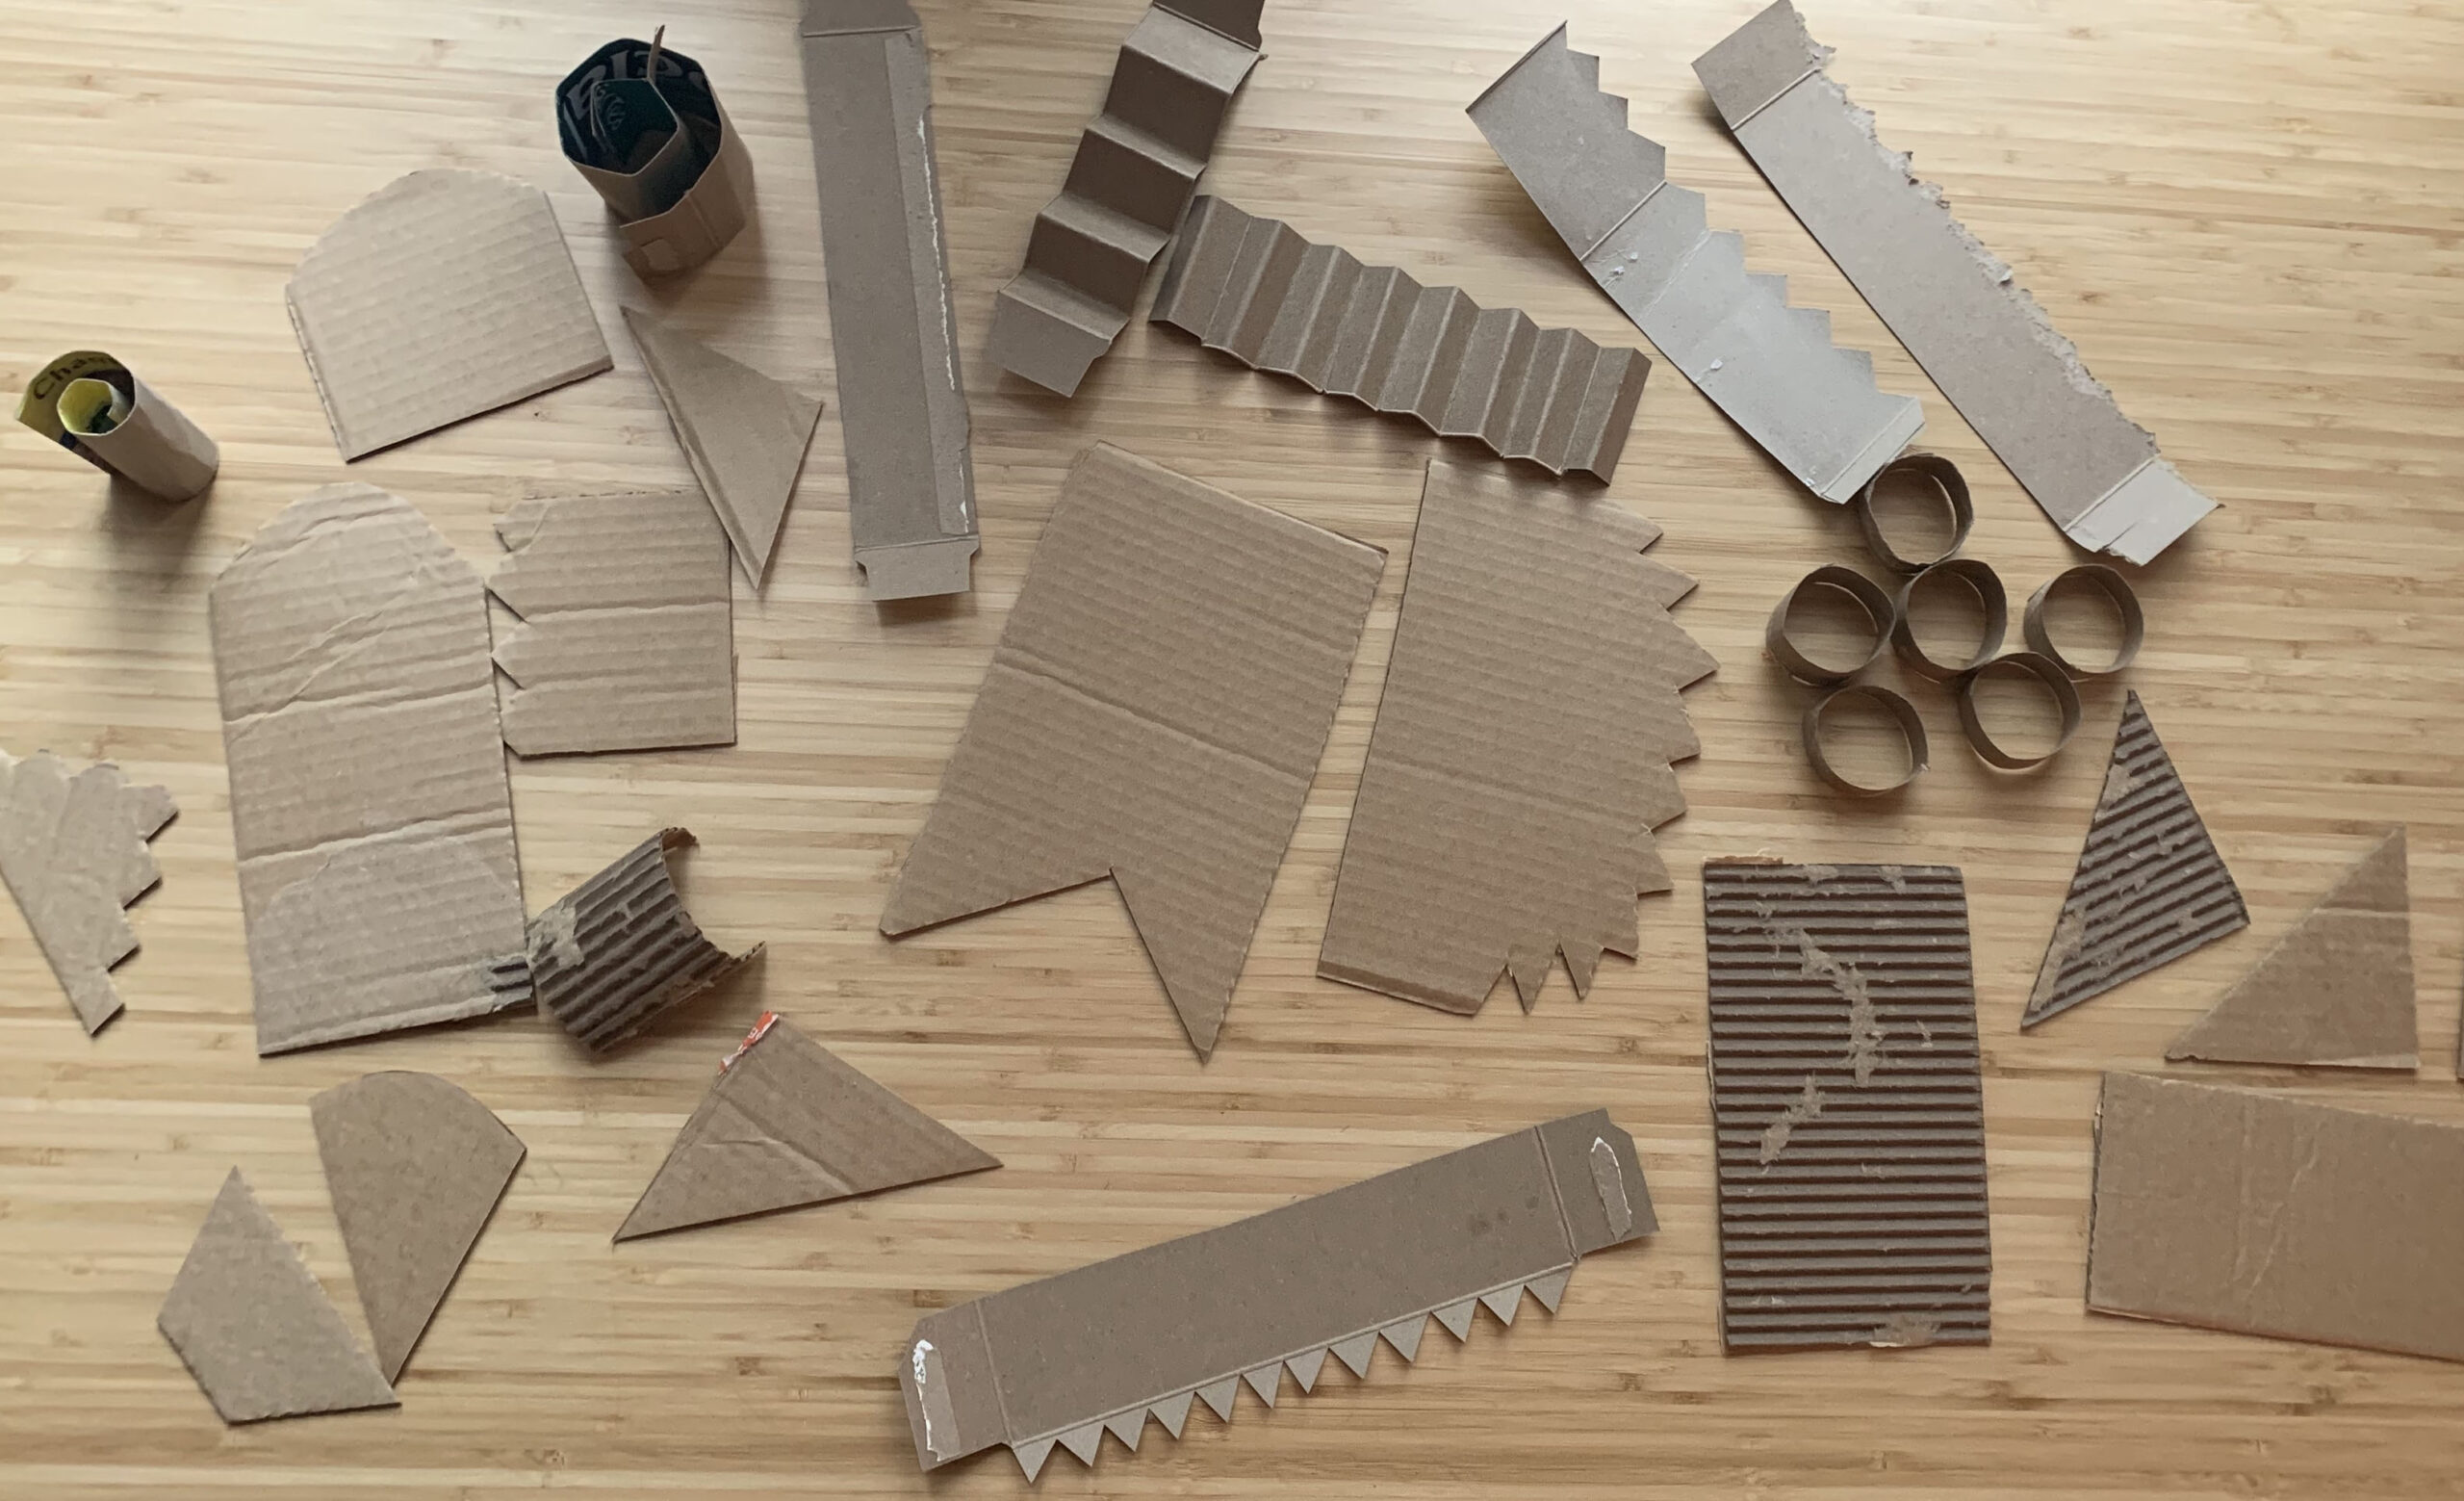

- Why do you think it is useful to look at and organize your shapes before you begin your sculpture?
Take a moment to lay out and organize your pieces. Begin thinking about which pieces might be good to make stairs, hiding places, and other elements you want to include in your space. Read the questions on the right side of the slide to help you begin.
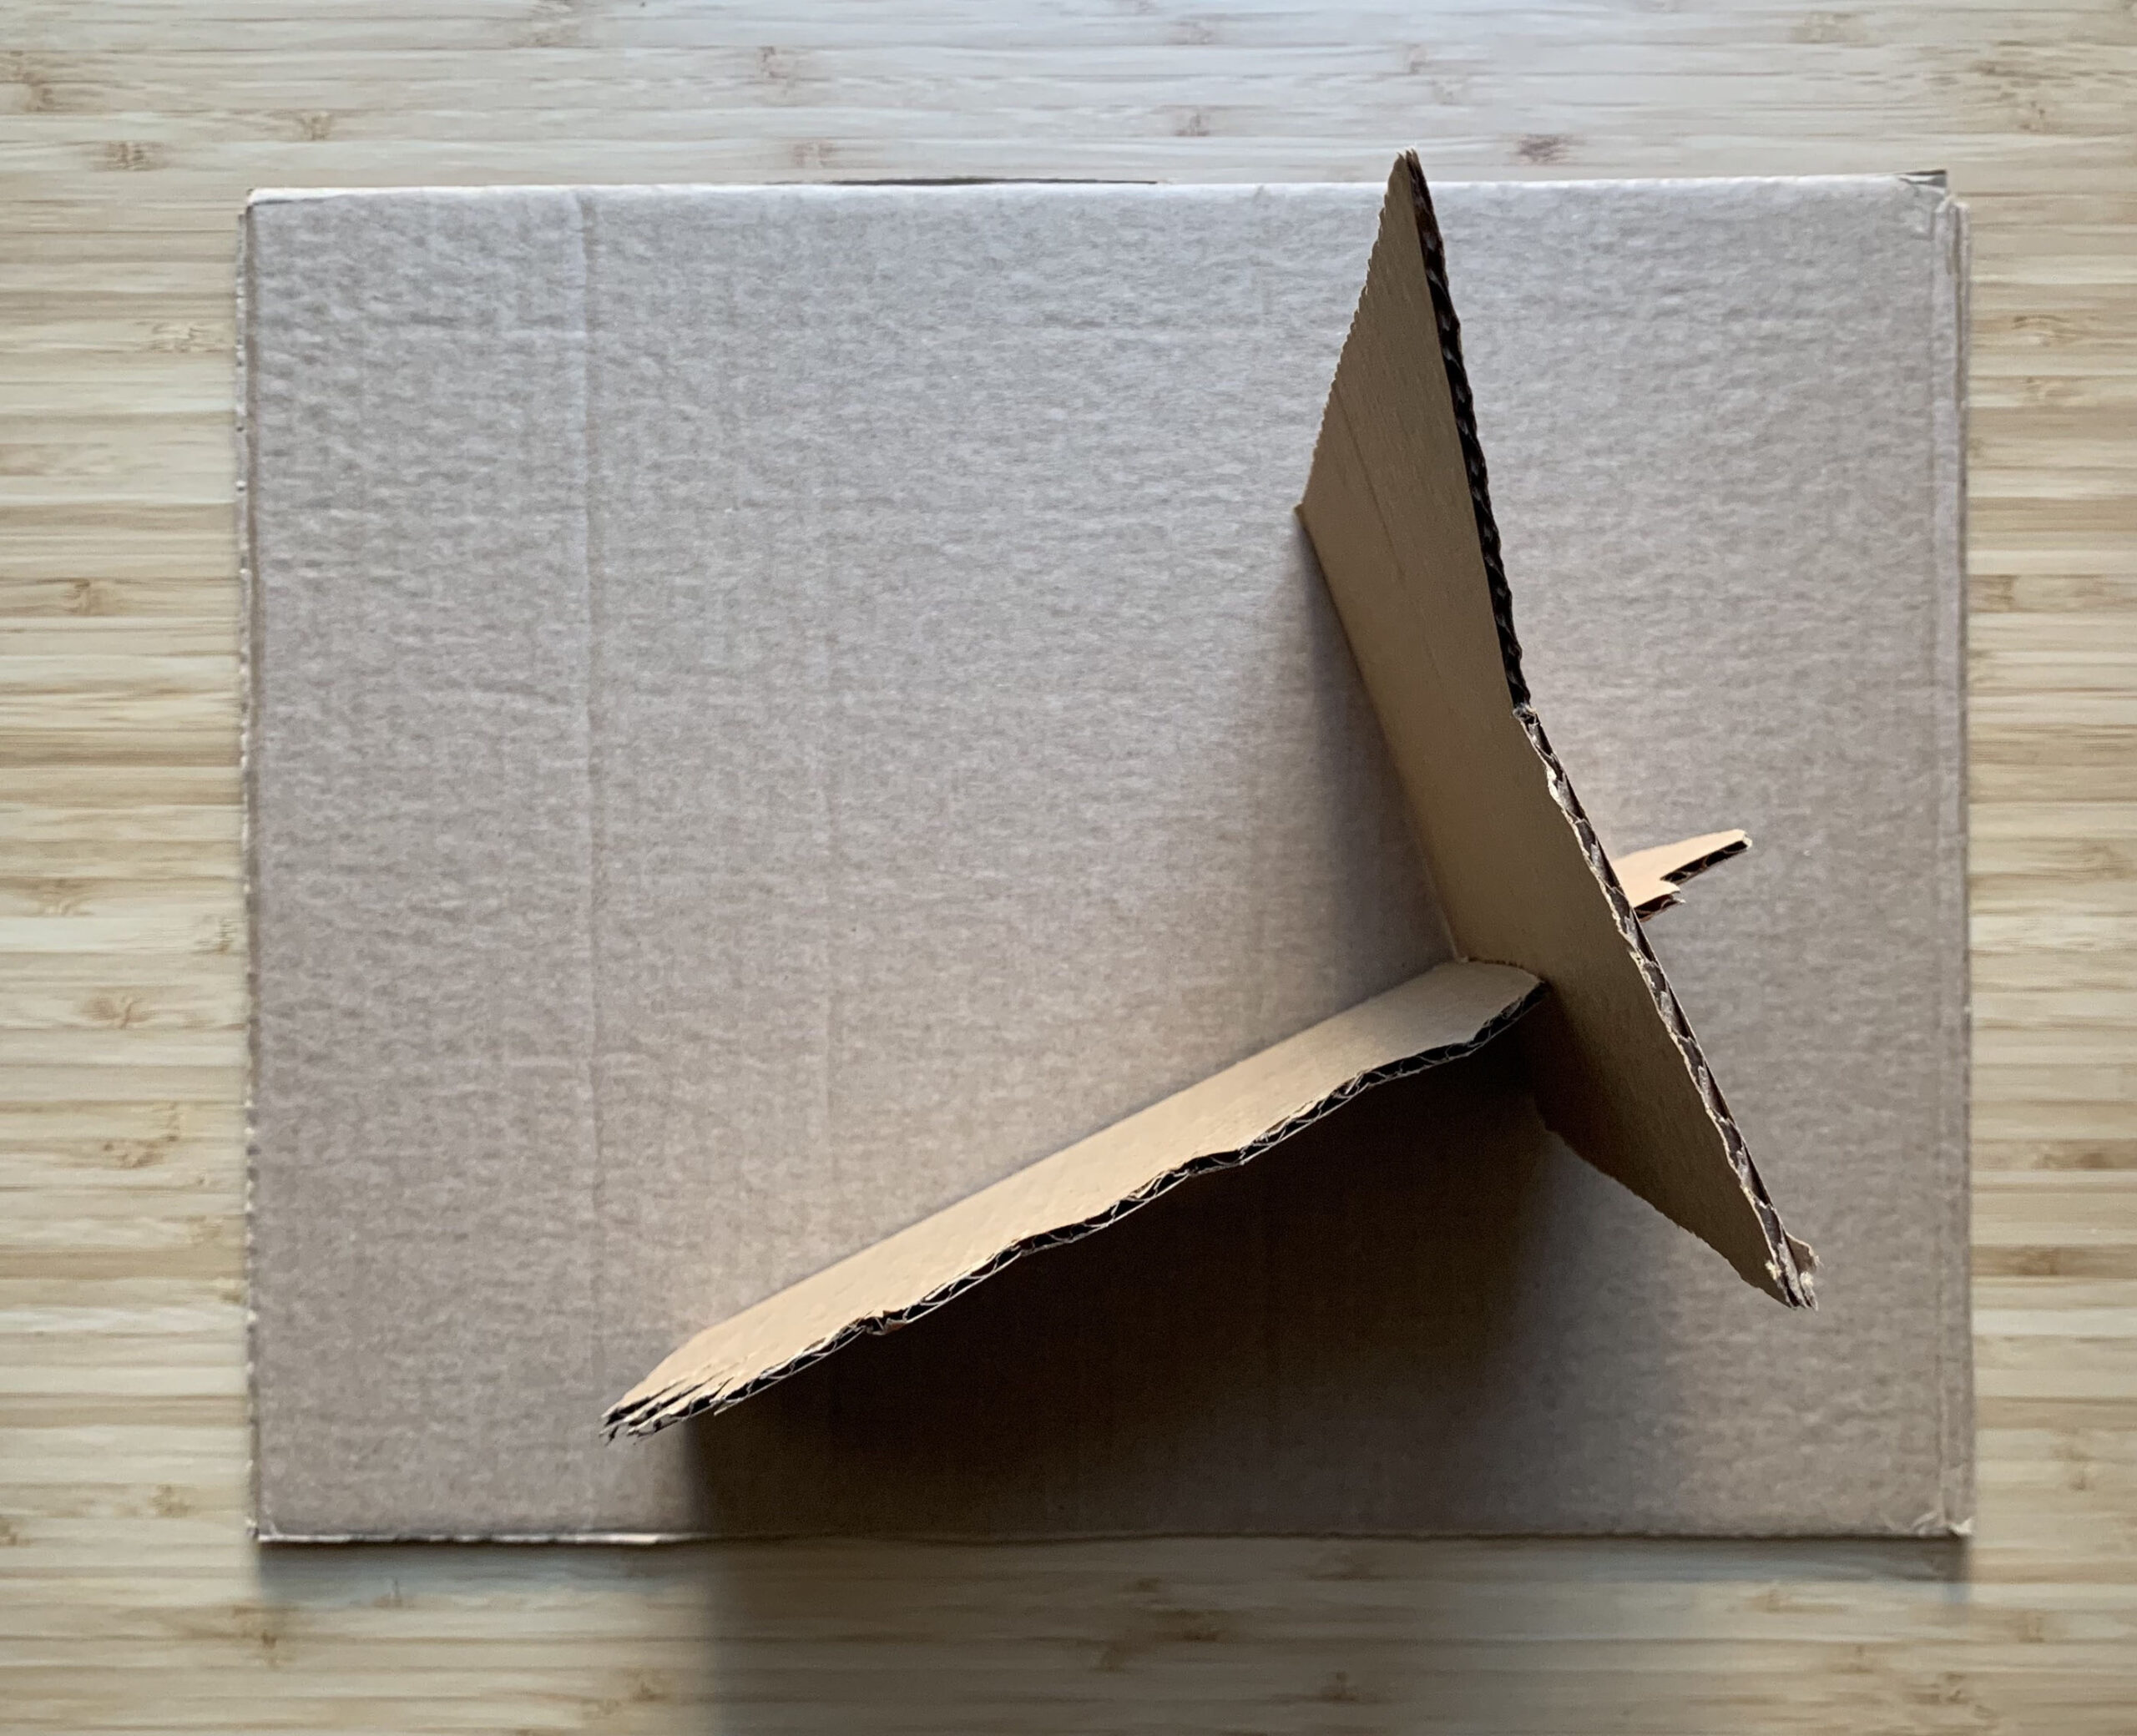
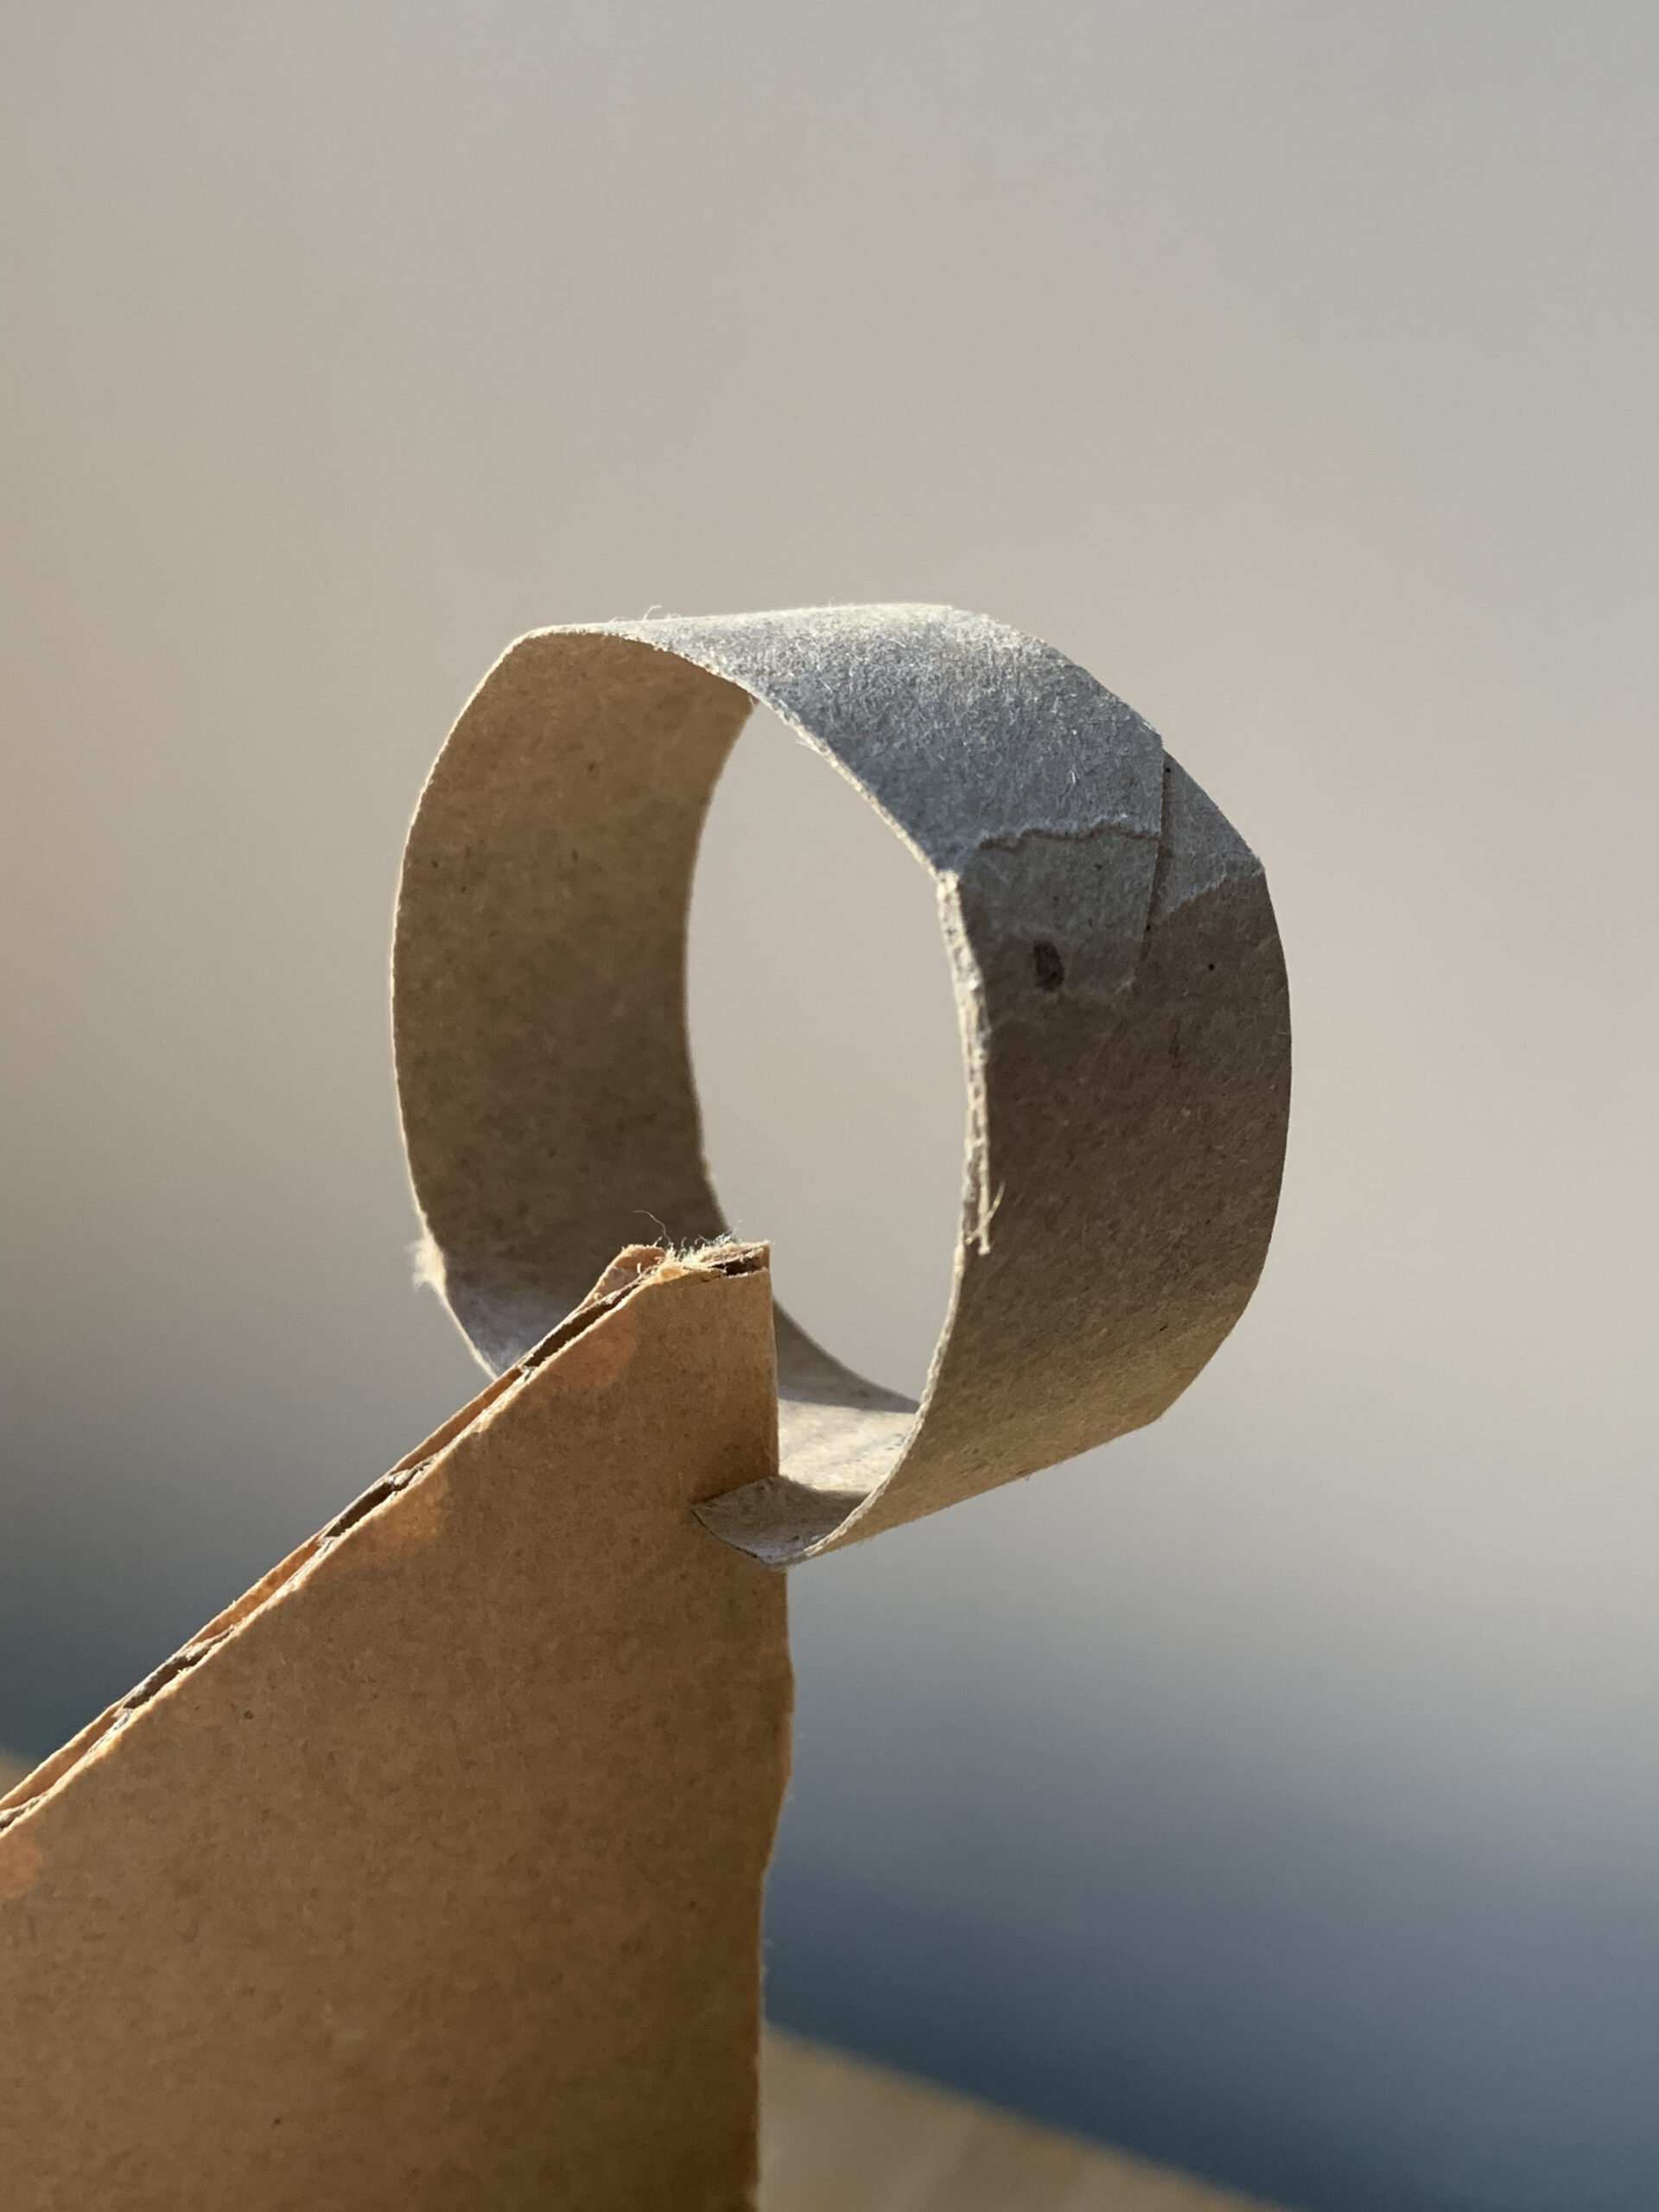
Look at Student Slide #8.
- What arranging technique is the artist using to add the folded piece to their play space?
- What might you do to arrange a piece like this in a different way?
- What would you do differently with a rolled or peeled piece?
Slide #9 shows some interesting possibilities for arrangements. The top two images show the way the artist is playing with slot joining. In the bottom photo, look at the way the slot-joined details add to the overall sculpture. Now look back at your work.
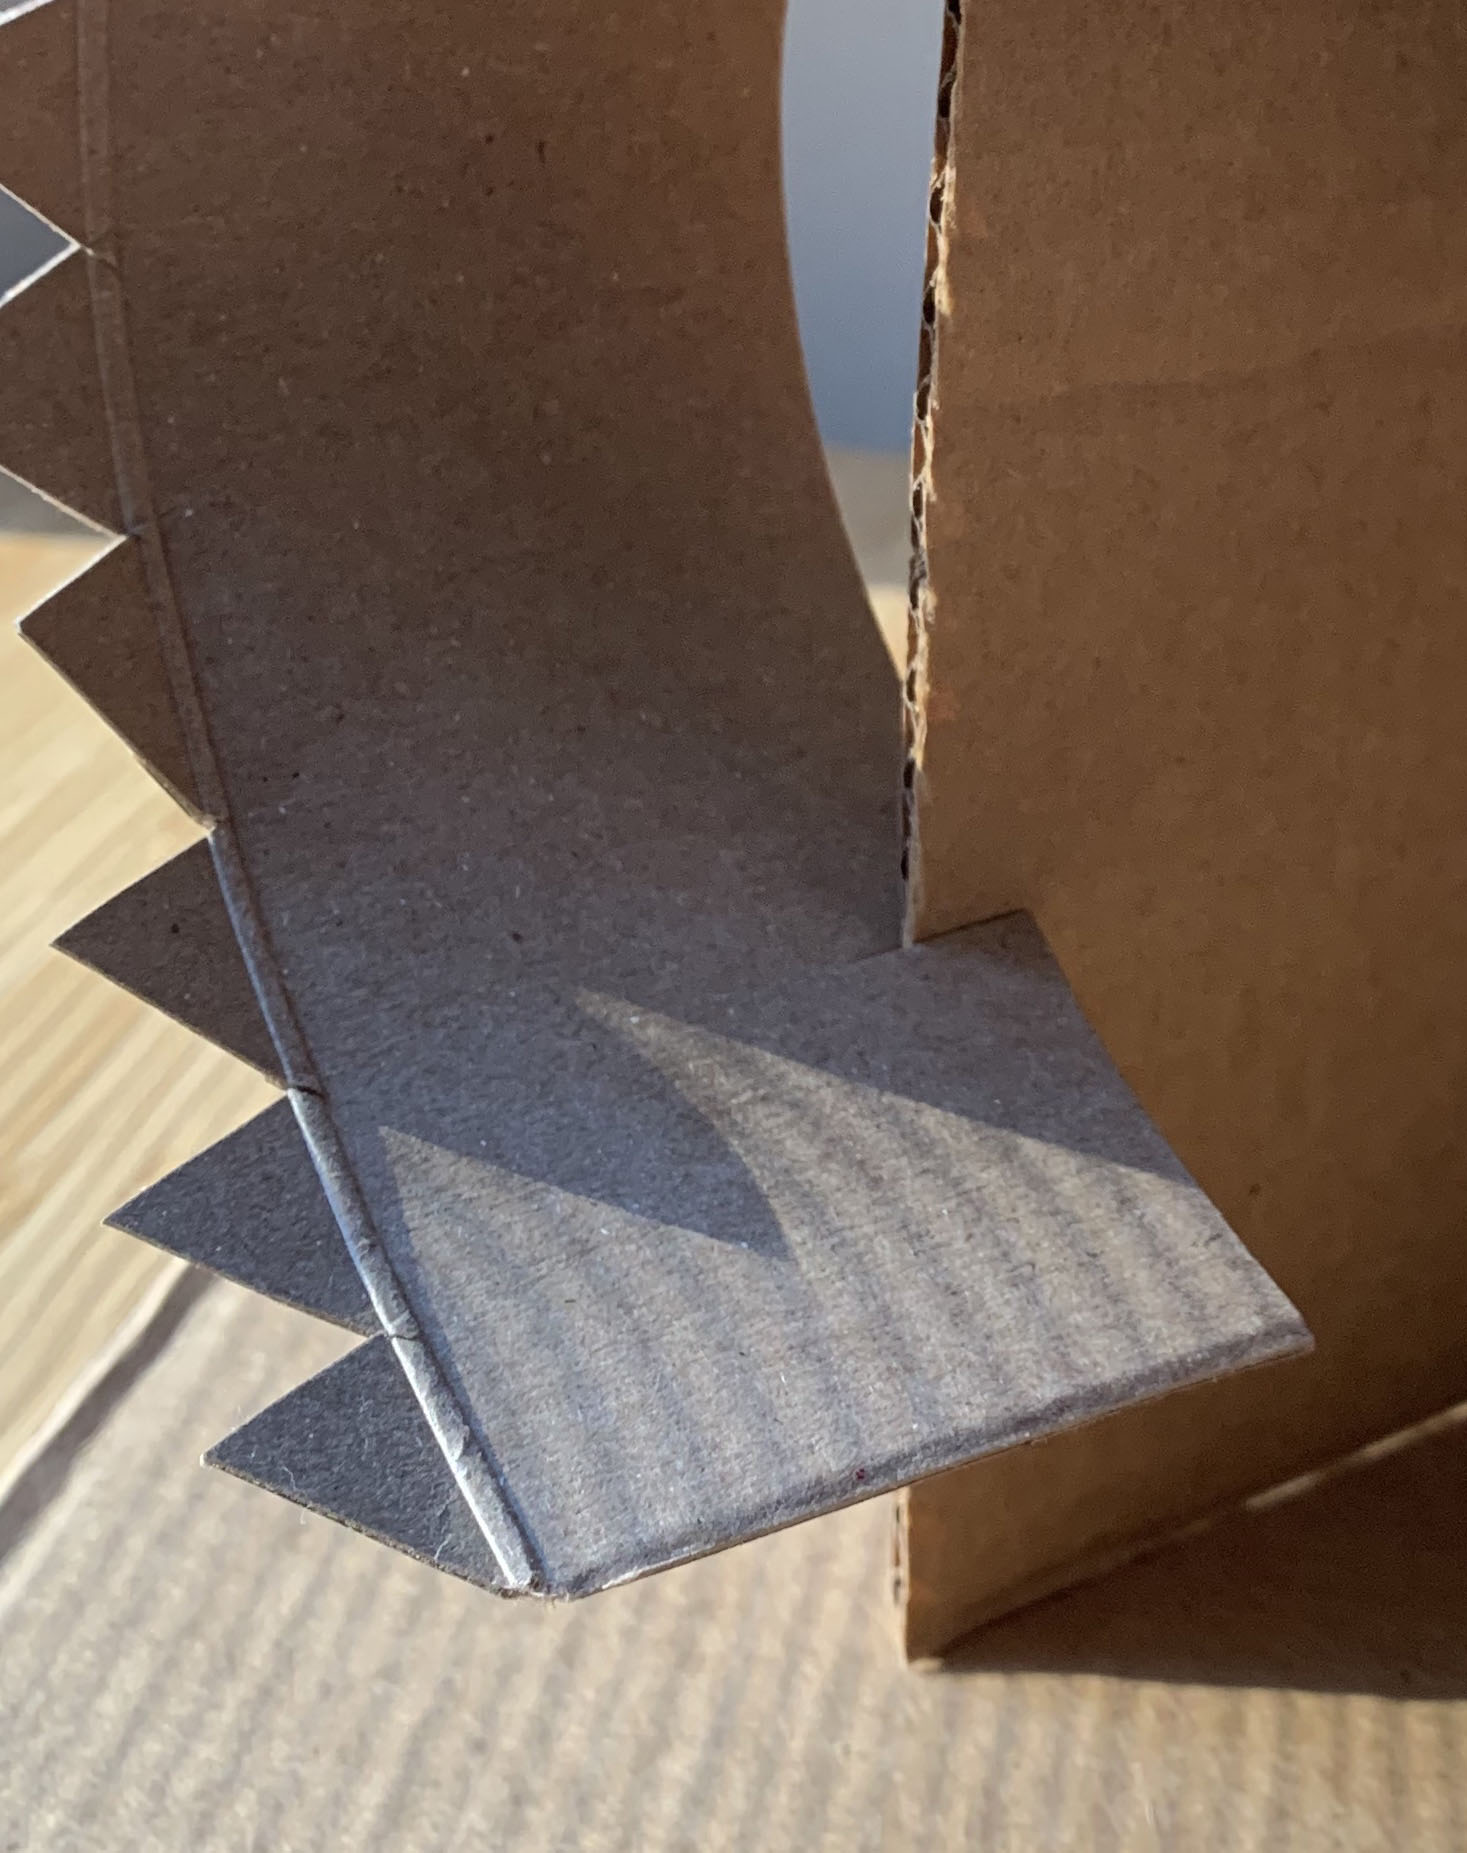
- Where can you add some slot-joined shapes?
- How will these add to the way we interact with your play space?
Once you have decided on a final arrangement for your play space, be sure to secure your pieces in place with glue or tape.

Step 4: Reflection Questions for Discussion (7-10 minutes)
- How did you build with your shapes?
- What pieces did you lean, balance, stand, stack, or cut and groove?
- In what ways does your piece remind you of a play space or playground?
Vocabulary
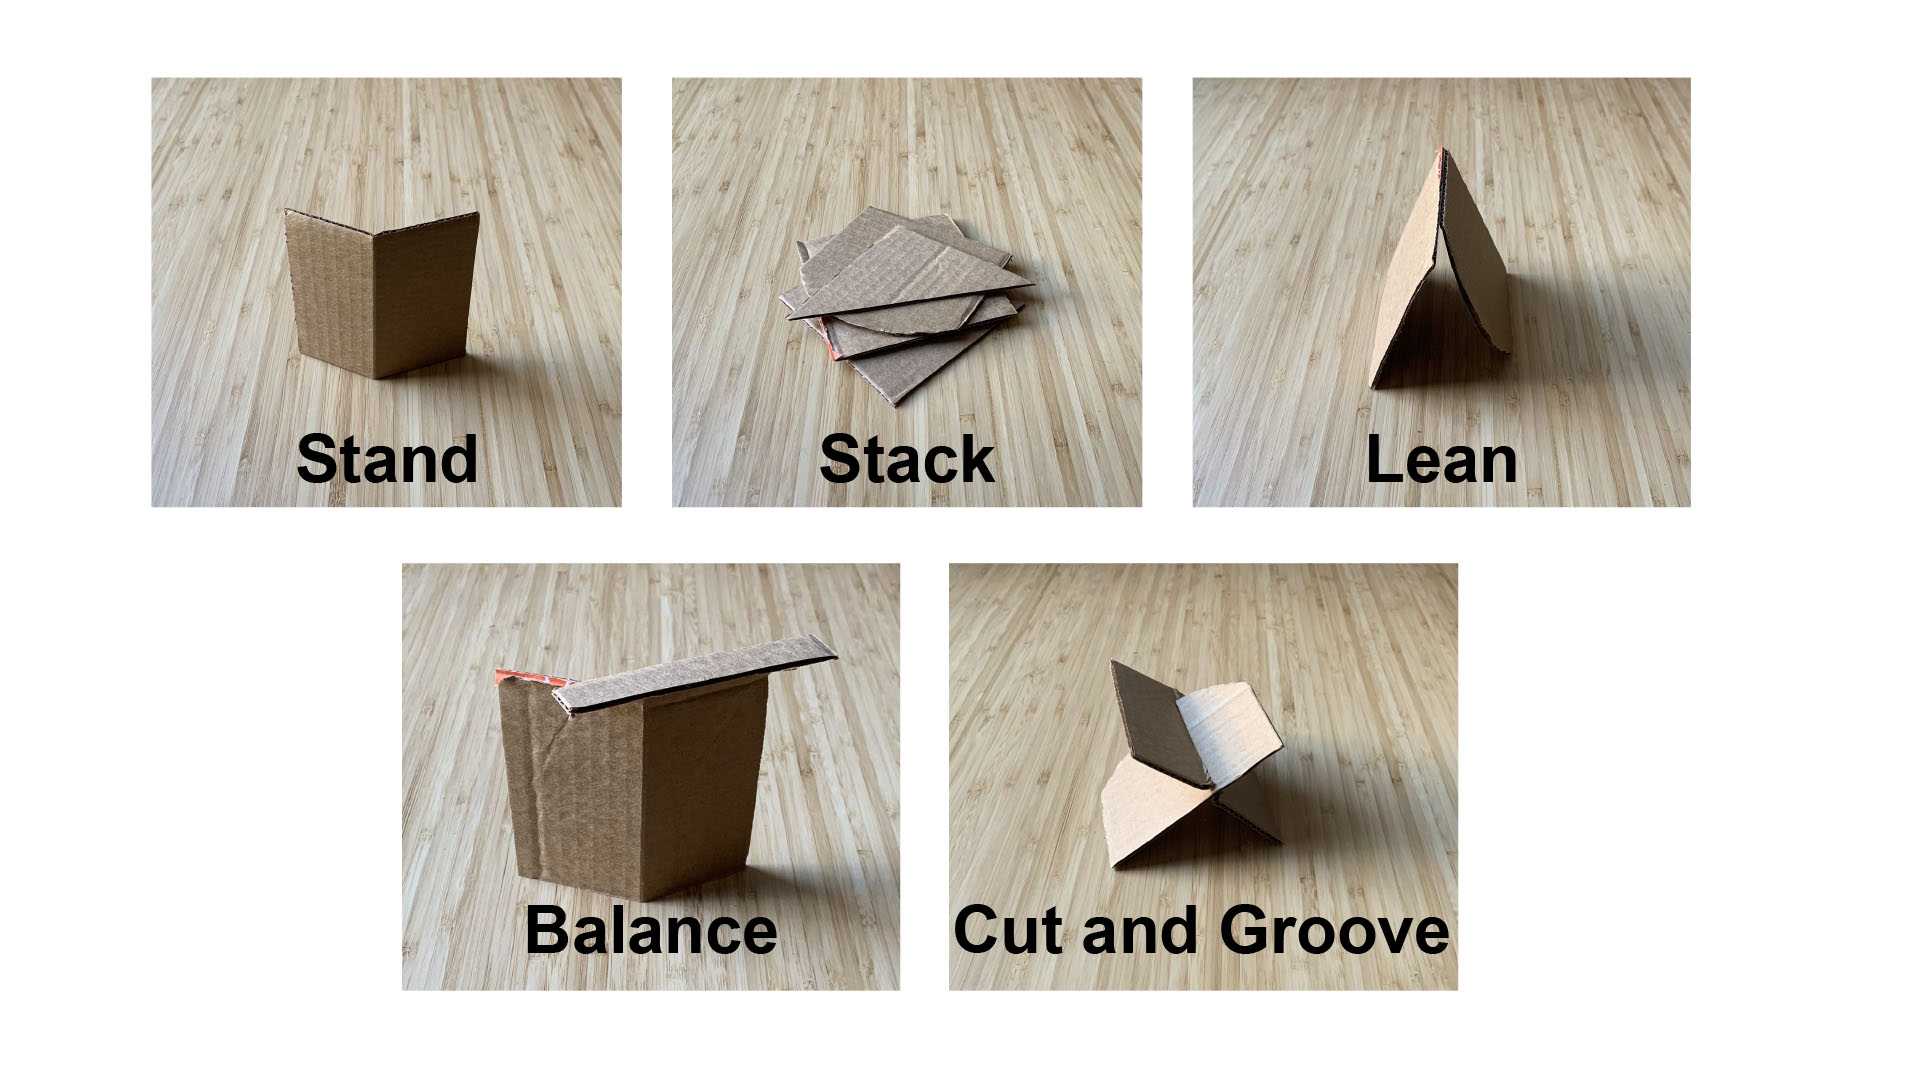
Stand
Stack
Lean
Balance
Cut and groove
Imaginary
Resources
Filip Dujardin. Sequence no 1. 2015, Open Air Art Festival, Flux. Public art installation along the banks of the river Leie in Kortrijk, Belgium.
Additional work by Filip Dujardin at the Museum of Modern Art, New York.