Overview
In this unit, students will create a cardboard maquette of a monument, learning foundational 3D art concepts while engaging with contemporary debates on the removal and replacement of monuments in society.
Lessons
Materials and Tools
- Corrugated cardboard
- Smooth cardboard
- Scissors
- A marker or pencil
- Sheets of paper
- Tape
- White glue
- Small, corrugated boxes
- Smooth cardboard tissue or food boxes
- Ruler
- Found box or your prepared pedestal
- Paper towel tubes or other tubes from your recycling
- Found paper
- Collage materials
- Optional: stapler, hole punch, string, wire
Alternative Materials
- Heavy duty railroad board or tagboard can be used in the classroom if recycled cardboard is unavailable
- Corrugated cardboard that is single sided, such as Corrobuff or a wrap roll from Uline, is easier to cut and manipulate for students who have difficulty with scissors
- For classrooms with a printer, students can research and print images or text and include it in their sculpture as described in Lesson 9
Objectives
- Students will be able to analyze and identify contemporary approaches to monuments
- Students will be able to identify and apply basic three-dimensional art concepts, including space, scale, and balance
- Students will identify how artists use visual language and create their own visual language to express their ideas
- Students will apply knowledge of construction techniques to create a three-dimensional, self-supporting structure
Student Outcomes
Students will understand that:
- Utilize creative problem solving and experimentation as an integral part of their artistic process
- Implement formal strategies of design and art making
- Express a concept through visual language
Students will be able to:
- Demonstrate how to alter materials to create different forms, textures, and meanings
- Apply knowledge about a variety of construction techniques to build and compose a freestanding, three-dimensional structure.
- Apply knowledge of spatial arrangements to create their own complex arrangement based on their concept
- Identify, describe, and defend their artistic decisions
Resources
More artwork by Geoffrey Farmer:
- https://www.designboom.com/art/life-magazine-cut-outs-from-1935-1985-by-geoffrey-farmer/
- https://canadianart.ca/interviews/geoffrey-farmer-reveals-process-behind-documenta-13-hit/
Adaptations
For Students with Disabilities
- Lessons can be modified by choosing and teaching the specific building and attaching techniques that are best for your students’ skill levels
- Offer student pre-cut shapes with slot and notch connections for students to build with
- Offer alternative materials. Corrobuff single-sided cardboard is an easier material to manipulate and cut than heavy cardboard
- Start with a box or other form that students can add to and build off of using pre-cut shapes or shapes they cut themselves
- Offer the option to build simply by balancing, as opposed to attaching
- Have students work collaboratively to use different strengths
- Break down lessons into smaller steps to work on one at a time
- Use audio with visuals in student-facing lesson guides
- Use technology to create drawings on an iPad or in Google Classroom
- Use audio with visuals in the student-facing Google Slides
For Multilingual Learners
- Activate prior knowledge, asking students what they know about monuments
- Have multiple students share ideas in their own words in response to questions throughout the lesson sequence
- Visual symbols can be developed in teams or table groups of mixed-level language learners. Final monuments can be made in a group
- Have students describe their peers’ work in writing or discussion during reflection
- Ask students to describe their work and process to a friend or family member
- Use images paired with lesson steps to help with meaning
- Emphasize repetition of new art vocabulary and spiral vocabulary
- Signpost: tell students what you are going to do next
- Chunk information and keep instructions concise
- Elicit information by asking open-ended questions and giving students time to think about an answer. Extend wait time
- Recast and spiral vocabulary: repeat vocabulary and concepts in lessons so that students gain familiarity
- Multiple entry points: speak, show, and do
- Use audio with visuals in student-facing lesson guides
Extensions
- Use your construction skills to build the tallest tower possible, using cardboard. Look at Brancusi’s Endless Column for inspiration
- Construct a monument with household items, such as boxes, bowls, cups, household utensils. Draw your monument. Look at these drawings by Claes Oldenburg for inspiration
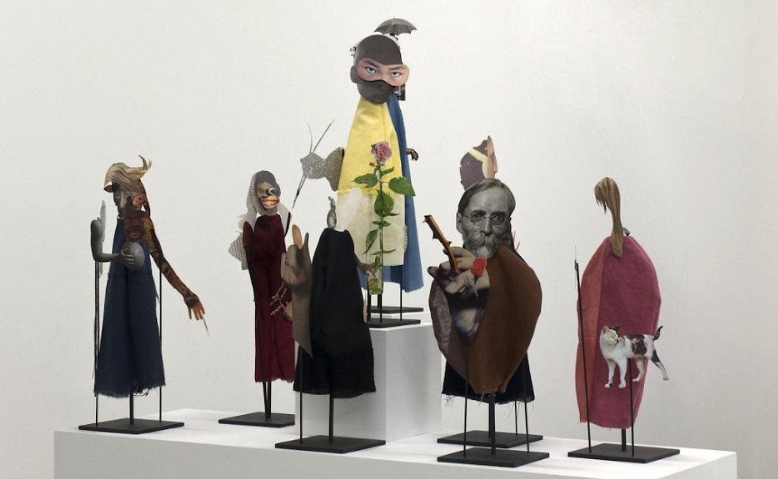
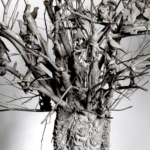
- Use the technique of collage to create a monument. Rip or cut shapes using colored papers, such as construction paper, or colors and images from magazines. Look at the work of Geoffrey Farmer for inspiration
Connecting to History and English Language Arts
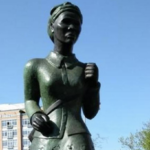
- Throughout the lesson sequence, teachers can facilitate discussions on how people from different cultures might interpret the public monuments shared. Alison Saar discusses this in respect to her Harriet Tubman sculpture in Harlem
- Listen to Alison Saar talk about her sculpture Swing Low and how she developed the symbols she weaves into her sculpture
- Students can pick a person they admire and research their lives. In their sketchbooks they can develop a “symbol library” that represents important aspects of their subjects’ life and legacyWatch a video about Abigail DeVille on Art 21. In this video, DeVille asks, “How does an artist acknowledge forgotten people?” Ask students to think about how they would make a monument to someone or something important but forgotten. This can be combined with the symbol library sketchbook activity above
New York Teaching & Learning in Visual Arts Standards
Art Making: 12th Grade Learning Indicators for Sculpture
Create a sculpture that demonstrates:
- Interaction with a space or the realization of a freestanding form
- Thoughtful selection and use of materials to express a personal style
- Planning, and execution of a work that conveys a message to influence opinion
- Effective use of the Principles of Design
Literacy in the Arts
- Looking At and Discussing Art
- Developing Visual Arts Vocabulary
- Reading and Writing About Art
- Problem Solving: Interpreting and Analyzing Art
Making Connections
- Recognizing the Societal, Cultural, and Historical Significance of Art; Connecting Art to Other Disciplines
- Observing and Interpreting the World
Community and Cultural Resources
- Cultural Institutions
- Public Art and Design
- Online Resources and Libraries
Careers and Lifelong Learning
- Awareness of Careers in Visual Arts
- Art for Enjoyment and Lifelong Learning
NYS Learning Standards for the Arts
Artistic Process: Creating
Anchor Standards:
- Anchor Standard 1: Generate and conceptualize artistic ideas and work
- Anchor Standard 2: Organize and develop artistic ideas and work
- Anchor Standard 3: Refine and complete artistic work
Artistic Process: Presenting
Anchor Standards:
- Anchor Standard 4: Select, analyze, and interpret artistic work for presentation
- Anchor Standard 5: Develop and refine artistic techniques and work for presentation
- Anchor Standard 6: Convey meaning through the presentation of artistic work
Artistic Process: Responding
Anchor Standards:
- Anchor Standard 7: Perceive and analyze artistic work
- Anchor Standard 8: Interpret meaning in artistic work
- Anchor Standard 9: Apply criteria to evaluate artistic work
Artistic Process: Connecting
Anchor Standards:
- Anchor Standard 10: Relate and synthesize knowledge and personal experiences to inspire and inform artistic work
- Anchor Standard 11: Investigate ways that artistic work is influenced by societal, cultural, and historical context and, in turn, how artistic ideas shape cultures past, present, and future
Credits
Writing Team
Anne-Marie McIntyre, Josef Zutelgte, Jamie Powell
Project Team
Belinda Blum, Nicola Giardina, Paul Urevitch, Andrea Burgay
Studio in a School NYC Team
Julie Applebaum, Senior Director
Hasna Muhammad, Ed.D., Chair, Board of Directors, Studio in a School Association
Alison Scott-Williams, President, Studio in a School NYC
NYC Department of Education OASP Team
Karen Rosner, Director of Visual Arts
Amber Lodman, Arts Program Manager
Kaitlin Trammell, Remote Arts Learning Partnership Project Coordinator
NYC Department of Education Visual Arts Teacher Team
Maria Bonilla, Amie Robinson, Susan Bricker, Lara Tyson
These educational materials were created through a partnership with Studio in a School NYC and The New York City Department of Education Office of Arts and Special Projects (OASP) and made possible by the generosity of The New York Community Trust.
Copyright © 2023 Studio in a School NYC LLC

