Overview
Students will explore a variety of different construction techniques and methods to make cardboard stand and to connect and attach shapes.
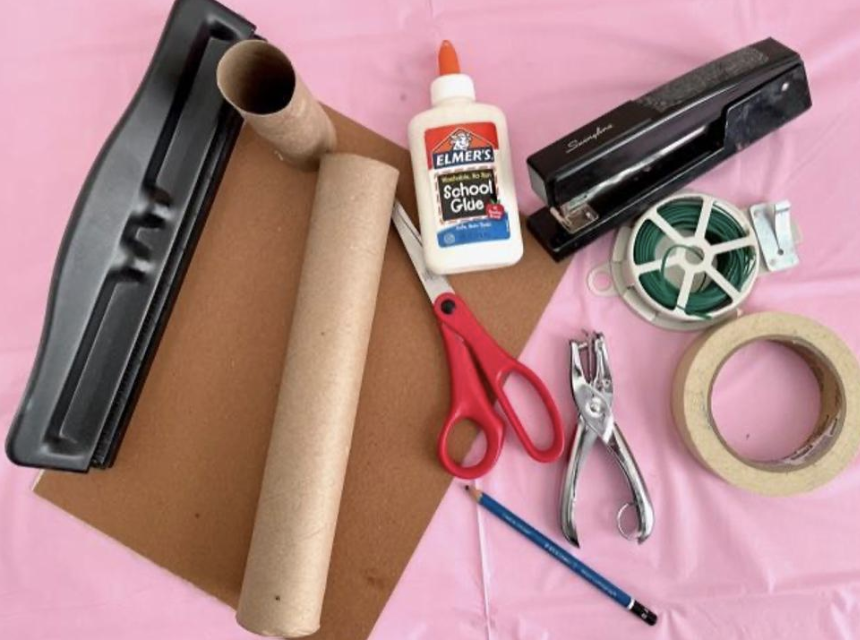
Materials and Tools
- Corrugated cardboard
- Smooth cardboard
- Scissors
- Tape
- White glue
- Pencil
- Optional: stapler, hole puncher, string, cardboard tubes
- Construction Techniques video
- Construction Techniques student slides
Objectives
Students will understand that:
- How to utilize experimentation as an integral part of the artistic process
- That attachment and building strategies create different visual effects
Students will be able to:
- Identify and demonstrate different ways of attaching and building with cardboard
- Identify strategies that work well with different types of forms
Activities
Note: The following steps are written with sample language you may use with your students as you go through the lesson. Explain to students that the slides and the video they see during the lesson will be shared with them so they can review the lesson on their own and continue to make more art.
Step 1: Introduction, Watch Construction Techniques Video (13 minutes)
In this lesson, you will explore a variety of different construction techniques and choose a combination of these to create a three-dimensional structure. This will be your first step in building your monument.
Your goal is to build a self-supported, freestanding three-dimensional structure that should be interesting from all sides when you walk around it. Watch the Construction Techniques video to learn different methods to make your materials stand up, to connect and attach shapes, and to make your sculpture stable and balanced.
Step 2: Close Looking: Zimoun, with Student Slide #4 (5 minutes)
Note to Teachers: Before teaching with a work of art, spend some time looking closely at it on your own. Familiarizing yourself with the artwork will prepare you to guide the close-looking activity.
If your students are new to looking at art together, you can introduce the activity to students in the following way:
Today we are going to spend some time looking at and discussing a work of art together. When we look at art, there are no right or wrong answers. I’m going to ask you to look closely, share your ideas about what you see, and listen respectfully to each other’s ideas. Everyone’s ideas are important. We all see things differently, and when we look at art, we can learn to see through each other’s eyes.
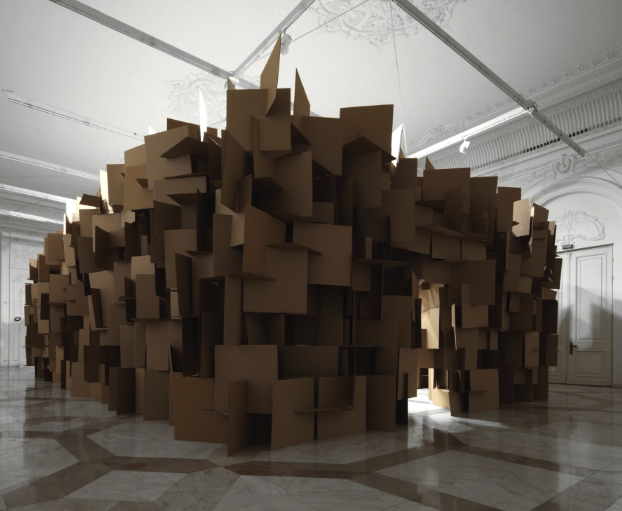
Artists use different methods and techniques to create freestanding sculptures. Let’s take a close look at an image of a freestanding cardboard sculpture by the contemporary artist Zimoun and the architect Hannes Zweifel.
- What do you notice about the way these cardboard elements are connected?
- How would the sculpture look and feel different if the boxes were neatly glued together?
- Does this sculpture feel monumental to you? Why?
- Does the attachment technique used by the artists add or take away from the sense of monumentality?
Step 3: Experimenting with Support Techniques, with Student Slides #6-10 (15 minutes)
Let’s begin experimenting with various construction techniques.
- What are some ways that you can make cardboard shapes freestanding?
Look at Student Slides #6 and #7. Folding, scoring, and rolling will create rectilinear and curvilinear freestanding forms.
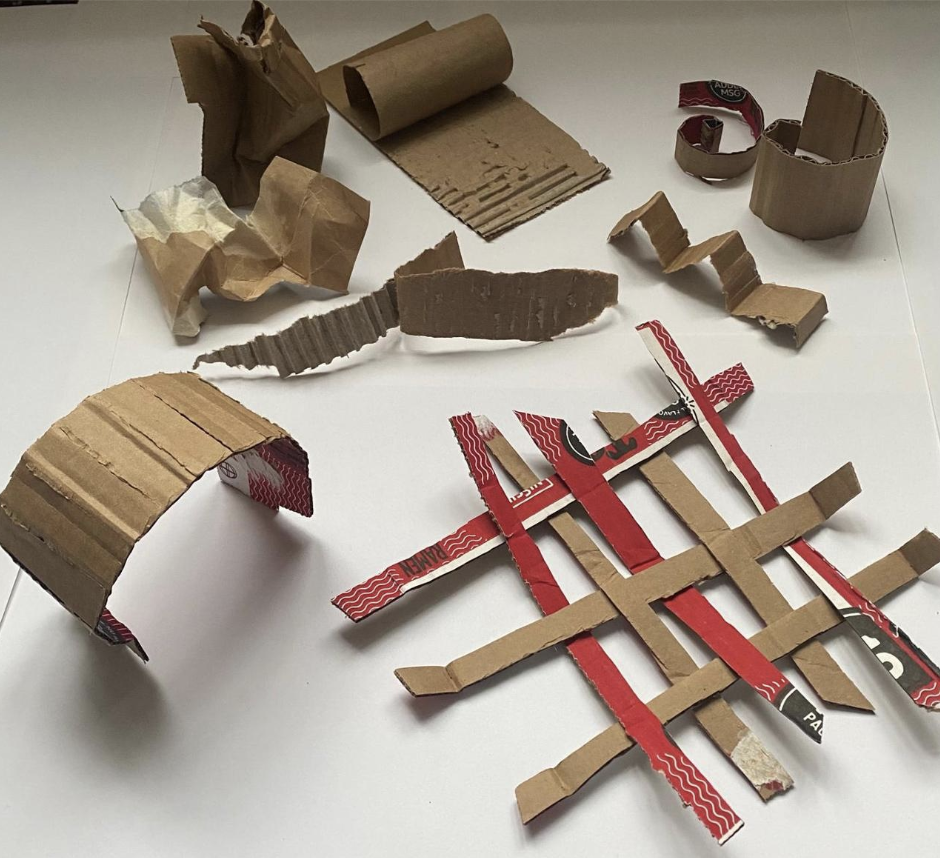
Look at Student Slides #8-10. Flange and gusset connections, as well as tabs, can help support pieces in a rigid, upright position.
Step 4: Experimenting with Attachment Techniques, with Student Slides #11-16 (15-20 minutes)
Now that you know how to make shapes stand, let’s begin connecting them together.
Look at Student Slides #11 and #12. Slotting and notching will allow you to connect shapes in multiple ways. Notice how one technique can have very different visual results.
Look at Student Slide #13. You can connect complex shapes easily with slots. Notice how the placement of the slot is an important part of this attachment method.
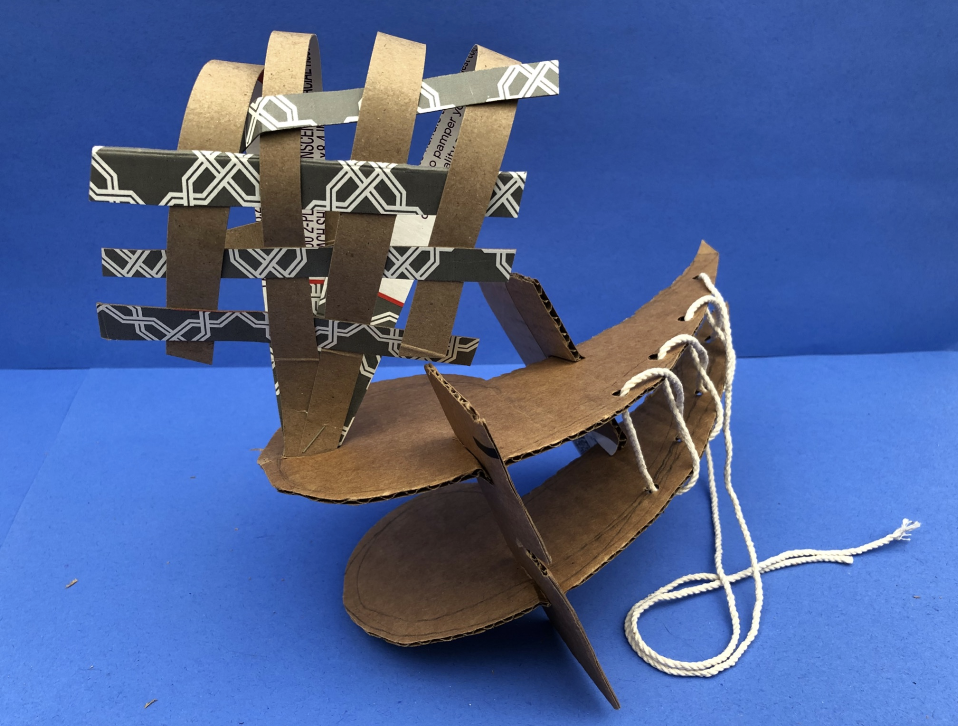
Look at Student Slides #14-16. Weaving, hooking, and sewing are alternative ways to connect shapes. Positive and negative space is a component you can play with in weaving. Hooking and sewing can be used to create movement in your sculpture.
Step 5: Building a Freestanding Sculpture, with Student Slide #19 (20 minutes)
Note: for additional support with this part of the activity, have students review Slides #6-10 from Lesson 3.
Build a self-supporting sculpture combining techniques from Steps 1 and 2.
Step 6: Reflection Questions for Discussion (10 minutes)
- Which construction techniques did you explore?
- Which did you ultimately choose? Why?
The materials and techniques you use can support and promote the concept of your monument. For example, weaving could stand for structure, order, strength, connection, or imprisonment.
- Did you use any techniques, textures, or shapes to convey a message?
Vocabulary
Balance
Texture
Three-dimensional
Construction techniques
Resources
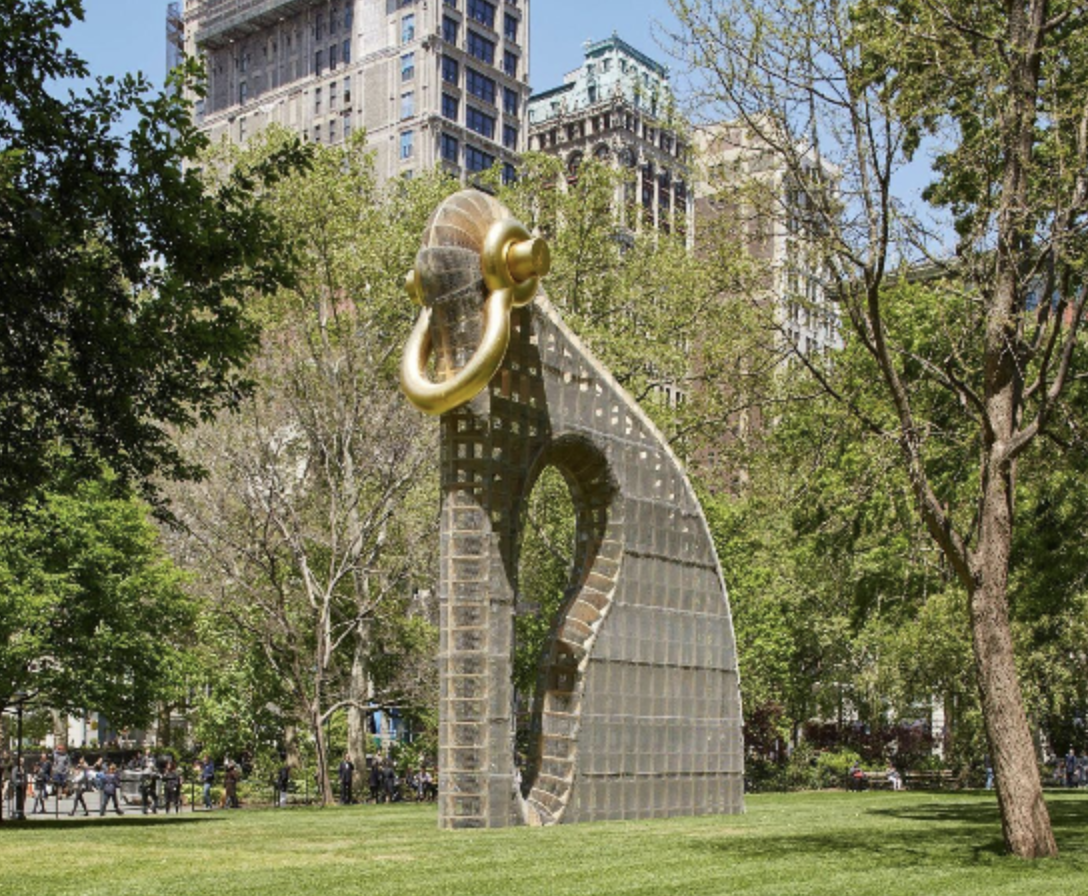
Martin Puryear on making Big Bling: Art 21 Video
Zimoun + Hannes Zweifel. 200 prepared dc-motors, 2000 cardboard elements. 2011, Bucharest