Overview
Students will use their new skills to begin to build a monument using cardboard, starting with the largest shapes first.
Note to teachers: Lesson 7 has two components: close looking and art making. You may choose to teach both parts as one lesson or to teach them as two lessons on different days.
Materials and Tools
- Cardboard
- Scissors
- Tape
- Glue
- Ruler
- Building a Monument video
- Building a Monument student slides
Objectives
Students will understand that:
- How to use the principles of three-dimensional design to create a sculpture that represents their idea
Students will be able to:
- Apply the techniques they have learned to transform, attach, and build with their cardboard to create large forms of their sculpture
Activities
Building a Monument Part 1
Step 1: Introduction, Watch Building a Monument Video (12 minutes)
Over the last several weeks, you have thought about monuments, made sketches, learned construction techniques, and developed a pedestal for your monument. Today, you will use all these skills and begin to build your own monument with cardboard, using your sketches as a guide. You will begin by building the large shapes first; details will come later. Watch the Building a Monument video to start thinking about how you will begin constructing your monument.
Step 2: Close Looking, with Student Slides #3-5 (20 minutes)
Let’s look at three examples of how artists use design elements and principles to express their message.
Student Slide #3, a monument to an event: This is a monument to social distancing, something people experienced during the 2020-2021 pandemic. It is an abstract monument.
- What do you think this monument shows about social distancing?
- What choices did this artist make to express those ideas?
People are represented through columns that are placed six feet apart. This artist used placement and repetition to communicate the idea that if everyone stays six feet apart, we will stay safe.
Imagine what would be different in a visual presentation of a group of people before the pandemic.
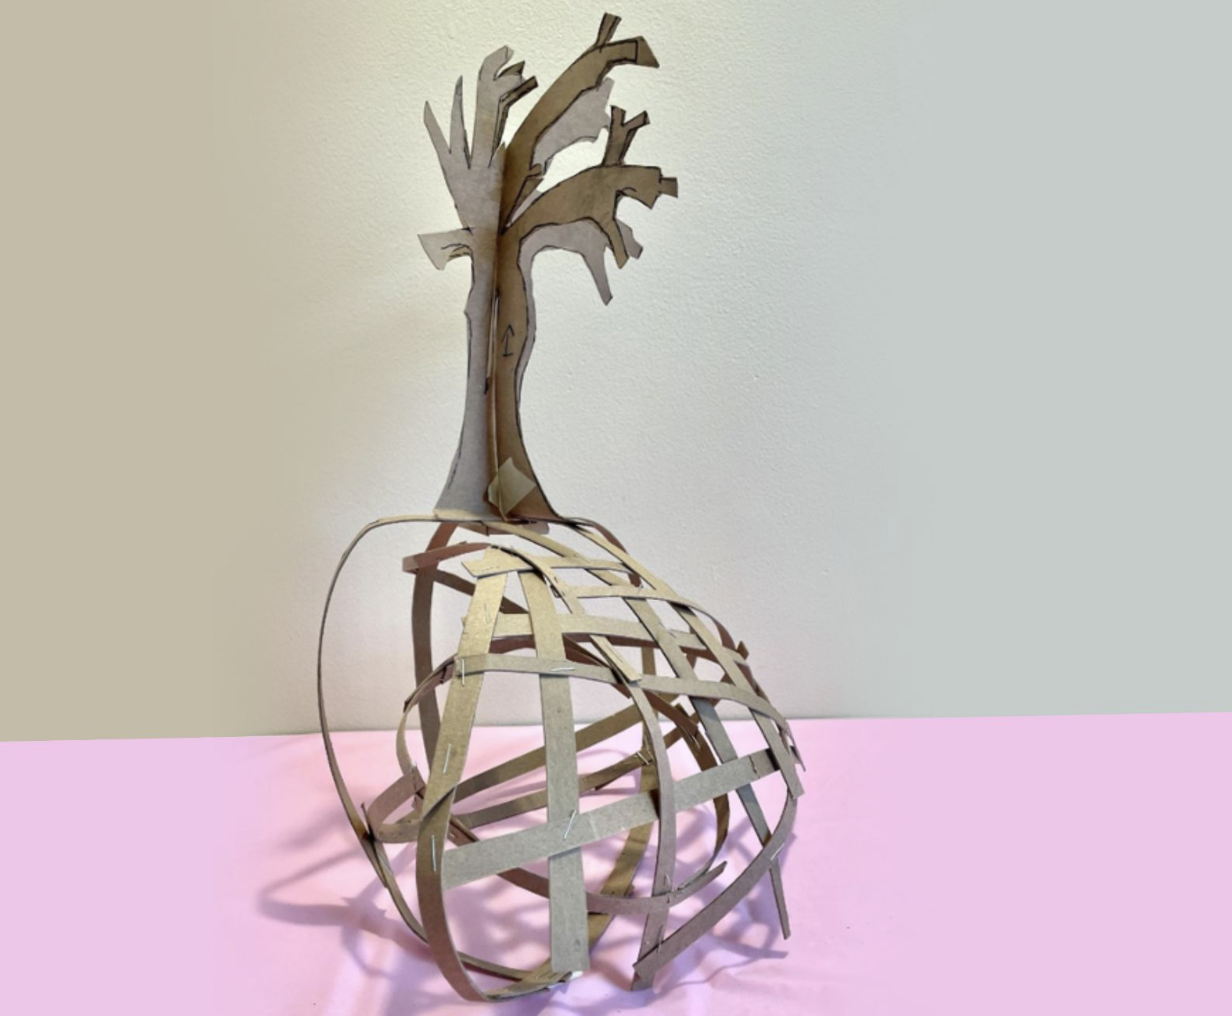
Student Slides #4-5, a monument to an idea: This monument represents an idea. A tree connects the earth and the sky. It represents life, growth, and strength.
- What choices did the artist make to communicate these ideas?
This artist used contrast between the solid shape of the tree and the fragile net-like roots to create tension and balance. The placement of the tree on top of the sphere creates balance and tension, which can represent the delicate world we are living in.
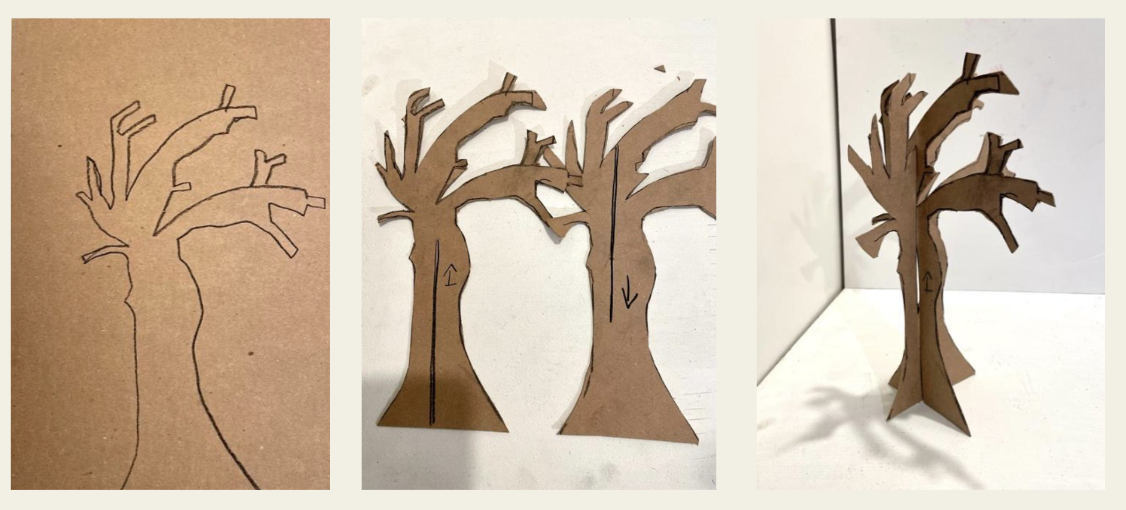
This artist began with a sketch, cut out the main shapes with slots, and assembled the tree using the slotting technique.
Step 3: Developing Ideas, with Student Slide #6 (2-3 minutes)
Look closely at the silhouettes of monuments and their pedestals.
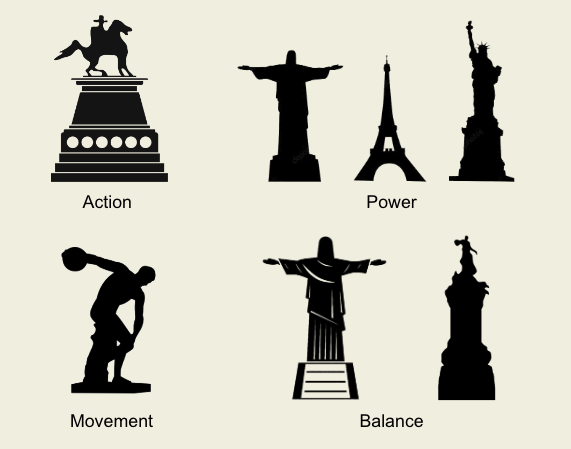
- How did the artists use placement, scale, and proportion to communicate these big ideas?
- How will you use placement, scale, and proportion to communicate your idea?
Building a Monument Part 2
Step 1: Creating your Monument (40 minutes)
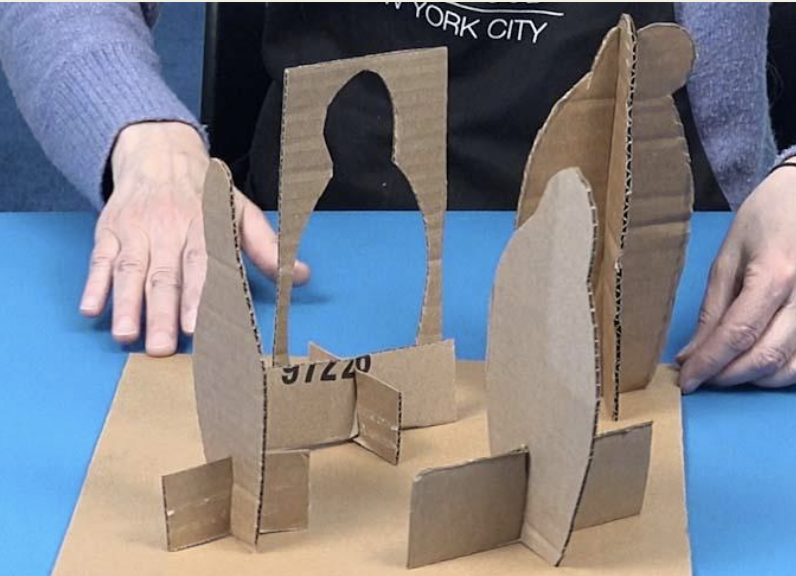
Choose techniques—folding, slotting, notching, stacking, adding tabs, or rolling—to attach and extend your shapes. Make sure your sculpture is stable. Make the connections strong by using glue and/or tape.
Step 2: Evaluating the Composition (10 minutes)
Once your base and monument are connected, take a minute to evaluate the composition. In art, composition is the arrangement of visual elements, such as your shapes. A well-composed sculpture will interest the viewer and help communicate the artist’s intention.
Important things to consider:
- Size and proportion
- Placement of shapes
- Positive and negative space
- Movement, rhythm, and balance
- Repetition
Step 3: Reflection Questions for Discussion (10 minutes)
- Turn your sculpture around. Is it interesting from all sides?
- How did you use scale or proportion in your design?
- Which is the largest shape in your design? Which is the smallest? Do their sizes match their significance?
- What visual elements repeat in your design?
Vocabulary
Composition
Proportion
Scale
Movement
Repetition
Resources
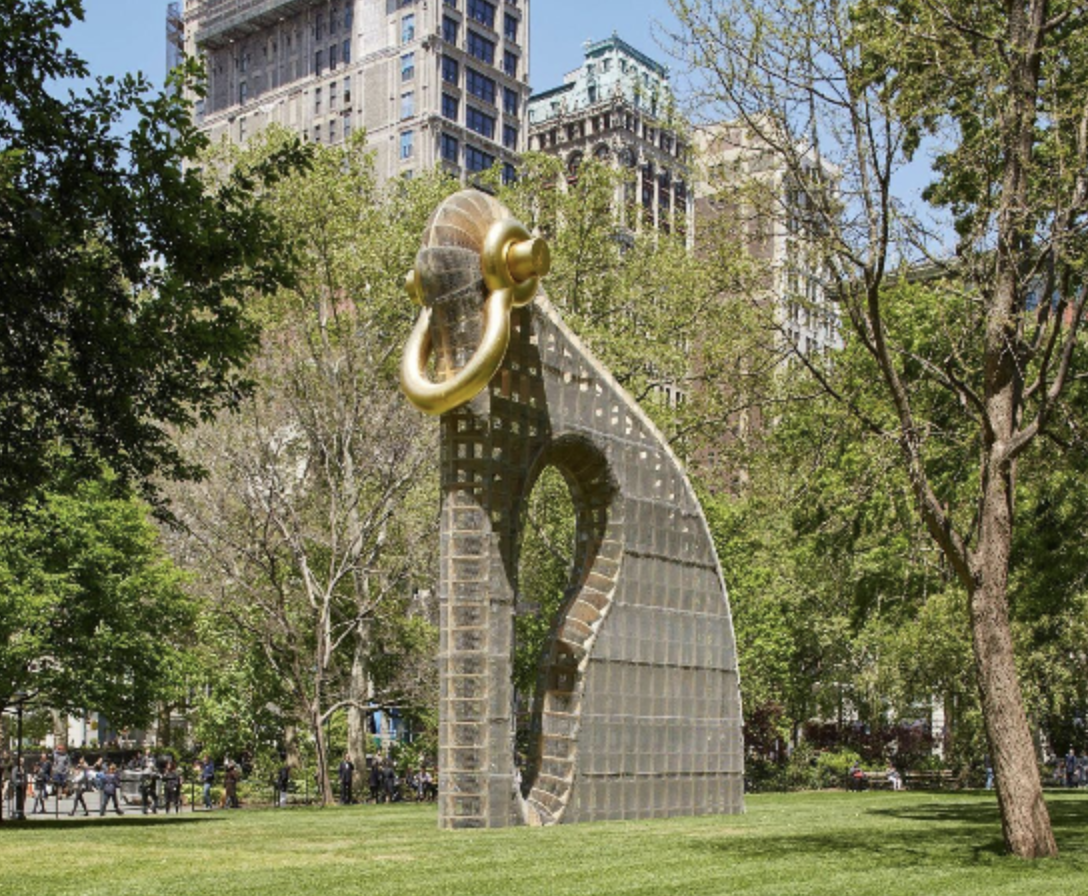
Martin Puryear. Big Bling. 2016, Madison Square Park, New York
Martin Puryear on making Big Bling: Art 21 Video