Overview
Students will finish their monument by adding more shapes, texture, or imagery.
Materials and Tools
- Your base and work from last week
- Smooth cardboard
- Found paper
- Collage materials
- Optional: drawing materials and sketches from your sketchbook.
- Finishing the Monument video
- Student Slides: Finishing the Monument
Activities
Note: The following steps are written with sample language you may use with your students as you go through the lesson. Explain to students that the slides and the video they see during the lesson will be shared with them so they can review the lesson on their own and continue to make more art.
Step 1: Introduction, Watch Finishing the Monument Video (12 minutes)
In the previous lesson we looked at Alison Saar’s Swing Low: Harriet Tubman Memorial and Maya Lin’s Vietnam Veterans Memorial and learned that artists add details to monuments for symbolic or narrative purposes.
Today you will complete your monument by adding shapes, texture, or imagery to further describe the meaning and symbolism in your monument. Watch the Finishing the Monument video to begin thinking about what details you may want to add to your work.
Step 2: Close looking, with Student Slides #3-7 (10-15 minutes)
Let’s look at how artists Nick Cave and Geoffrey Farmer used details to further describe their ideas in sculpture.
Look closely at the image of A·mal·gam by Nick Cave on Slides #3-5. This is the artist’s proposal for the High Line Plinth in New York City.
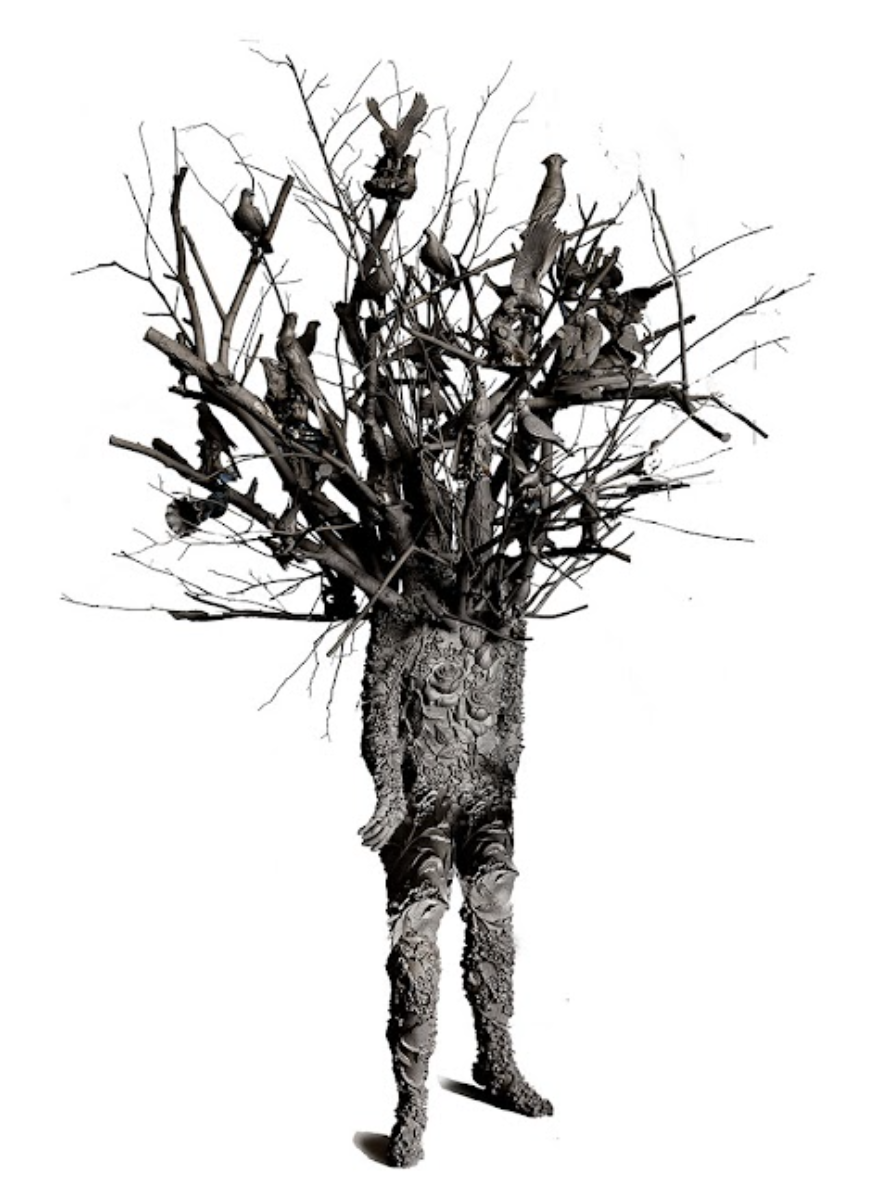
- What do you notice?
- What does this sculpture make you think of?
The definition of amalgam is a mixture or blend.
- What evidence of mixing and/or blending can you find in this sculpture?
Now let’s zoom in to see the details of the sculpture on slides #4 and 5.
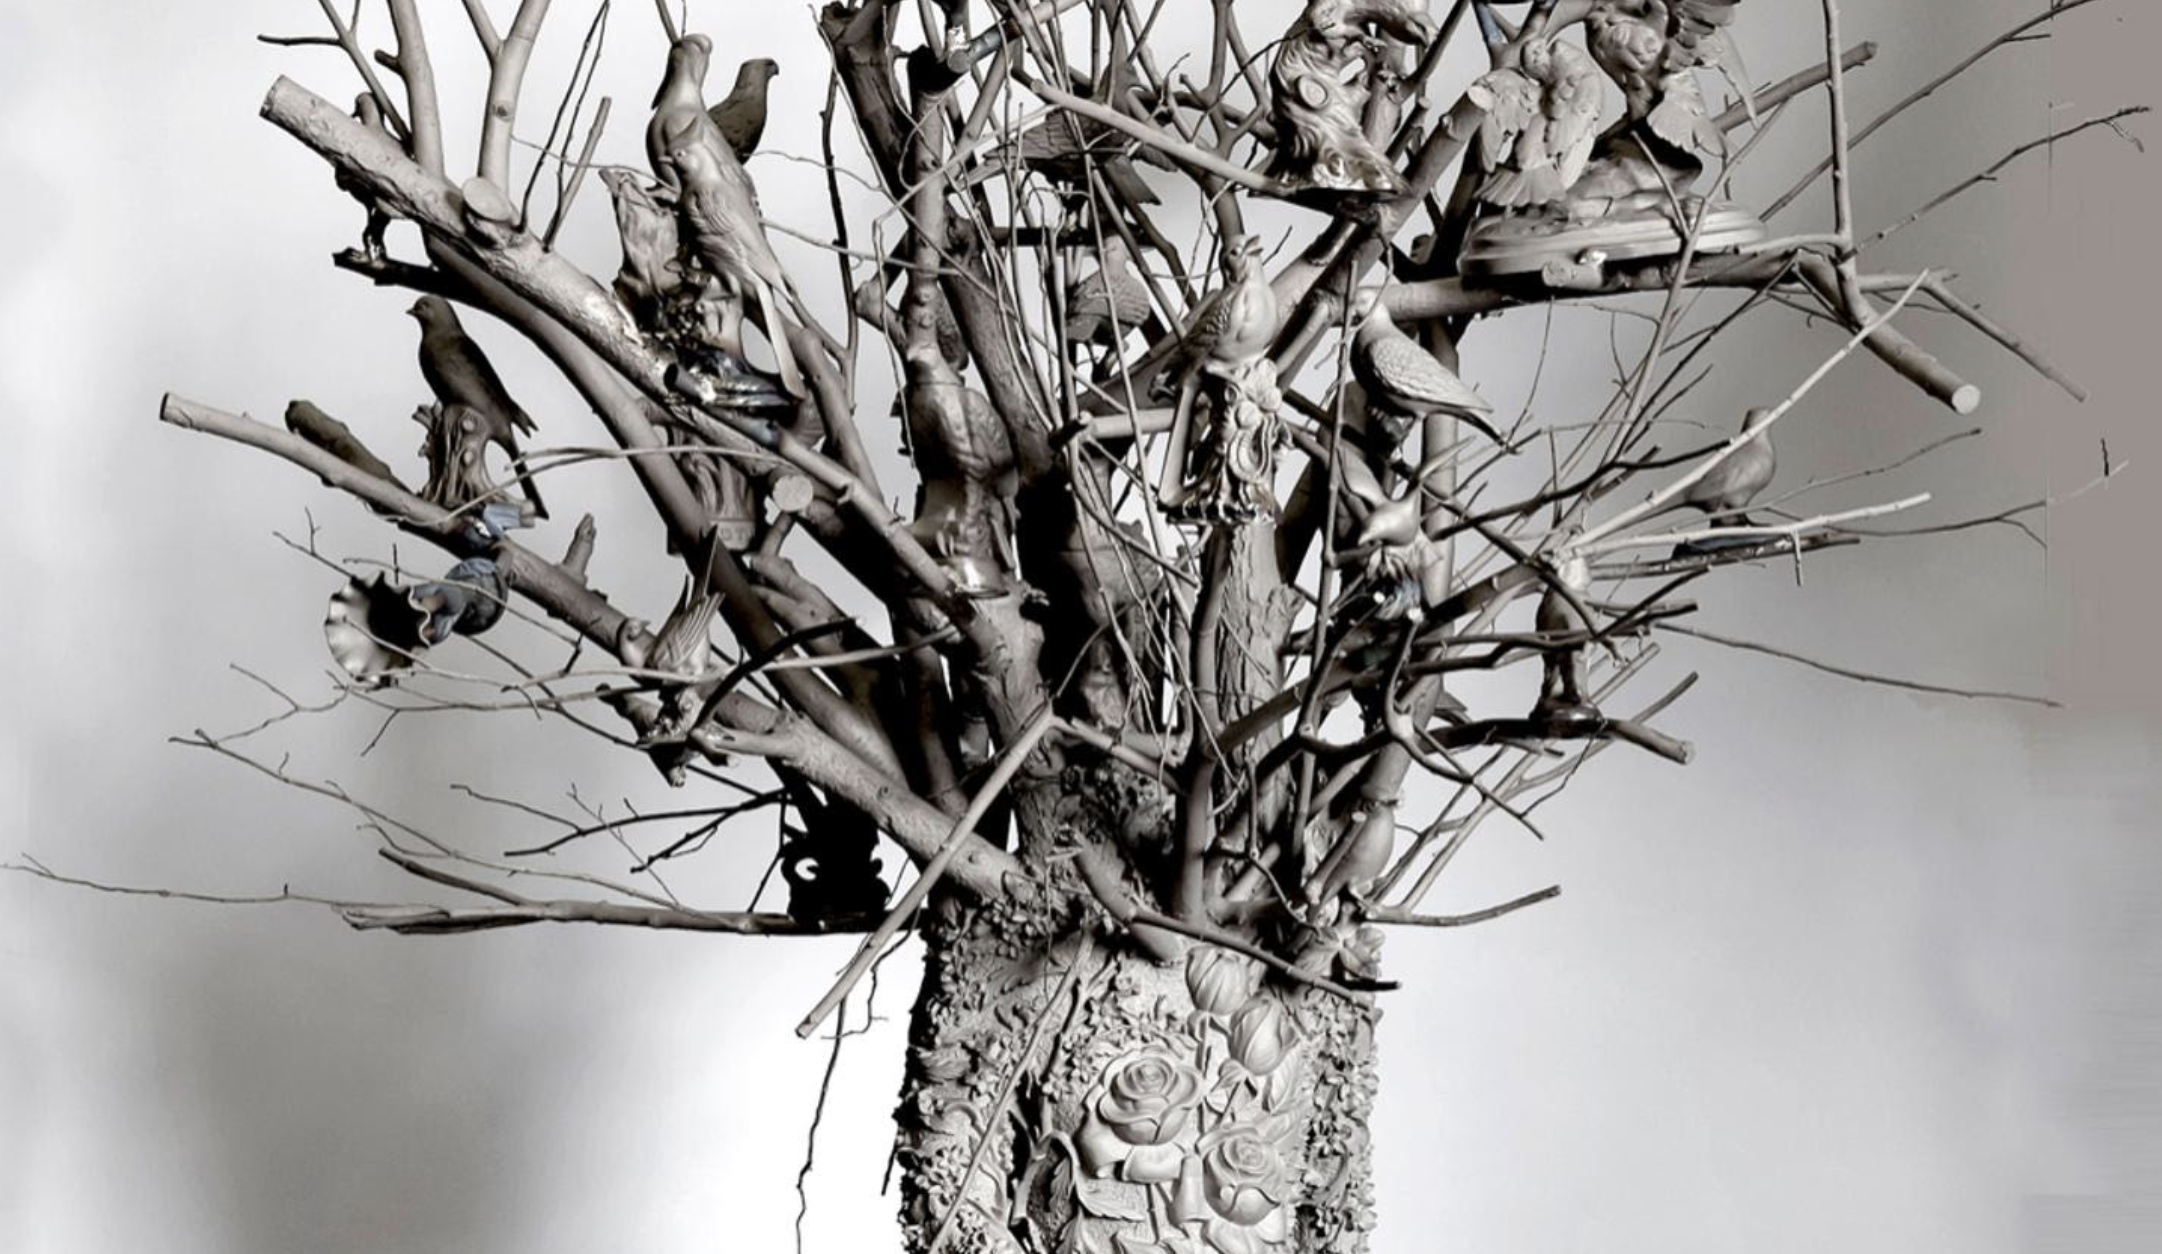
- What do you notice?
- What details did the artist include?
- What new ideas do you have about the sculpture now that you’ve seen it up close?
Look at the work of Geoffrey Farmer on Slides #6 and 7. Geoffrey Farmer is an artist who uses collage to add imagery to his sculptures.
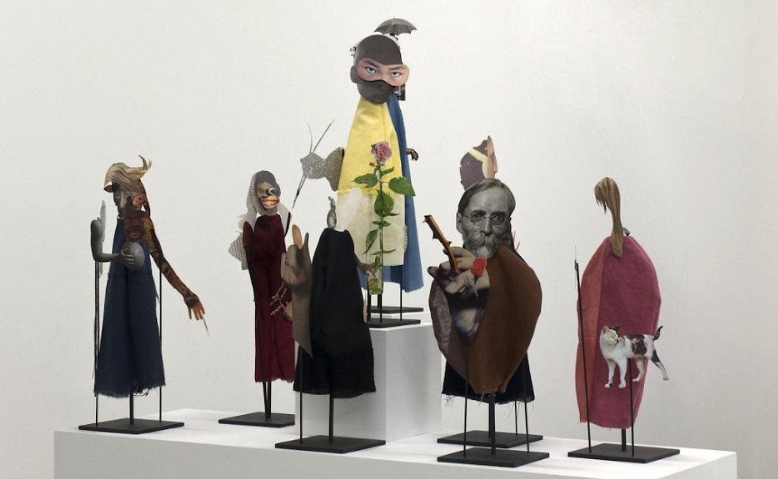
- What do you notice?
- What details did the artist include?
- How do the collage images add to the sculptures?
Step 3: Adding Details, with Student Slides #8-14 (30 minutes)
Now it’s time to finish your monument by adding details. We have seen examples of artists who use simple forms, texture, and imagery as details in their work.
- What kind of details do you want to add to your work?
Let’s look at some of the possibilities for adding details to your monument.
Student Slides #8-10: In this example, the artist decided to add images of hands found in a newspaper. What images might you consider adding as details to your monument to further describe your idea? Keep in mind that these images should support what you have already designed. Carefully consider where and how you will add them in relationship to the three-dimensional aspects of your work.
Student Slide #11: In this example, the artist included symbols and text as details. Would a text-based detail or symbol support your monument’s idea? Think about this choice carefully. Less is often times more. The addition of one word or symbol may be enough to communicate your intended message.
Student Slides #12-14: In this example, the artist used their sketchbook drawing of a large hand holding a paper ballot to create Monument to the Voter. Is there a sketch that you developed that could be used as an interesting focal point in your monument? Think carefully about where you will place the additional image. Explore different compositions until you find a placement that has an integral relationship to the meaning and form of your monument.
Step 4: Reflection (10 minutes)
Monuments are made to be shared with a community. The artists we explored in these lessons worked with many other people to create and install their monuments. They spoke with other people to help refine their ideas.
Share your monument with someone you trust. Ask them how they interpret it. Inevitably, they will have their own interpretations. How do you feel about that? What did you learn from what they shared with you?
Vocabulary
Amalgam
Resources
Nick Cave, A·mal·gam, 2019, installed on the High Line, New York: https://www.thehighline.org/art/projects/nick-cave
More of Nick Cave’s work: https://jackshainman.com/artists/nick_cave
Geoffrey Farmer, The Surgeon and the Photographer, 2010, Installation view and detail: https://catrionajeffries.com/artists/geoffrey-farmer/exhibitions/the-surgeon-and-the-photographer-january-29-march-6-2010 – 10
More artwork by Geoffrey Farmer:
https://www.icaboston.org/exhibitions/geoffrey-farmer