Overview
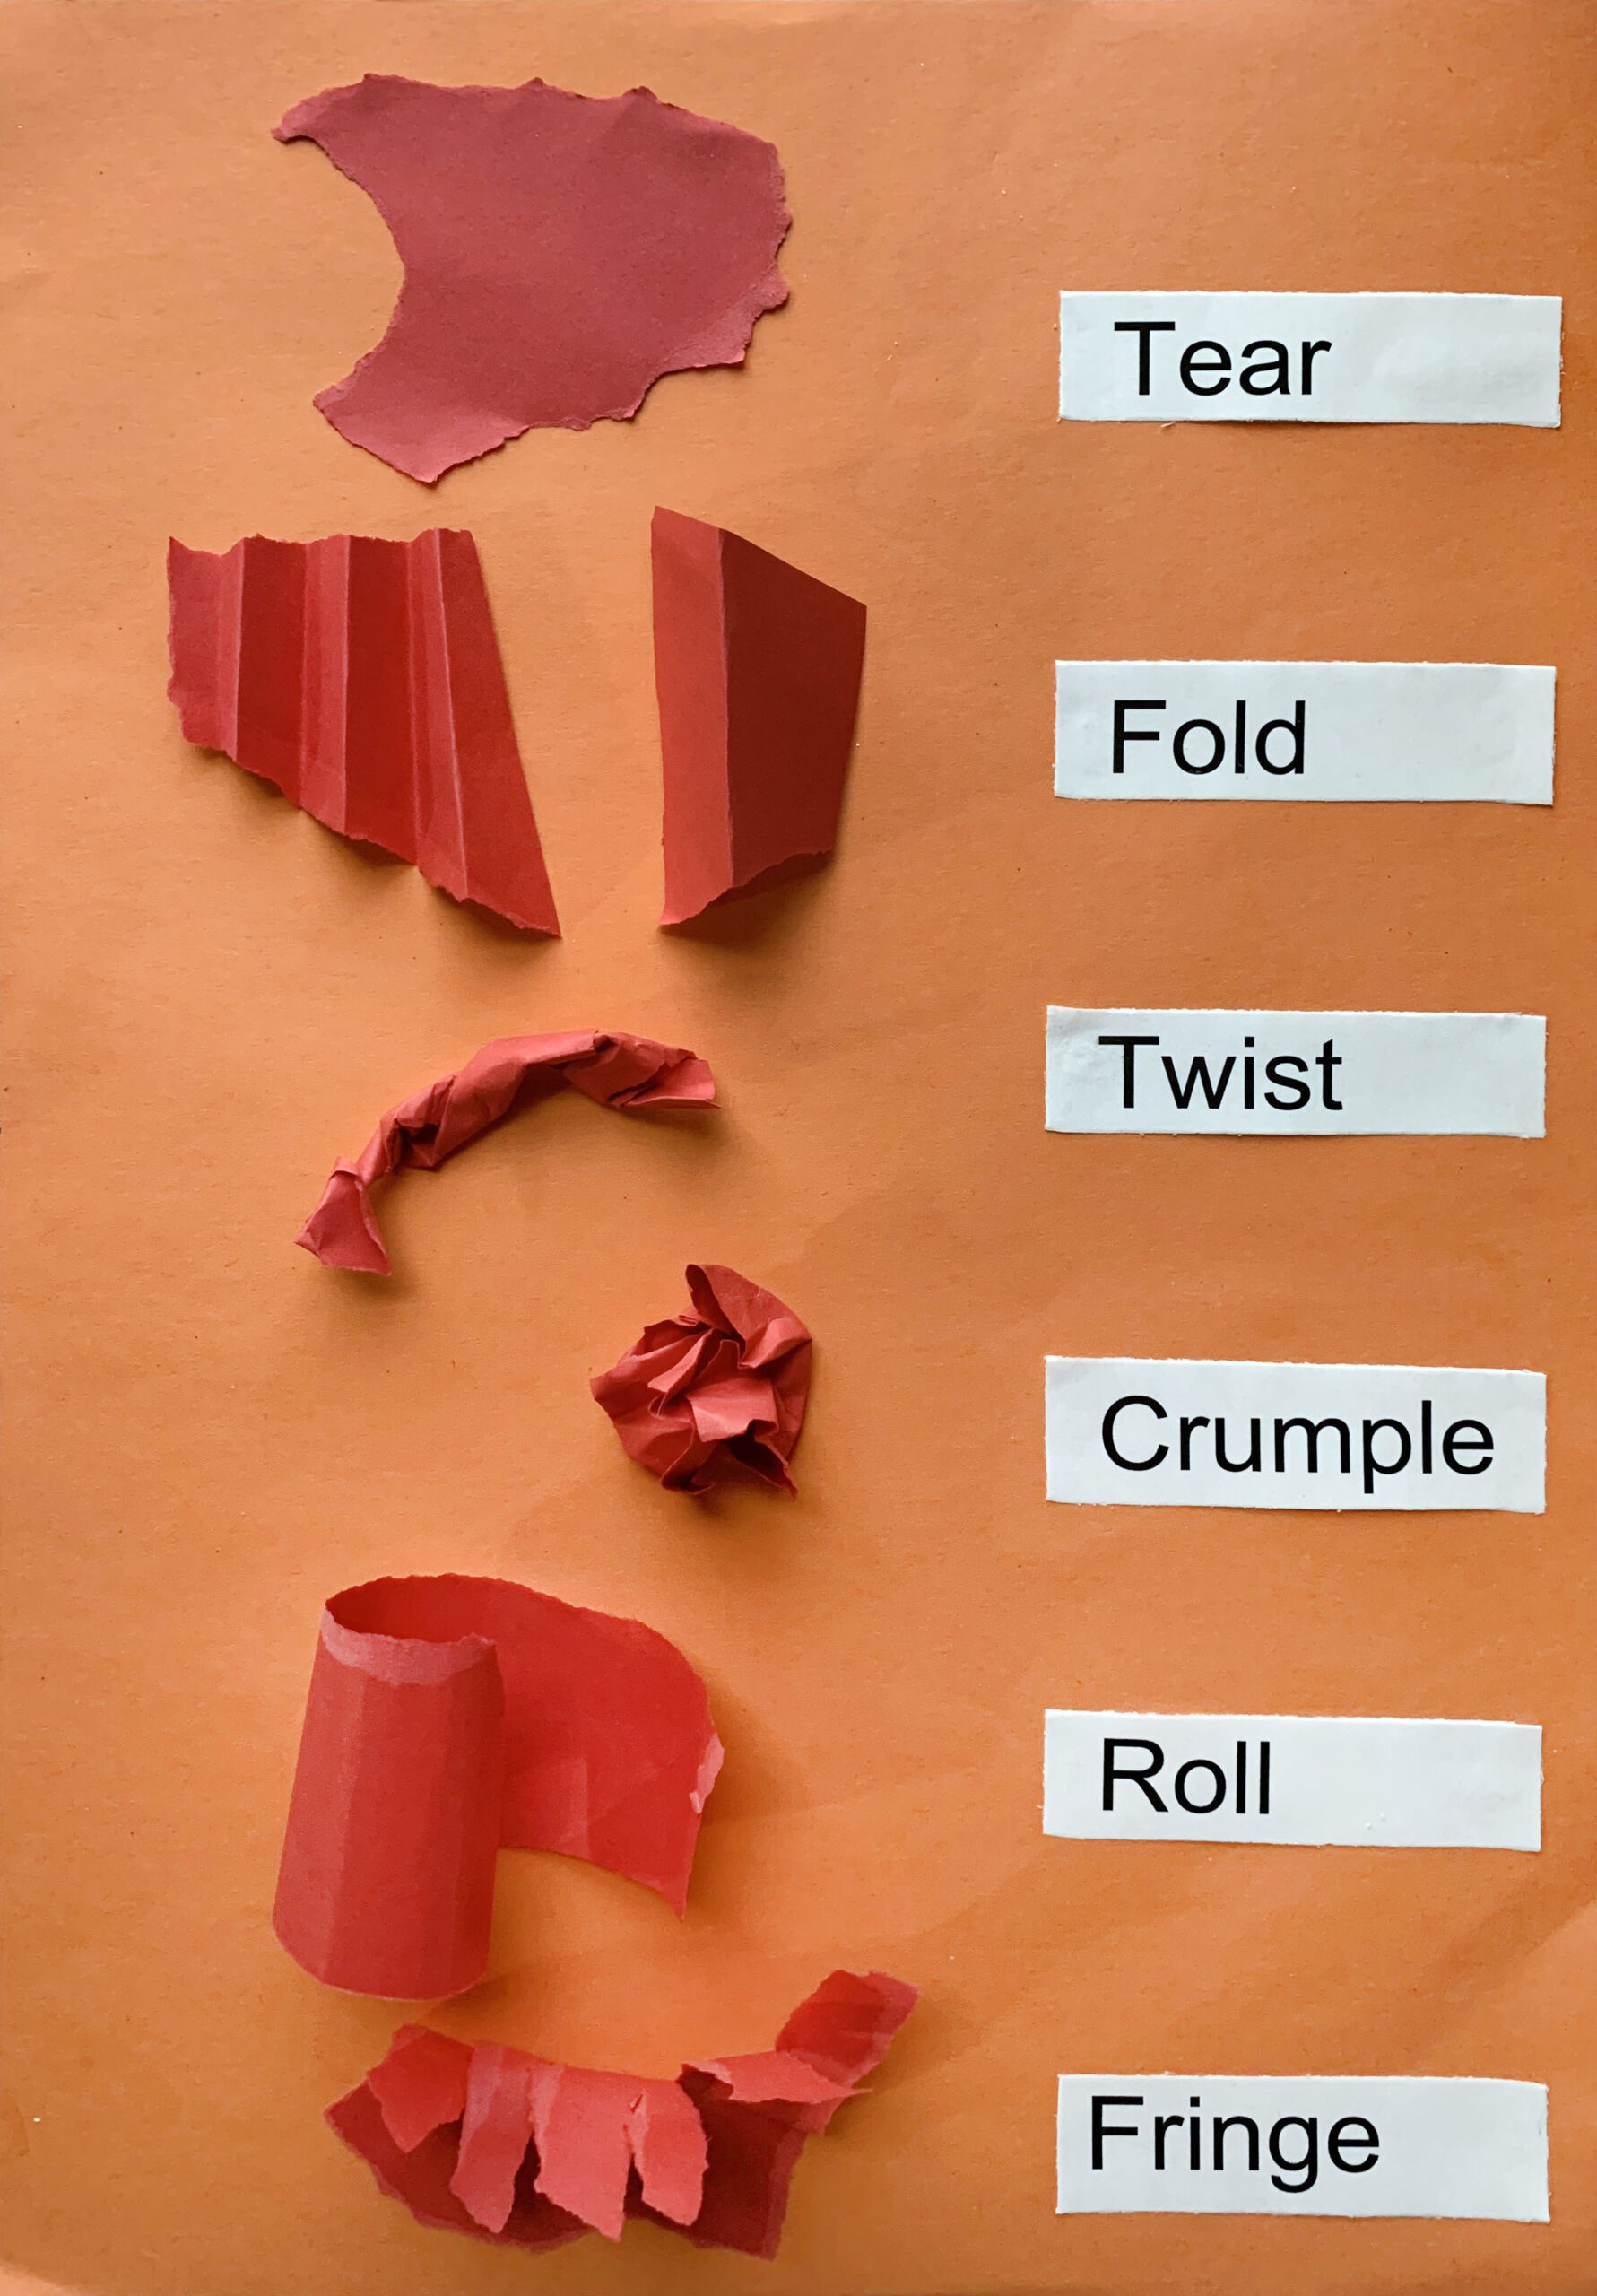
Students will use their hands to change a piece of paper six different ways (tear, fold, crumple, roll, twist, fringe). Students will make different arrangements with their shapes on a background paper.
Materials and Tools
- Two sheets of paper that are different colors
- Exploring Paper video
- Exploring Paper student slides
Objectives
- Students will be introduced to four elements of art: line, shape, color,
and pattern - Students will explore collage by changing paper with their hands and making different arrangements
Student Outcomes
- Students will be able to create artworks using different lines, shapes, colors, and patterns
- Students will be able to tear, fold, twist, roll, crumple, and fringe paper with
their hands
Students will understand that:
- There are many different types of lines, and they can be found everywhere
- Hands can be a tool to change paper in different ways
Students will be able to:
- Change a flat piece of paper (two dimensional) into something that stands up (three dimensional)
Activities
Note: The following steps are written with sample language you may use with your students as you go through the lesson. Explain to students that the slides and the video they see during the lesson will be shared with them so they can review the lesson on their own and continue to make more art.
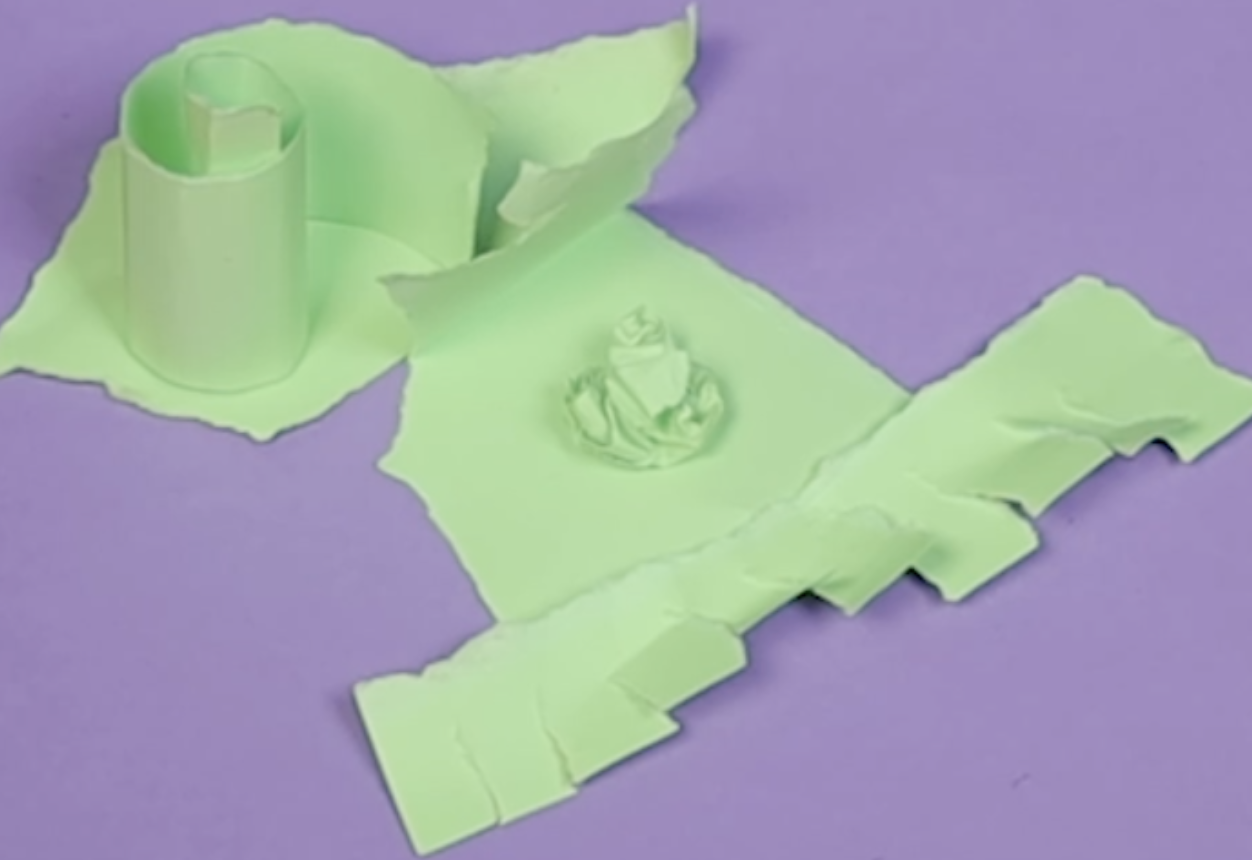
Step 1: Introduction/Close Looking, with Student Slide #2 (5 minutes)/ Watch Exploring Paper Video (partial)
Welcome back, artists. We have learned that lines, shapes, and patterns can be found all around us. Today we will explore creating lines, shapes, and patterns in a new way. Let’s look at Student Slide #2 to find out how.
What do you notice about these shapes?
- How are the shapes similar and different from the lines and shapes we made in our previous work?
- Can you find a spiral line?
- How is this spiral different from one that is drawn on a flat piece of paper?
- How do you suppose the artists made the spiral stand up?
To find out how the artist made her spiral stand up and learn many other ways to change paper with your hands, watch the Exploring Paper video up to minute 6:22.
Step 2: Using Hands to Change Paper, with Student Slides #3-5 (15 minutes)
The artist instructor, Belinda, showed us so many ways to change paper with our hands.
- What was your favorite way?
Isn’t it interesting that just by using our hands we can create so many different types of shapes — flat, standing, and even rolled shapes?
Now it’s your turn, artists. Turn to Slides #3-5 to review the techniques Belinda showed us in the video. Then create your own torn-paper shapes.
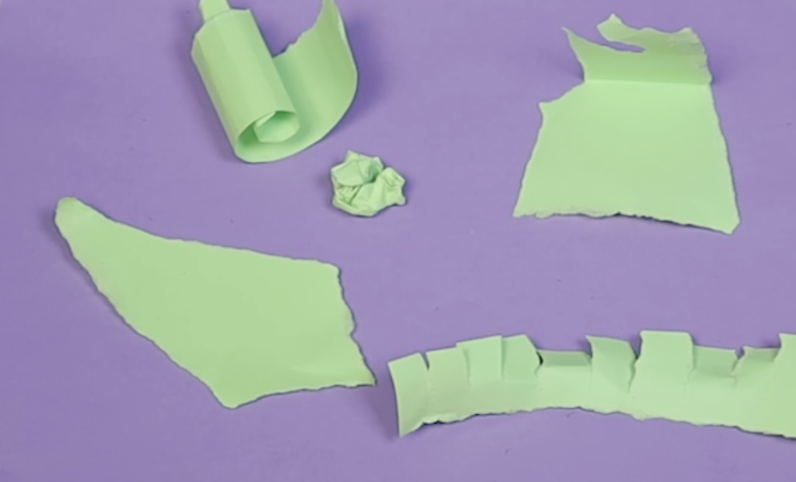
Step 3: Making Arrangements with Torn Shapes (15 minutes)/Watch Exploring Paper Video (3 minutes)/ Review Student Slide #6
- What are some ways Belinda arranged her green paper shapes on her purple paper?
Provide a silent minute for students to respond.
I noticed she tried three different ways of arranging paper. In her first arrangement, she placed the pieces next to each other without touching. Belinda also explored overlapping the pieces. She turned the tent shape upside down and tucked a twisted piece in the crease, like a hot dog! Lastly, she explored leaning the shapes together so they would hold each other up.
Now it’s your turn to play with arranging your shapes! Look at Slide #6 to guide your exploration.
Step 4: Reflection Questions for Discussion (10 minutes)
- How did you change the paper?
- How did you arrange the shapes on your background paper?
Vocabulary
Tear
Fold
Crumple
Roll
Twist
Fringe
Arrange
Background
Resources
Making Paper Three-Dimensional