Overview
In this lesson, students will tear and cut shapes to create an imaginary animal with details.
Materials and Tools
- Scissors
- Three or more sheets of different colored, patterned, and/or textured paper—one for background, at least two to cut
- Glue or tape
- Imaginary Animal Collage video
- Imaginary Collage Animal student slides

Objectives
Students will understand that:
- Imaginary animals are made-up animals that artists invent using their imagination
- Imaginary animals can have different features and details than real animals
- Imaginary animals can be made by combining different shapes
- Details and patterns add interest and describe the attributes of a subject
Students will be able to:
- Identify and choose shapes, details, and patterns to create an imaginary animal
- Demonstrate use of scissors, or tearing, to create shapes, details, and patterns
- Arrange shapes, details, and patterns to create an animal of their own design
Activities
Note: The following steps are written with sample language you may use with your students as you go through the lesson. Explain to students that the slides and the video they see during the lesson will be shared with them so they can review the lesson on their own and continue to make more art.
Step 1: Introduction/Watch Imaginary Animal Collage Video (14 minutes)
Welcome back, artists! In our last lesson we made a collage of a real animal using a photograph to inspire our work. Today we will be creating a made-up animal using our imagination. Watch the Imaginary Animal Collage video to learn how you will be putting your imagination and collage skills to work today.
Step 2: Close Looking, with Student Slide #2 (5-10 minutes)
Let’s look at Slide #2 to observe a drawing of an imaginary animal.
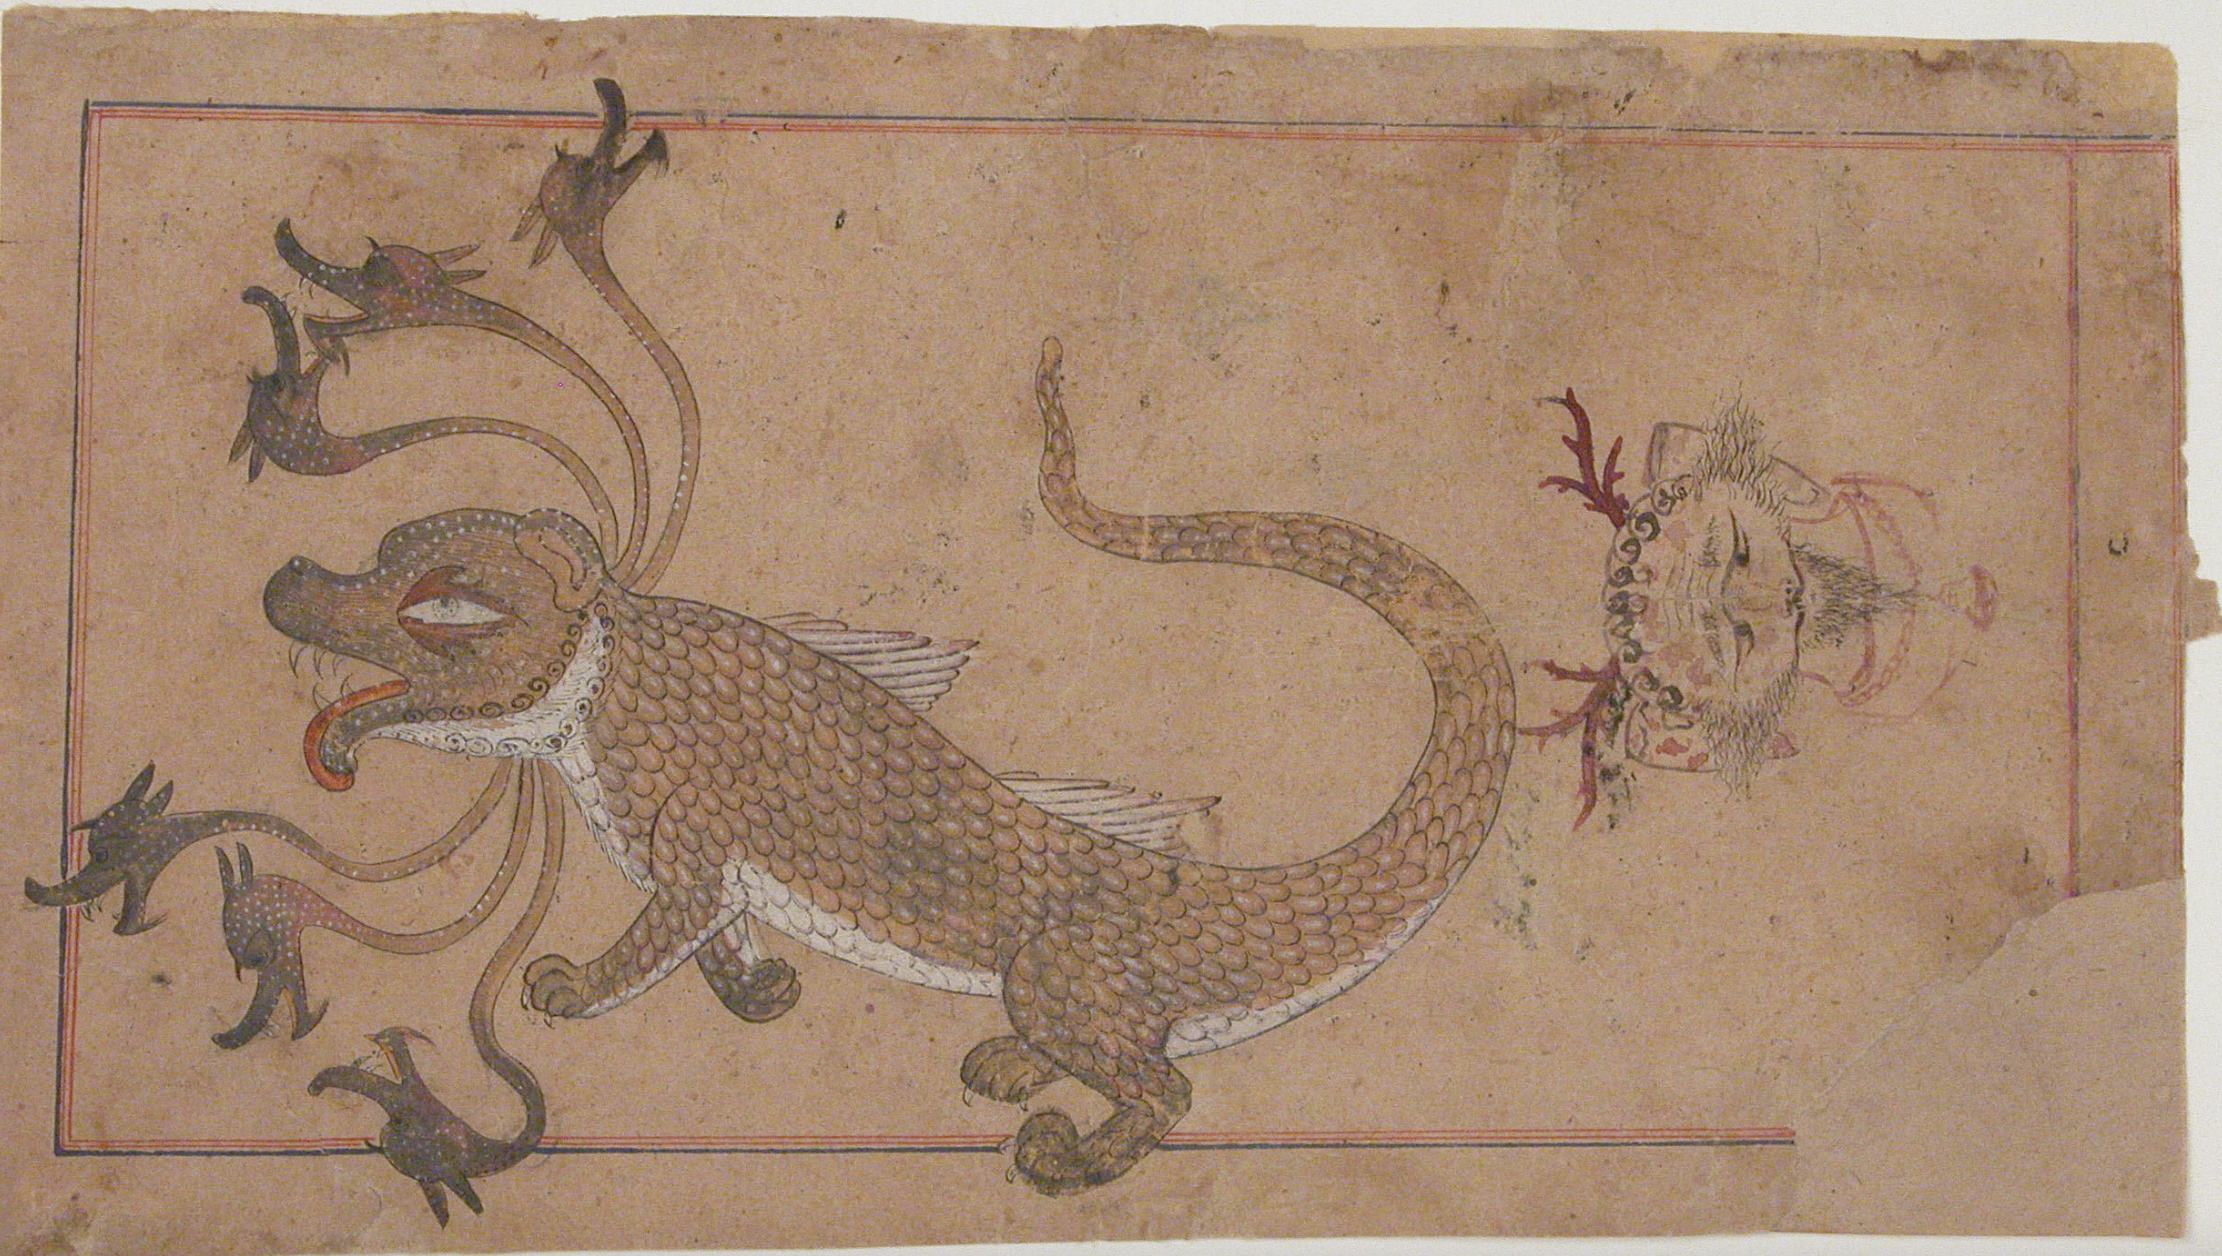
- What do you notice about this creature?
- Is this a real or made-up animal?
- What do you see that makes you say that?
- Why do you think an artist would want to create a dragon with seven heads?
- What can a dragon with multiple heads do that a single-headed dragon cannot do?
- What are some details that help us learn even more about the dragon?
Now, take a moment to consider what your imaginary animal is going to look like. Here are a few questions to inspire your thinking:
- What type of animal do you want to make? Land, sea, air, or a combination?
- Are there any features that you will want to repeat?
- What action pose will you create for your made-up animal?
Step 3: Cutting, Arranging, and Gluing Imaginary Animal, with Student Slide #4 (20 minutes)
Now that you have an idea in mind, start cutting your shapes. You can use cut and torn geometric and organic shapes. An animal made with only cut shapes will look and feel very different than a creature made with torn shapes. The choices that you make as you create your collage will tell us a lot about your imaginary creature.
Look at Slide #4.

- What action pose did the artist use to describe what the animal is doing?
- What action pose will your animal take?
Just like your choice of shapes, the pose of your animal will tell us something important about your creature.
- What would you like us to know about your creature based on its pose?
Play with a few arrangements until you find one that best suits the personality of your imaginary animal.
Once you are ready, glue down the overall shape of your animal’s body.
Step 4: Adding Details and Patterns, with Student Slide #5 (15 minutes)
It’s time to add details and patterns to your imaginary animal collage. Let’s look at Slide #5 for some inspiration.
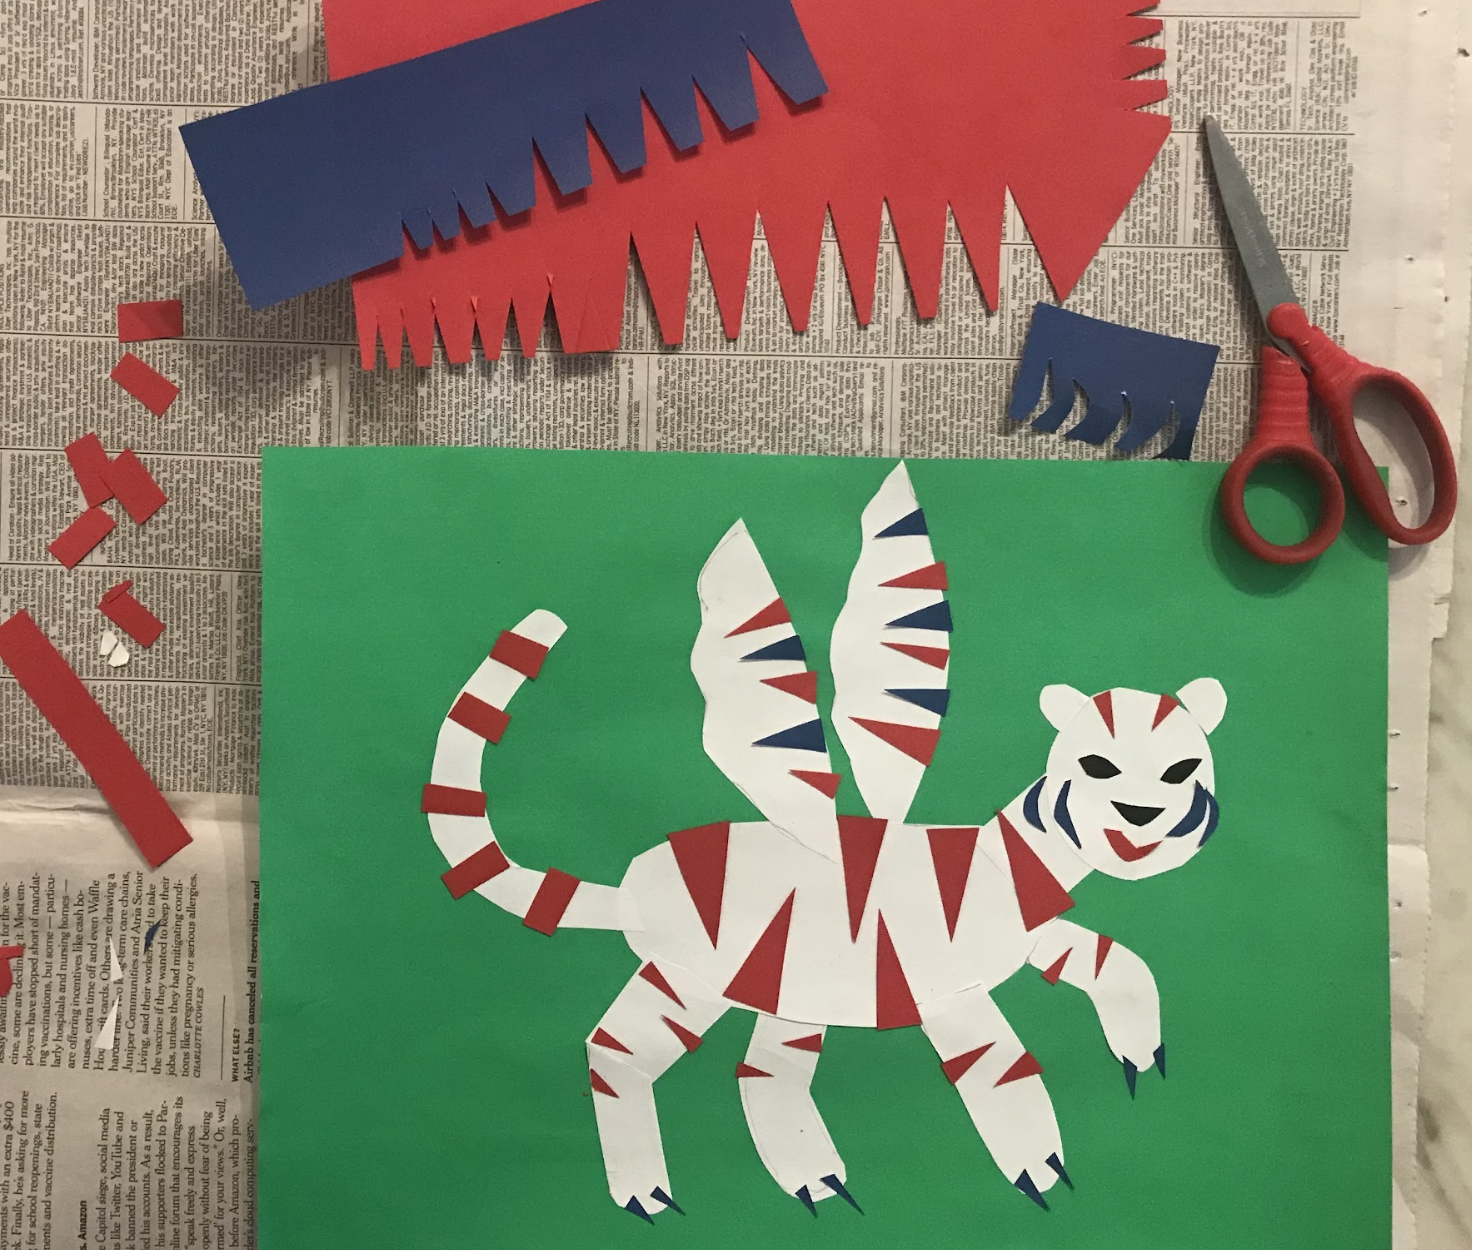
- What details and patterns did the artist add to their imaginary animal?
- What can we learn about the creature based on the details and patterns? What do you see that makes you say that?
- Is there another detail you would add to this collage animal? Why?
Let’s bring our attention to the blue and red pieces of construction paper used to make the details.
- What part of the paper did the artist use to cut the triangles for the pattern?
- Do you think this is a smart way of working? Why?
It would be more challenging to cut the triangles from the middle of the paper instead of the edge. As you begin cutting your details and patterns think about what part of the paper is best to use to cut out the details.
Now it’s your turn. Complete your imaginary animal by adding the details and patterns.
Step 5: Reflection Questions for Discussion (5-7 minutes)
- Describe your imaginary animal. What makes it special?
- What shapes did you use to create your imaginary animal?
- What special details did you add to your animal?
Vocabulary
Imaginary
Special details
Resources
Watch an artist draw a hybrid imaginary animal: