Overview
Students will create an expressive face assemblage.
Grade Level
6-8
Media
Sculpture
Theme/ Big Idea
Artists can express ideas by using different materials to make lines, shapes, and forms.
Essential Question
How can we use everyday materials to make expressive face assemblages?
Materials and Tools
- Collected objects
- Transformed objects
- Materials for attaching
- Expressive Face Assemblage video
- Expressive Face Assemblage student slides
Objectives
Students will convey meaning by making choices about nontraditional materials and placement.
Students will understand that:
- Selection is a powerful tool of expression that demonstrates preferences and identities
- By arranging and rearranging materials, multiple meanings can be explored
- Artists evoke emotion through their use of materials
Students will be able to:
- Transform and arrange nontraditional materials to create an expressive assemblage face
Activities
Note: The following steps are written with sample language you may use with your students as you go through the lesson. Explain to students that the slides and the video they see during the lesson will be shared with them so they can review the lesson on their own and continue to make more art.
Step 1: Introduction, Watch Expressive Face Assemblage video (10 minutes)
In the previous lesson, we learned how to attach, or permanently connect, our materials using different techniques. Through exploration and observation, we discovered that found objects could be altered into marvelous works of art. We also learned that collecting, arranging, transforming, and attaching are an important part of the process of creating a work of art with everyday materials.
Today we will be making a final expressive face assemblage by combining everything we have learned. Watch the Expressive Face Assemblage video to learn how you will create your final work of art.
Step 2: Identifying and Arranging Materials for Expressive Face Assemblage, with Student Slides #3-5 (10 minutes)
Turn to Student Slide #3 and observe the way the materials are laid out. The image on the left shows the found objects that will be used for making the sculpture. The photo on the right shows the materials that will be used for attaching the artwork.
- Why do you suppose it’s important for artists to organize and separate their materials before they begin working on an assemblage sculpture?
Take a moment to prepare your workstation before you begin your sculpture.
Begin by selecting a found material that you would like to use for the shape of the face. Keep in mind that you will be attaching different objects to this base material to create the facial features. Be sure to choose a base material you feel comfortable manipulating. The artist in the video used a plastic plate. A rigid paper plate would also work well and may be easier to attach other materials to. Choose whatever material works best for you.
Consider the questions on Slides #4 and #5 to help you think through the process of arranging your materials to create a face. As you arrange your found objects, think about how the choice of objects and their arrangement affect the facial expression.
Be sure to try out various combinations of materials and expressions.
Step 3: Developing a Strategy for Attaching Material to Base Shape, with Student Slide #6 (20 minutes)
- What will be the best way to attach your facial features to your base shape?
To help you think about this idea, look at Student Slide #6.
Feel free to use your previously explored attachment techniques to come up with different solutions. As you work, think carefully about the choices of materials you have for each technique. For example, you may choose to attach an object to your base shape by weaving. Consider which material will be easier to weave through your base. While you could use either yarn or sandwich ties, one may prove to be easier to manipulate. These small considerations will make a big difference in the process of attaching your assemblage together successfully. In many ways you are thinking not just like an artist, but also like an engineer.
Step 4: Adding Details to Enhance Facial Features, with Student Slide #7 (10 minutes)
You may want to add some final details to complete your expressive face assemblage. Look at Slide #7 to see how drawing can be used to add description to the facial features in an assemblage. Then, take a moment to observe your own work and think about where you might want to add some details to enhance the features and expression of your face. Keep in mind that these details are finishing touches and should not overwhelm or cover the beauty of your found objects.
Step 5: Reflection Questions for Discussion (10 minutes)
- How did you start creating your face? What facial feature did you create first?
- What challenges did you encounter? How did you overcome them?
- What techniques did you use to transform your materials?
Vocabulary
Transform
Assemble/assemblage
Scale
Expression
Resources

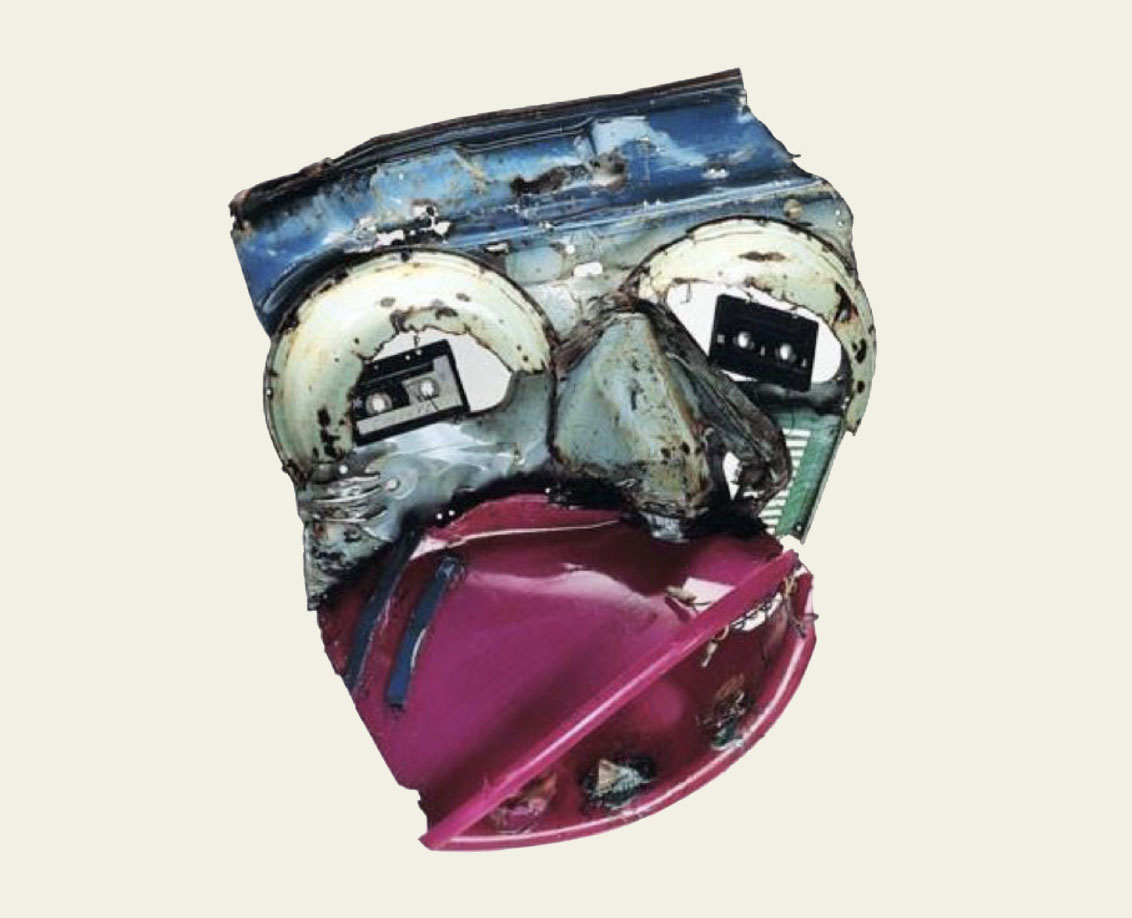
Examples of Facial Expressions
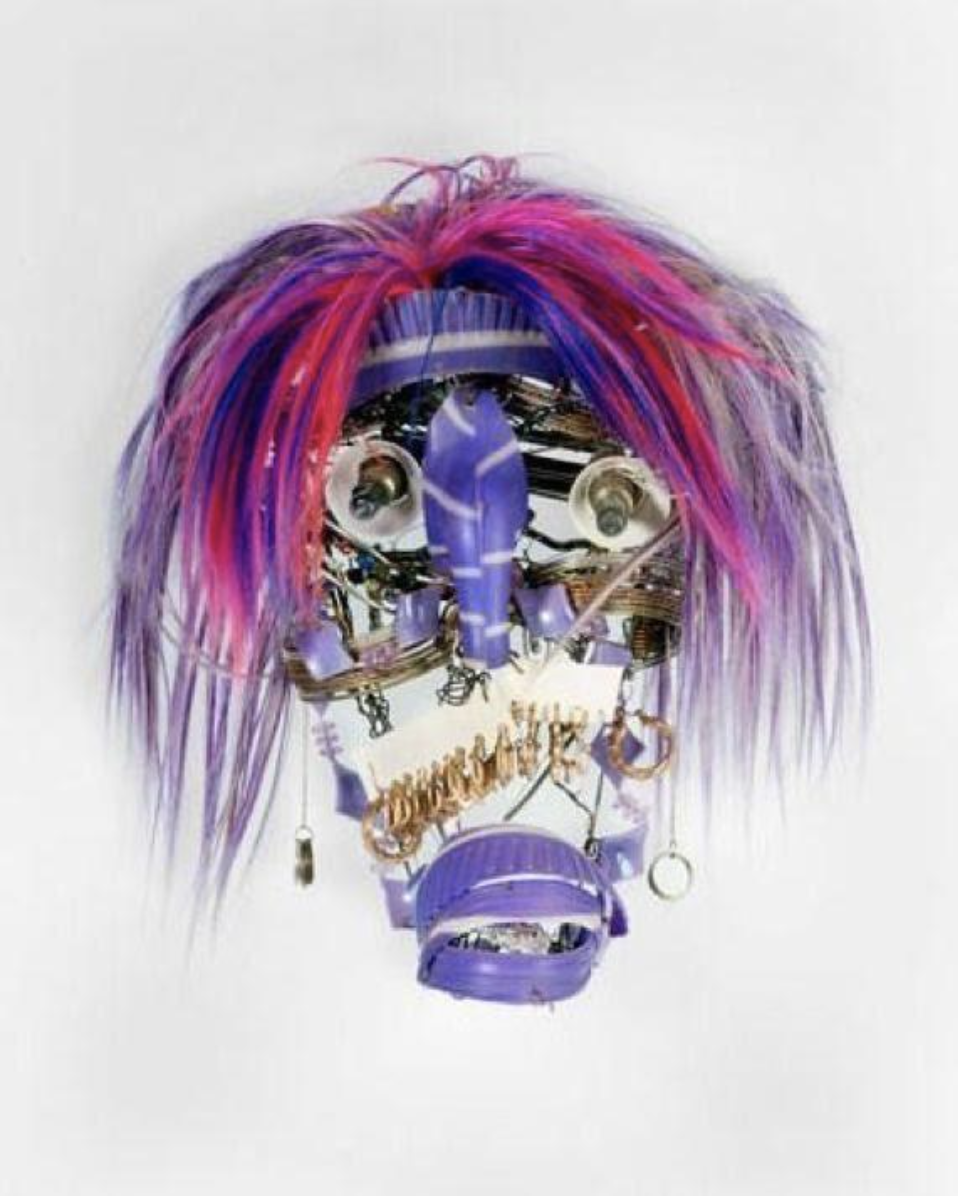
Calixte Dakpogan, Papa Sodabi. 2002, steel, metal, plastic, glass, and other found materials