Overview
Students will reflect on their art making using close-looking, speaking, writing, and/or sketchbook prompts.
Grade Level
6-8
Media
Sculpture
Theme/ Big Idea
Artists can express ideas by using different materials to make lines, shapes, and forms.
Essential Question
How can we use everyday materials to make expressive face assemblages?
Materials and Tools
- Pencil
- Sketchbook or one or two pieces of paper
- Expressive face assemblage from Lesson 9
Activities
Note: The following activities are written with sample language you may use with your students. Following the art-making lesson, you may choose as many reflection activities as desired for students to work on in class or independently.
Step 1: Discussion (5-7 minutes)
Today we are going to reflect on our finished expressive face assemblages.
- Have you noticed new faces in objects or places around you?
- If you haven’t noticed any new faces yet, look around the room and see if anything catches your attention as a possibility. Describe what you see.
Step 2: Writing Activity (10-15 minutes)
Think about all the materials you have experimented with and used in your assemblage.
- Has the way you think about the objects and materials around you changed since starting this project? How?
- What are some ways you can continue exploring assemblage?
Share your artwork and ideas with someone else.
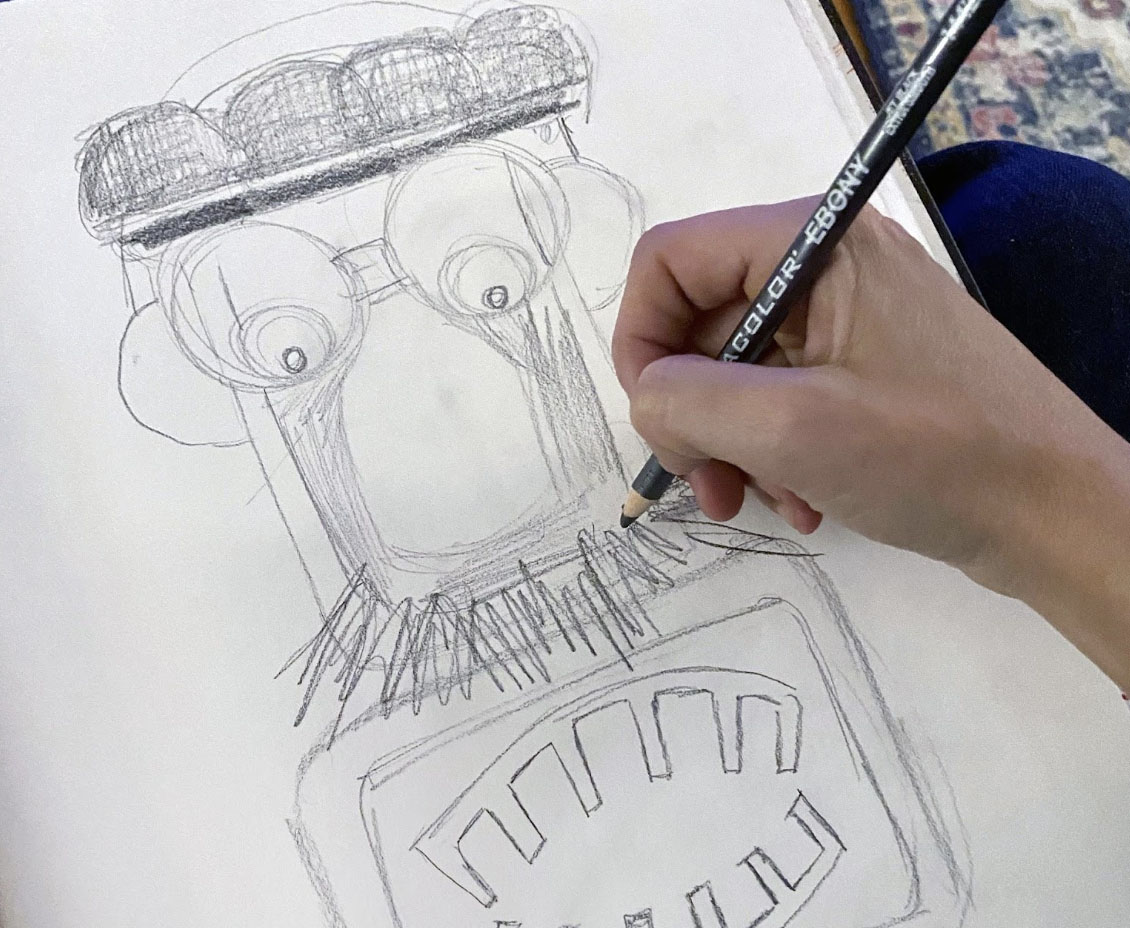
Step 3: Sketchbook Activity (10-15 minutes)
Look closely at your final expressive face assemblage. Make a sketch of it.
When you sketch, start with the biggest shapes that you see, and then add the smaller shapes.
- How can you vary your lines to express texture?
Add shading to convey the different colors that you see.
Try drawing your assemblage face with different facial expressions.
Step 4: Close Looking: Romuald Hazoume (10 minutes)
Note to Teachers: Before teaching with a work of art, spend some time looking closely at it on your own. Familiarizing yourself with the artwork will prepare you to guide the close-looking activity.
If your students are new to looking at art together, you can introduce the activity to students in the following way:
Today we are going to spend some time looking at and discussing a work of art together. When we look at art, there are no right or wrong answers. I’m going to ask you to look closely, share your ideas about what you see, and listen respectfully to each other’s ideas. Everyone’s ideas are important. We all see things differently, and when we look at art, we can learn to see through each other’s eyes.
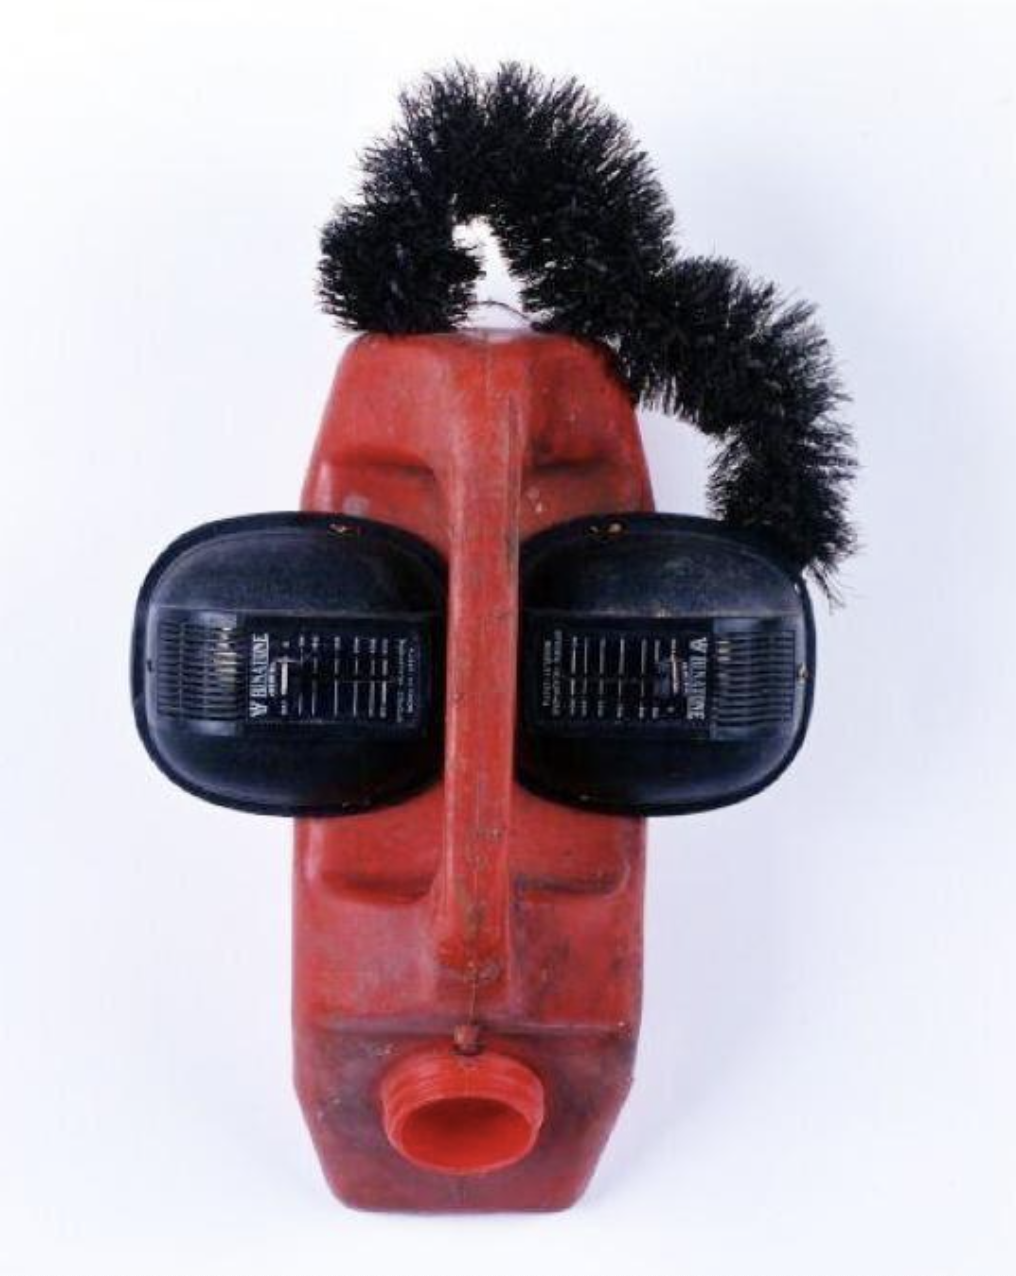
- What mood has the artist created with his work, Ear Splitting?
- What choices did the artist make about materials and color that contribute to this mood?
Ear Splitting was created for an exhibition in Liverpool, UK, and is inspired by the musical legacy of that city. It features two large earphones worn as oversized goggles, as well as hair defined by a whirling brush.
Visit the online exhibition from the Metropolitan Museum of Art, New York. Reconfiguring an African Icon: Odes to the Mask by Modern and Contemporary Artists from Three Continents.
Vocabulary
Assemblage
Sculpture
Resources

Examples of Facial Expressions
- Louis Stettner, Car in Winter, 7th Ave. 1956:
- Artist’s Book: Faces by Francois and Jean Robert, 2004.
- Romuald Hazoume, Ear Splitting. 1999, plastic can, brush, speakers
- Visit the online exhibition from the Metropolitan Museum of Art Reconfiguring African Icon: Odes to the Mask by Modern and Contemporary Artists from Three Continents.