Overview
Students will use what they learned in Lesson 8 about changing paper in different ways to create the shapes and details of the head of a collage character.
Materials and Tools
- Various papers—construction paper, notebook paper, wrapping paper
- Glue or tape
- Creating a Collage Character video
- Creating a Collage Character student slides
Objectives
- Students will be introduced to four elements of art: line, shape, color, and pattern
- Students will explore collage by changing paper with their hands, making different arrangements, and creating an imaginary face
Student Outcomes
- Students will be able to create artworks by transforming paper, using different shapes and colors
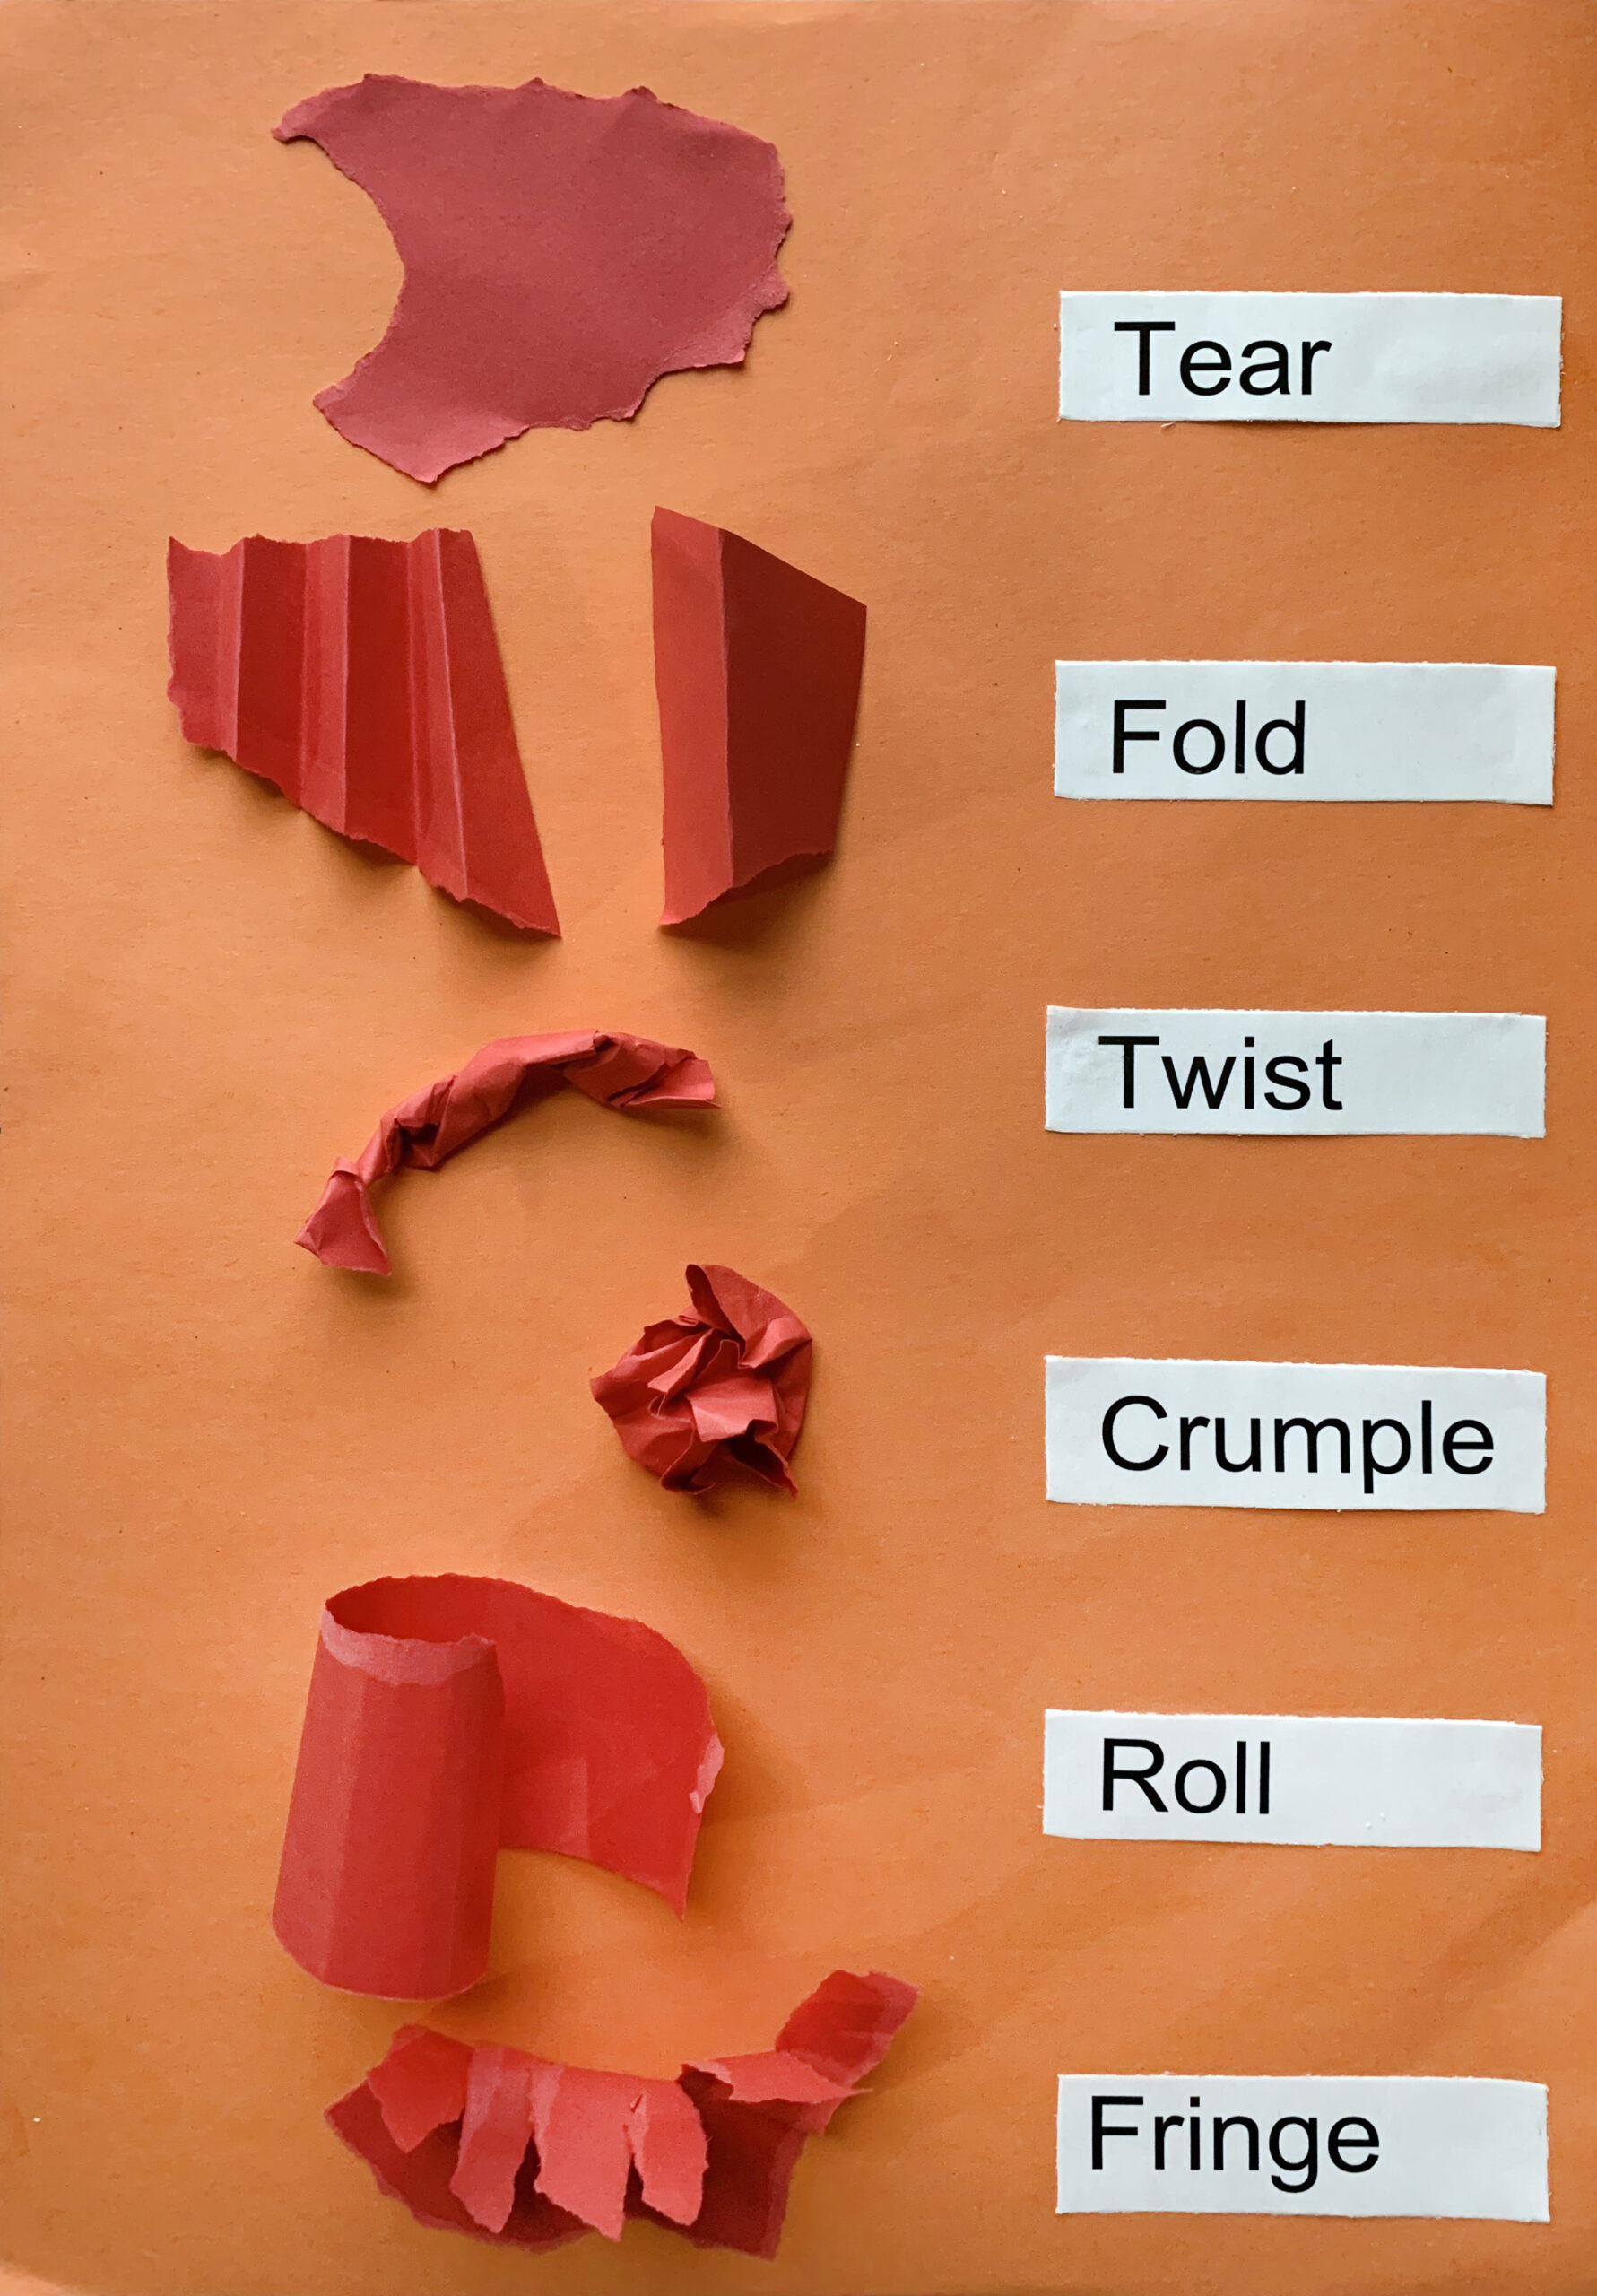
- Students will be able to tear, fold, twist, roll, crumple, and fringe paper with their hands
- Students will use their hands as tools to create facial features
Students will understand that:
- Shapes can be geometric or organic and can be found everywhere
- Hands can be a tool to change paper in different ways
Students will be able to:
- Change a flat piece of paper (two-dimensional) into something that stands up (three-dimensional)
- Create a face collage with two- and three-dimensional elements
Activities
Note: The following steps are written with sample language you may use with your students as you go through the lesson. Explain to students that the slides and the video they see during the lesson will be shared with them so they can review the lesson on their own and continue to make more art.
Step 1: Introduction/ Close Looking, with Student Slide #1 (5 minutes)/ Watch Creating a Collage Character Video (13 minutes)
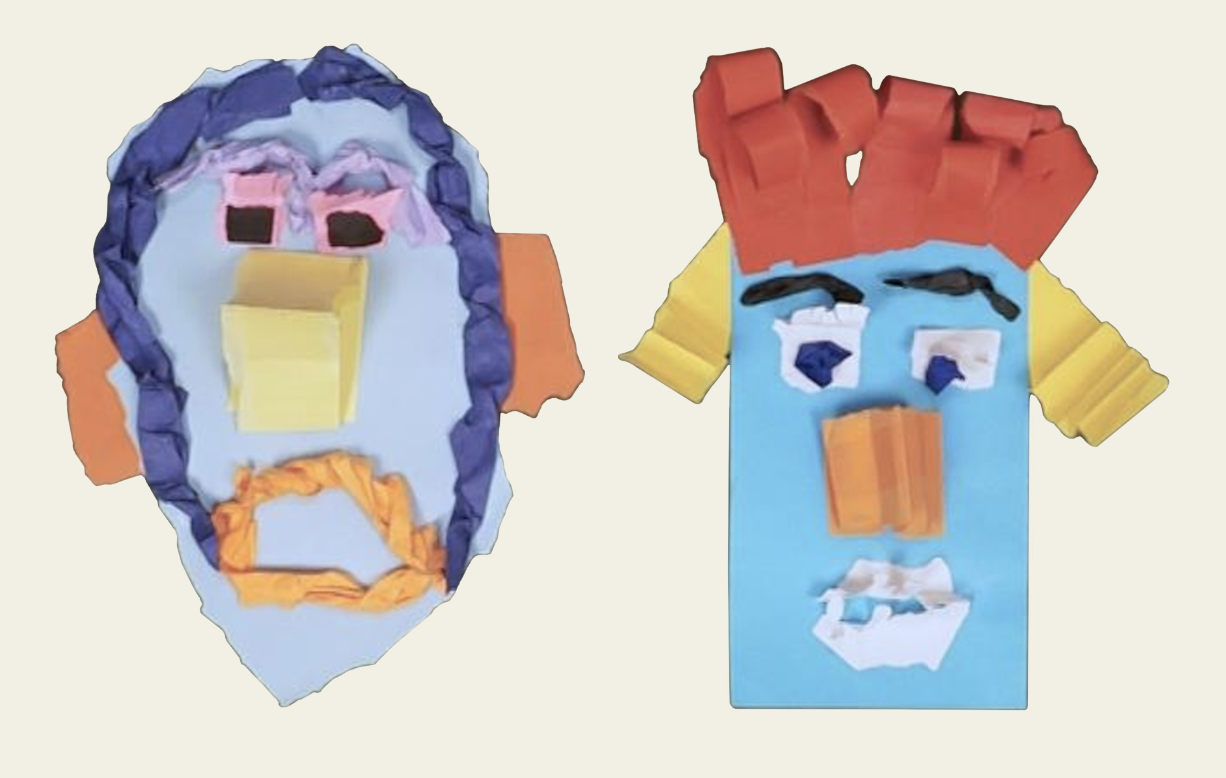
Welcome back, artists! In our last lesson we learned how to change paper with our hands to create lines and shapes that lay flat and stand up. Today we are going to use what we learned to create a collage character. Let’s look at Student Slide #1 for inspiration.
- What do you notice about the way these characters are made?
- In what ways did the artist change the paper to create the facial features?
Compare the hair on each character.
- How did the artist use her hands to create the red hair? What do you see that makes you say that? How about the blue hair?
Take a moment to feel your hair.
- What shapes and lines do you feel?
- Which technique would you use to create your hair out of paper (twisting, rolling, tearing)?
- What else might you try?
Watch the video Creating a Collage Character to learn more about how to create a collage face.
Step 2: Creating the Head, with Student Slides #2-3 (10 minutes)
Let’s make the shape for our character’s head. Before we do, look at Student Slide #3.
- What do you notice about the size of the head the artist has torn?
- Why do you think it’s important to make the head a larger size?
From watching the video, we learned how to use our hands to tear a large oval.
- What are some other important steps in this process that we learned from the artist?
For example: I learned to use my thumb and first finger for tearing.
- What else did you discover about tearing the head shape?
- What shape will you create for your head?
- Will you tear the shape or use the paper as it is?
Once you have decided, go ahead and make your head.
Step 3: Making Facial Features, with Student Slide #4 (20 minutes)
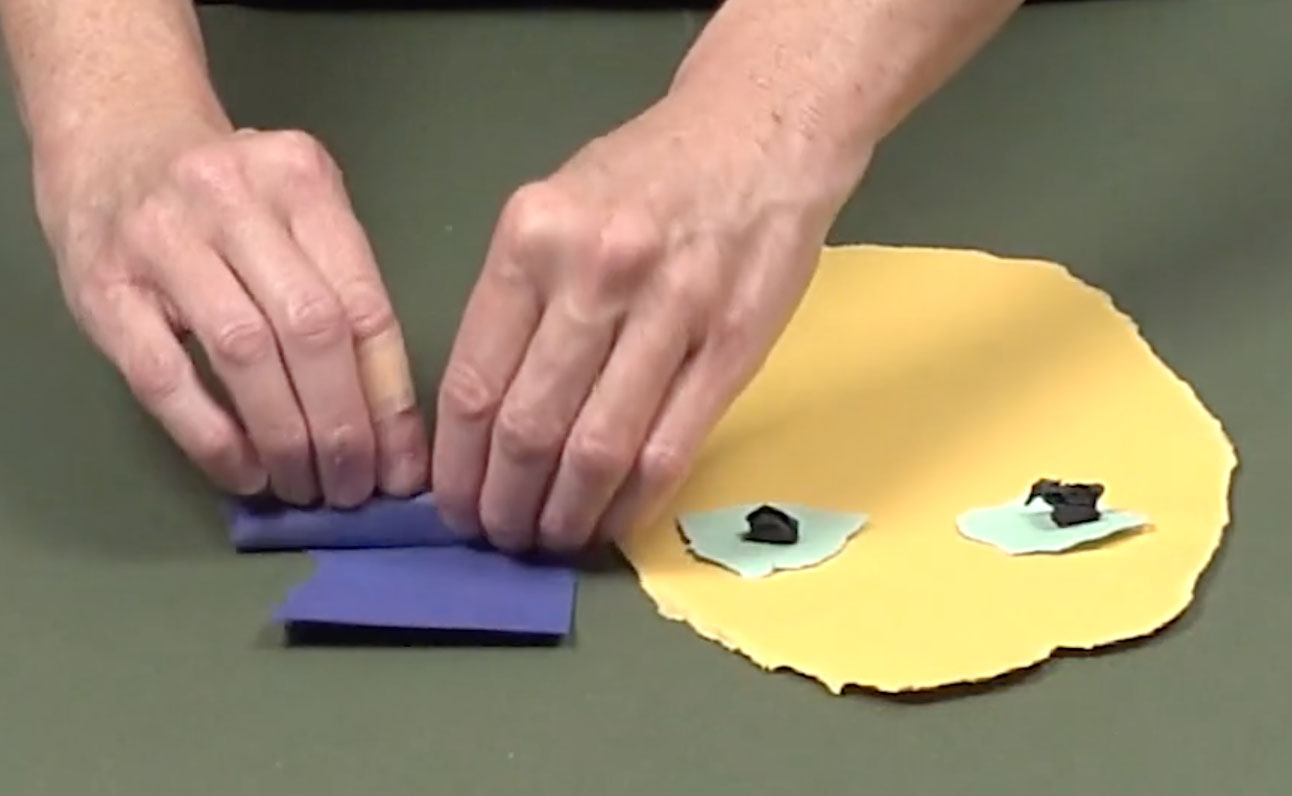
It’s time to create facial features for our character. Look at Student Slide #4.
- What technique is the artist using to make the nose?
- What are some other ways we can make a nose?
Let’s carefully feel the shape of our own nose.
- What do you feel?
- What might we do with our paper to create the bumpy shape of our nose?
From the video, I learned how to crumple small pieces of paper to make the pupils for my character’s eyes. I think I may try this out today.
- How about you? Will you make your pupils lie flat or stand up?
Let’s continue working on our collage. As you work, notice how the way you use your paper begins to give your character its personality. Have fun, artists!
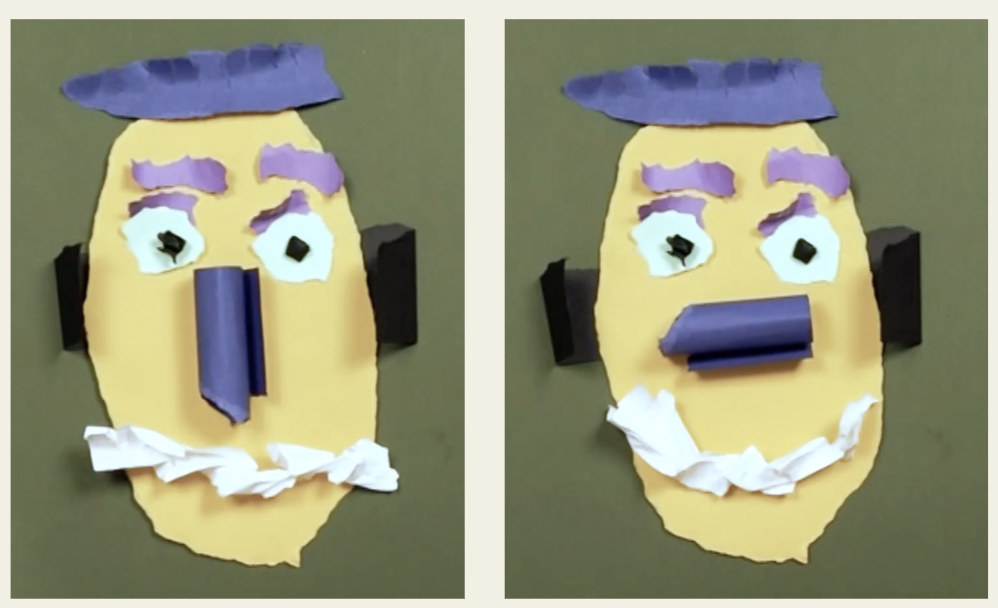
Step 4: Arranging and Gluing Shapes, with Student Slide #5 (15 minutes)
Before we glue the facial features of our characters, let’s play with the arrangement. Look at Student Slide #5. Compare the arrangement of the features on the left with the arrangement on the right.
- Which arrangement gives the character a more serious personality? What do you see that makes you say that?
- Which arrangement gives the character a silly personality? How come?
Now it’s your turn to play with the arrangement of your character’s facial features. As you work, think about the personality you want your character to have.
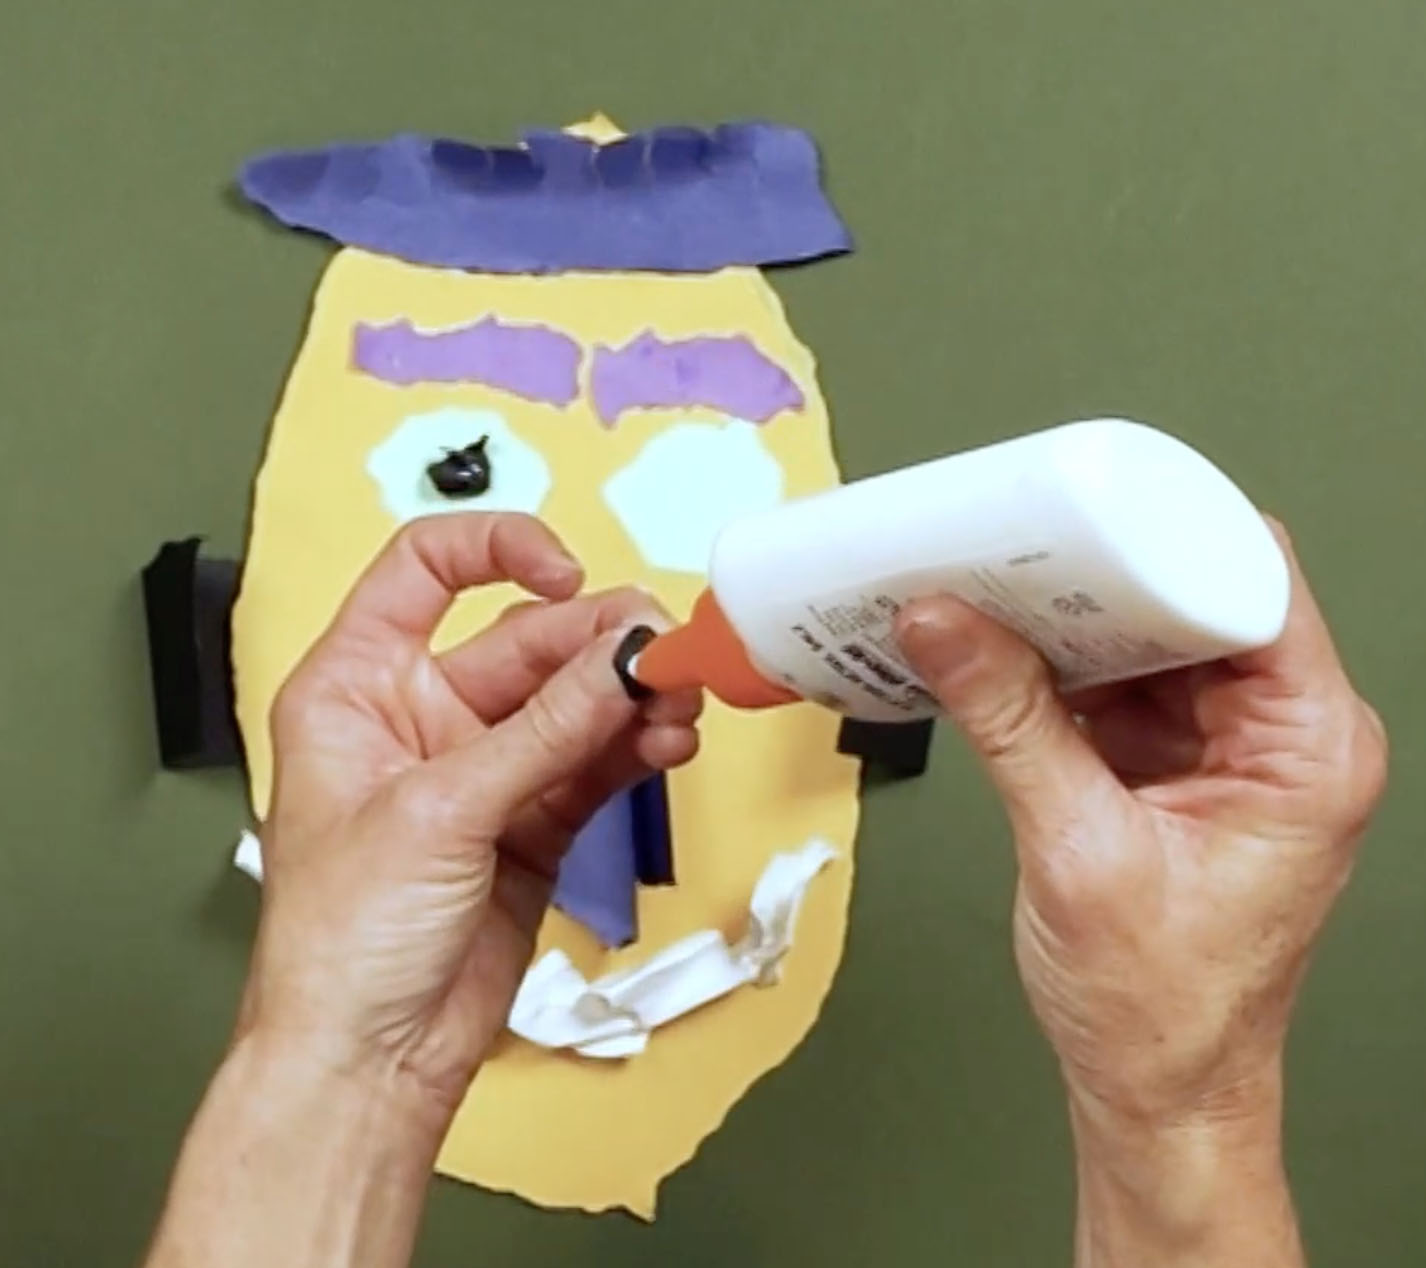
When you have decided on your final arrangement, glue it down. Remember to use a small amount of liquid glue on the edges, press your shapes down and count to ten, just the way the artist in the video did. This will ensure that all your pieces stay glued down.
Step 5: Reflection Questions for Discussion (10 minutes)
- How did you change the paper to make a face?
- What parts of the face are flat and what parts stand up?
Vocabulary
Collage
Arrange
Resources
Making Paper Three-Dimensional