Overview
Students will reflect on their art making using close-looking, speaking, writing, and/or sketchbook prompts.
Grade Level
6-8
Media
Sculpture
Theme/ Big Idea
Artists can express ideas by using different materials to make lines, shapes, and forms.
Essential Question
How can we use everyday materials to make expressive face assemblages?
Materials and Tools
- Pencil
- Sketchbook or one to two pieces of paper
- Transformed objects from Lesson 7
Objectives
Students will understand that:
- Household materials, like cardboard, can be used to make art
- Cardboard can be changed in a variety of ways to make it stand
- Different types of cardboard can be changed in different ways
Students will be able to:
- Demonstrate cutting a variety of geometric shapes and lines from cardboard
- Identify and apply different ways to change cardboard: roll, peel, and fold
- Identify patterns made by changing cardboard in different ways
Activities
Note: The following activities are written with sample language you may use with your students. Following the art-making lesson, you may choose as many reflection activities as desired for students to work on in class or independently.
Step 1: Discussion (5-7 minutes)
Today we are going to reflect on our experience in the last lesson of transforming materials using attachment techniques.
Look closely at your experiments.
- Which of the following techniques did you use to attach your materials: folding, sewing, weaving, gluing, stapling, threading, making holes, looping, knotting, bundling, taping, cutting, poking, tying?
- What was your favorite attachment technique and why?
Step 2: Writing Activity: Materials (10-15 minutes)
Write one sentence to respond to each question.
- What was an interesting discovery that you made about the materials you were attaching and transforming?
- Which of your materials was easy to attach?
Which were difficult or even impossible to attach?
Now, make a list of the materials you enjoyed using most and how they can be attached to different materials.
For example:
Cardboard paper towel tube: I can use Elmer’s glue, a stapler, I can cut it, I can poke holes in it, and thread twist ties.
Step 3: Writing Activity: Techniques (10-15 minutes)
Make a list of at least four techniques you used. Then write about the types of materials you could attach with each.
For example:
Making holes and threading or weaving: I connected a plastic vegetable tray to a sheet of cardboard by poking five holes with a pair of scissors and looping yellow and red fruit packing netting through the holes.
Step 4: Brainstorming (10-15 minutes)
Discuss as a whole class, or have students respond by writing in their sketchbooks.
Next week we will be creating a face with our objects.
- How can you strategically use these experiments and techniques to make a sculpture of a face?
- Do you see any potential facial features in what you have already made?
- What will you start with when you build your face?
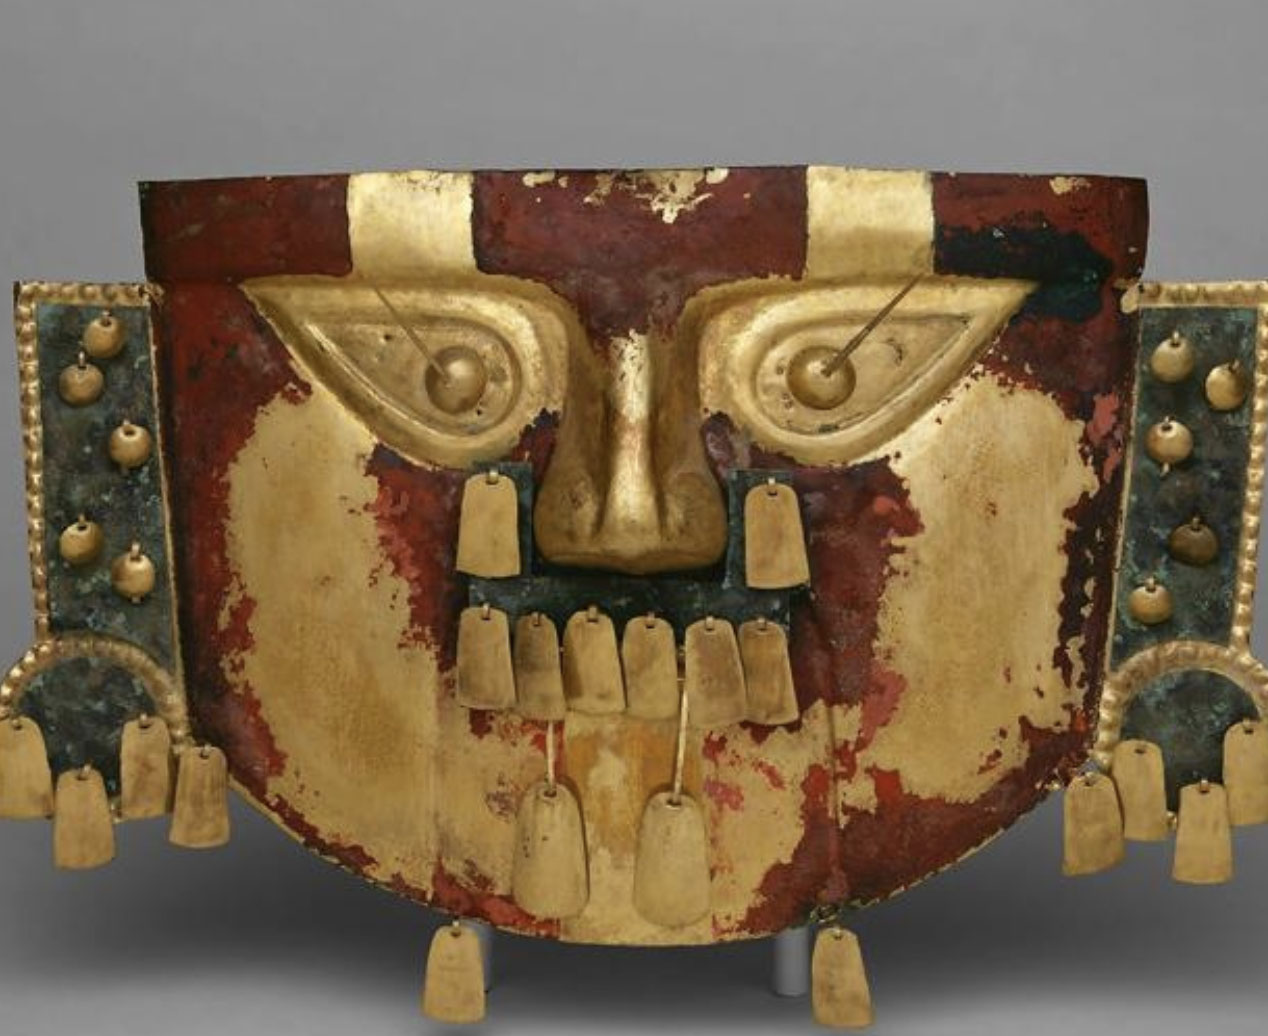
Step 5: Close Looking: Kuba Mask and Funerary Mask (10 minutes)
Note to Teachers: Before teaching with a work of art, spend some time looking closely at it on your own. Familiarizing yourself with the artwork will prepare you for close looking.
If your students are new to looking at art together, you can introduce the activity to students in the following way:
Today we are going to spend some time looking at and discussing a work of art together. When we look at art, there are no right or wrong answers. I’m going to ask you to look closely, share your ideas about what you see, and listen respectfully to each other’s ideas. Everyone’s ideas are important. We all see things differently, and when we look at art, we can learn to see through each other’s eyes.
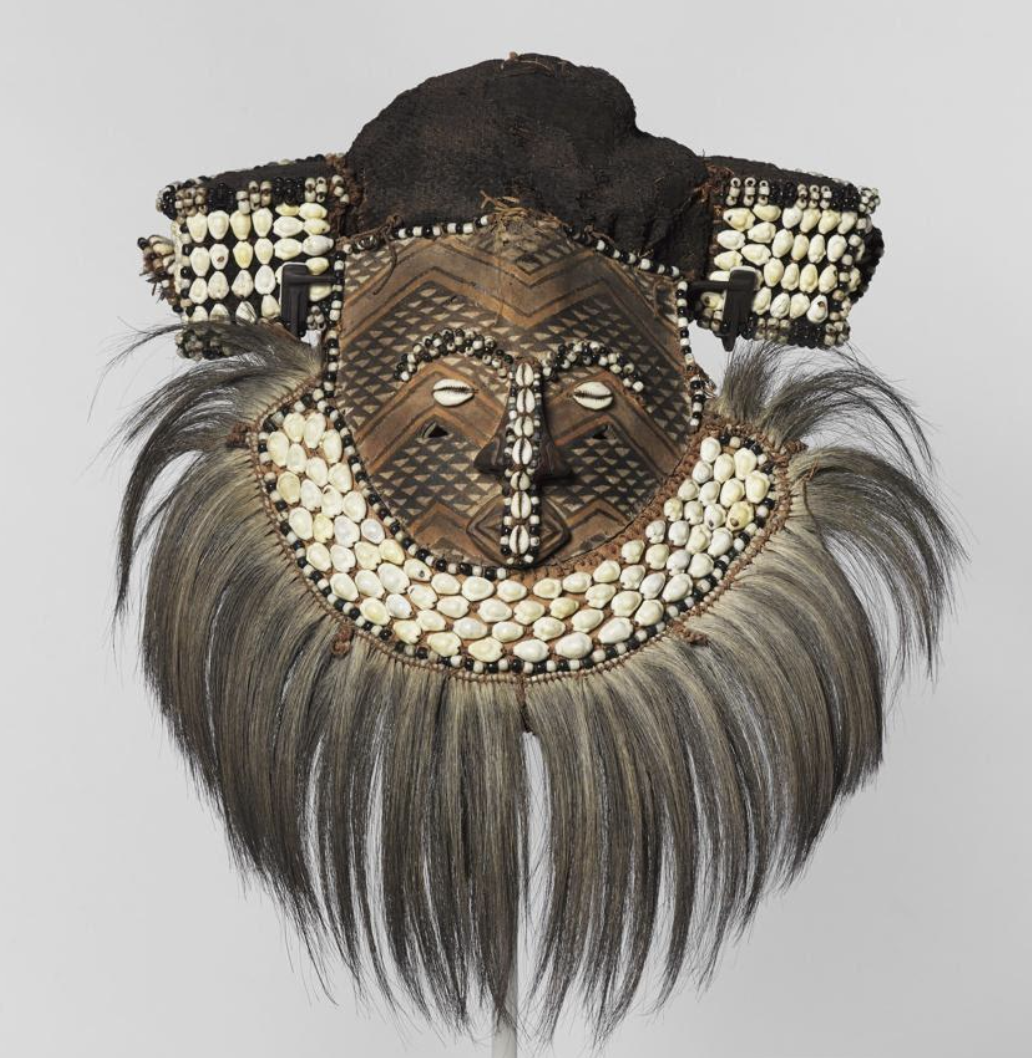
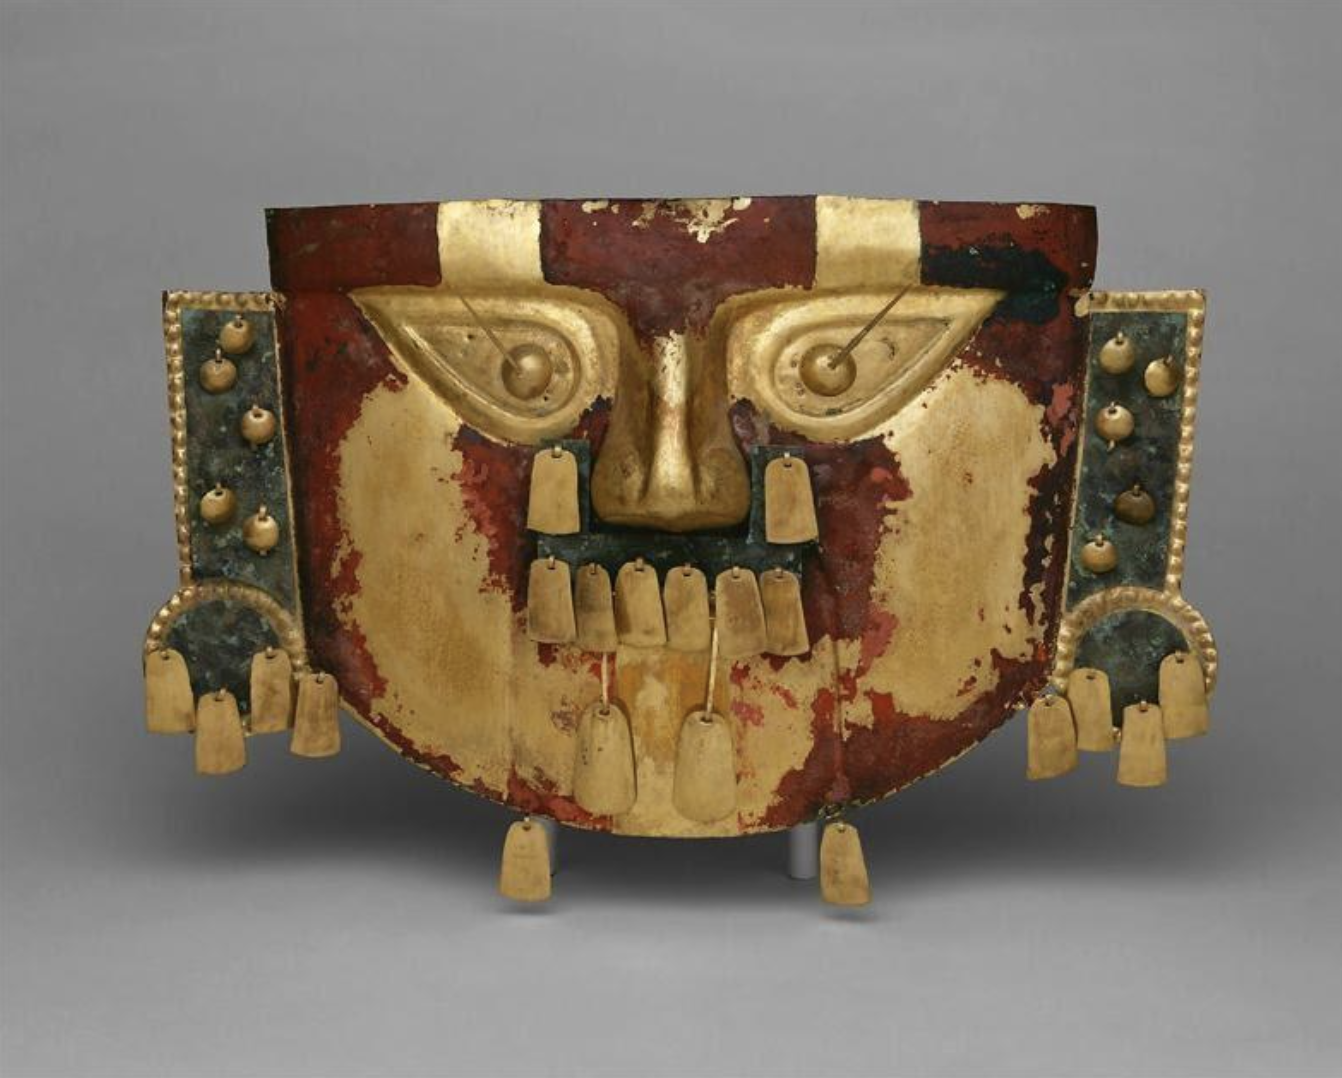
Let’s look closely at these two masks. The Kuba mask is from Central Africa and the funerary mask is from Peru. Take a moment to look on your own.
Give students a silent minute to look.
- How would you describe the facial expression in each mask?
- What materials are each mask made from?
- Why do you think the artist chose these materials?
Check out the Brooklyn Museum and Metropolitan Museum of Art’s websites to see images of extraordinary masks made by Indigenous artists from around the world.
Activity #6: Sketchbook Activity (10 minutes)
Choose one mask that that you are curious about and sketch it. You can use one we’ve looked at together, or one on the Brooklyn Museum or Metropolitan Museum of Art’s websites.
- What stands out to you most about this mask?
- What do you notice about its facial expression?
Vocabulary
Attachment techniques: fold, sew, weave, glue, staple, thread, make holes, loop, knot, bundle, tape, cut, poke, tie
Facial expression
Resources

Examples of Facial Expressions
Kuba artist, Mask (Mwaash aMbooy). Late 19th or early 20th century, rawhide, paint, plant fibers, textile, cowrie shells, glass, wood, monkey pelt, feathers. Brooklyn Museum
Funerary Mask, Lambayeque (Sicán), Peru. 10th–12th century, Metropolitan Museum of Art
Masks at the Brooklyn Museum
Masks at the Metropolitan Museum