Overview
Students will make two rubbings of their printing plate and make any necessary adjustments before printing.
Grade Level
6-8
Media
Theme/Big Idea
Artists can use collage techniques to create collagraph prints of someone they admire.
Essential Questions
- How can we honor someone through our artwork?
- How can we represent the unique qualities of an individual through full-body portraiture?
Materials and Tools
- Printing plates, oil pastels or crayons with labels taken off, 12 x 18″ newsprint, masking tape
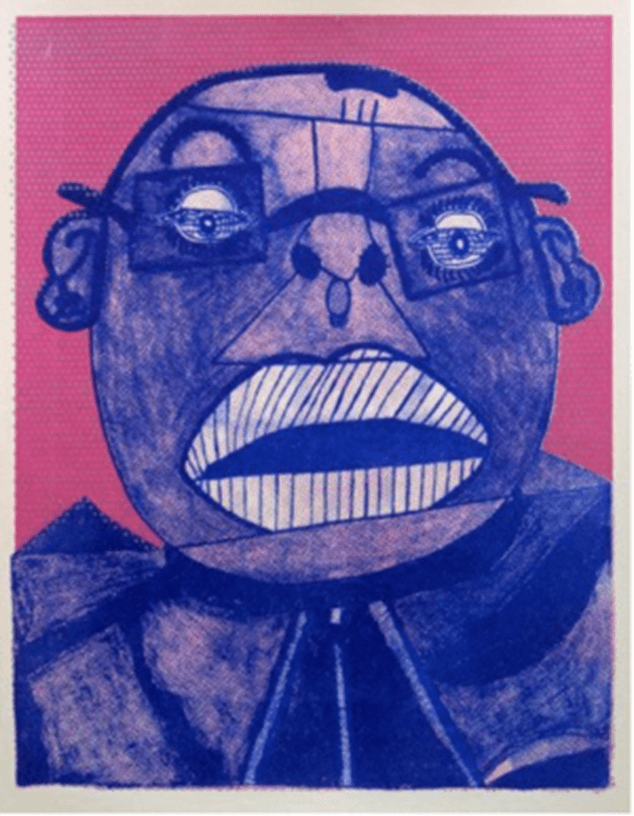
- Thomas Birdsong. Miles, Slide 21
- Students’ printing plates
Objectives
Students will:
- Create a composition using portrait printing plate and background elements to make a rubbing.
- Make adjustments to their printing plate to clarify and refine their portrait.
Activities
Note: Teacher language is italicized.
Introduction (10 minutes)
Today, we are going to make a rubbing of our printing plate. A rubbing is a type of print that captures the texture or raised parts of a surface. Rubbings are made by placing paper over the printing plate and rubbing over the surface with a dry drawing material such as graphite, oil pastels, or crayons.
To begin, we need to make an interesting composition by arranging our printing plate and background elements. We need to decide where we want our portraits to print on the newsprint. Will they be in the middle or on the side, closer to the top or bottom, angled or straight? Then, we need to decide how the other elements will best fit around them.
Demonstrate arranging elements on your printing plate, then think aloud while demonstrating the next steps.
The next step is to use masking tape to gently adhere the plates to the table, so they don’t move while we make a rubbing. Place a piece of newsprint on top and tape each side down to the table with masking tape.
Then use an oil pastel to rub over the printing plate. Start on one side, and go across the printing plate, from side to side, or top to bottom. Try to use the same amount of pressure as you work.
Dark colors work better than lighter colors for rubbings, as they contrast with the lighter paper and capture more detail.
Now that I have a rubbing of my plate, I can see what shows up clearly. Is there anything I want to change? Is there anything I want to add? Do I want to arrange the plates differently?
Making a rubbing can help us refine our printing plates and develop our compositions.
Group or Independent Work (25 minutes)
Set up your area to make a rubbing. Be careful as you make your rubbing not to tear the paper. If you need help, a friend can hold your paper down instead of using tape.
After you’ve made one rubbing, make any changes you’d like to your printing plates or composition. Then, make a second rubbing.
Reflection Questions for Discussion (10 minutes)
Arrange a gallery walk for students to view each other’s work, reflecting on the following questions:
As you view the rubbings, pick one that stands out to you.
- What do you notice about this print?
- What do you think the artist is expressing about the person in the portrait?
Questions for individual artists:
- What surprised you about doing your rubbing?
- After your first rubbing, what changes did you make to your printing plate or composition?
- What are some things you noticed that make a good print?
Vocabulary
Rubbing, printing
Resources
Thomas Birdsong via ECF Art Center

Adaptations
Alternative Ways of Working:
- Students can feel their printing plate through the newsprint to notice the different shapes and edges
- Teachers can pre-tape printing plates and paper for students
- Students can use adapted printing tools
NYC Blueprint Strands Addressed
#1 Artmaking
#2 Developing Visual Arts Literacy
#3 Making Connections through Visual Arts