Overview
Students will explore noticing physical textures and drawing visual textures.
Materials and Tools
- Pencil
- Paper
- Eraser
- Pencil sharpener
- Household objects with texture to draw
- Exploring Texture video
- Exploring Texture student slides
Objectives
Students will understand that:
- Texture describes how a surface feels to the touch: rough, smooth, fuzzy, or soft.
- Many objects have texture.
- Visual texture, or implied texture, can be created by repeating marks, lines, or shapes to create the appearance of physical texture in a drawing or painting.
Students will be able to:
- Find and identify different textures in their home
- Identify the lines, marks, or shapes that make up each texture
- Apply their knowledge of how to use a pencil to create different types of marks and lines and draw eight different visual textures
Activities
Note: The following steps are written with sample language you may use with your students as you go through the lesson. Explain to students that the slides and the video they see during the lesson will be shared with them so they can review the lesson on their own and continue to make more art.
Step 1: Introduction, Watch Exploring Texture Video (12 minutes)
Welcome, artists. Previously, we learned how to draw an object from observation by analyzing shapes. Today we will be exploring how to create visual textures from observation. Watch the Exploring Texture video to learn how to observe and draw different textured surfaces.
Step 2: Close Looking, with Student Slide #3 (5 minutes)
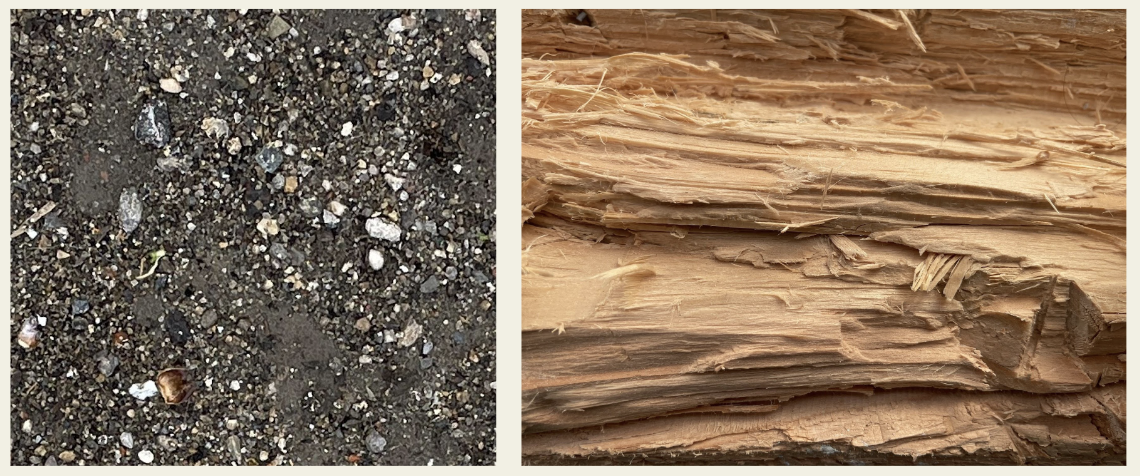
Look at Slide #3 and observe the photographs of textures. Using your mind’s eye, imagine what it would feel like to run your hand over the wood.
- What textures do you feel?
- What do you see that makes you say that?
Now take a moment to imagine what it might feel like to touch the sandy gravel on the left.
- How does it feel? Why?
- How is the texture of the splintered wood similar and different from the texture of the sand?
Step 3: Finding Interesting Textures to Draw, with Student Slide #5 (5 minutes)
Let’s find some interesting visual textures in our environment. Student Slide #5 has great ideas to help you begin identifying textured surfaces. Notice how things we use every day, such as paper towels, have wonderful textured surfaces.
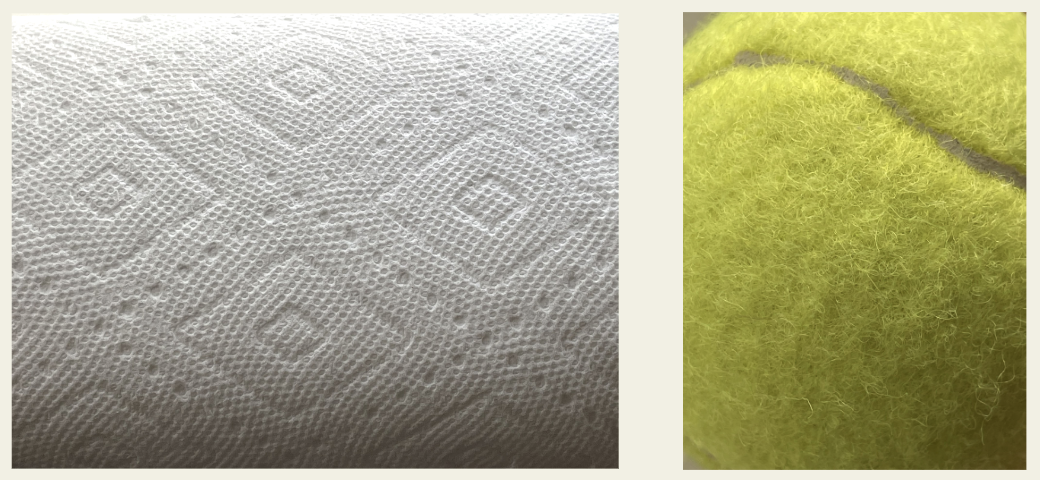
- How many different textures do you see on the paper towel? What do you see that makes you say that?
- What do you imagine the texture of the tennis ball is like? Why?
Take a few minutes to collect between five and eight objects that have different textures. As you begin gathering your items, try to find objects that have different textural qualities. Analyze your objects by using your senses of touch and sight.
Step 4: Drawing Visual Textures, with Student Slides #6-7 (25 minutes)
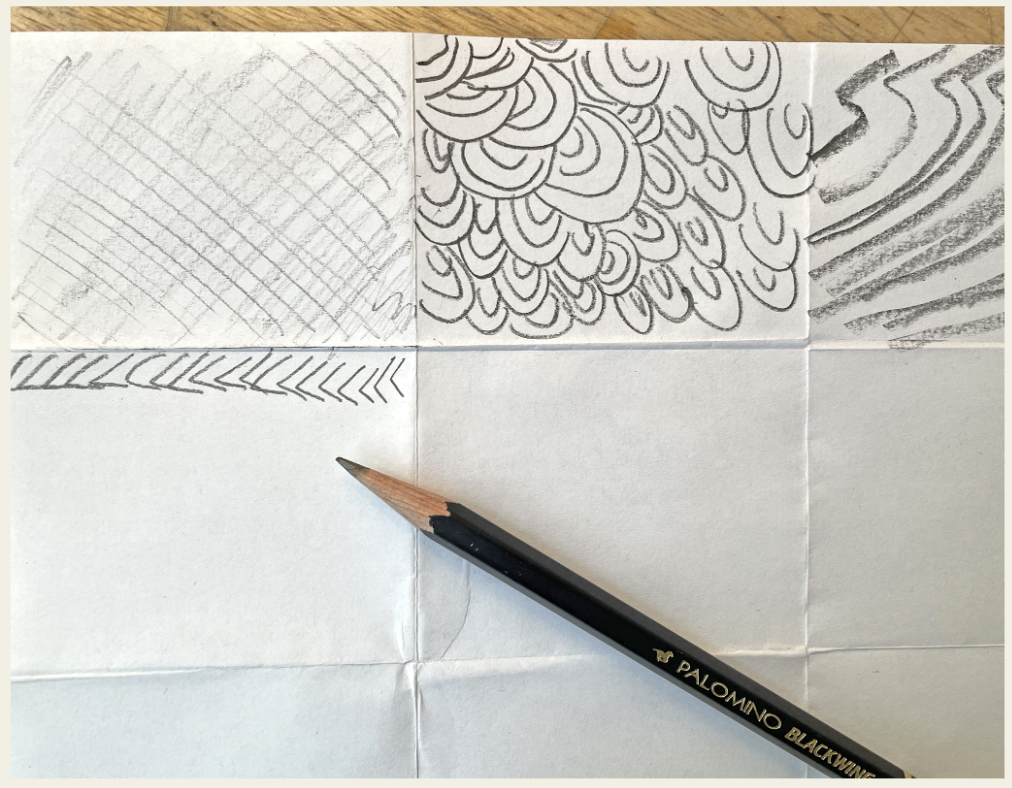
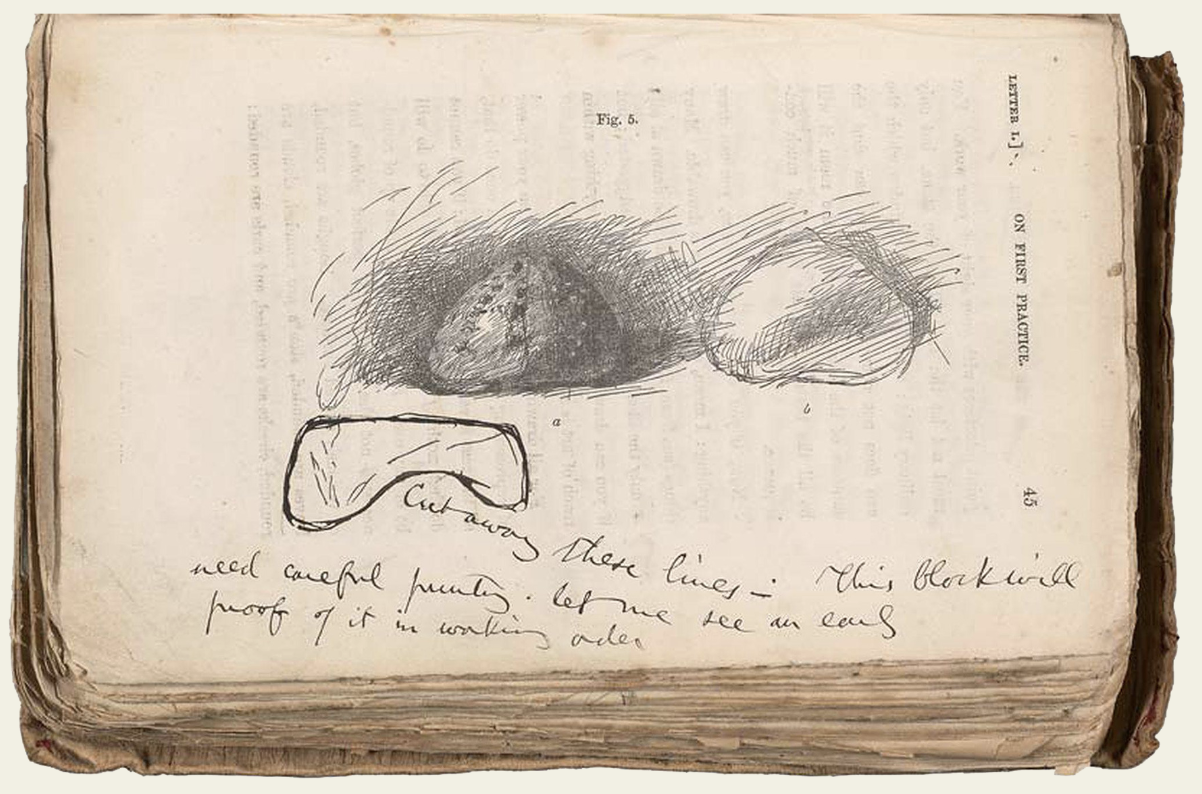
Let’s observe how an artist translates an actual, or real, texture to a visual, or implied, texture. Turn to Slide #6 and closely observe the photo of the actual texture.
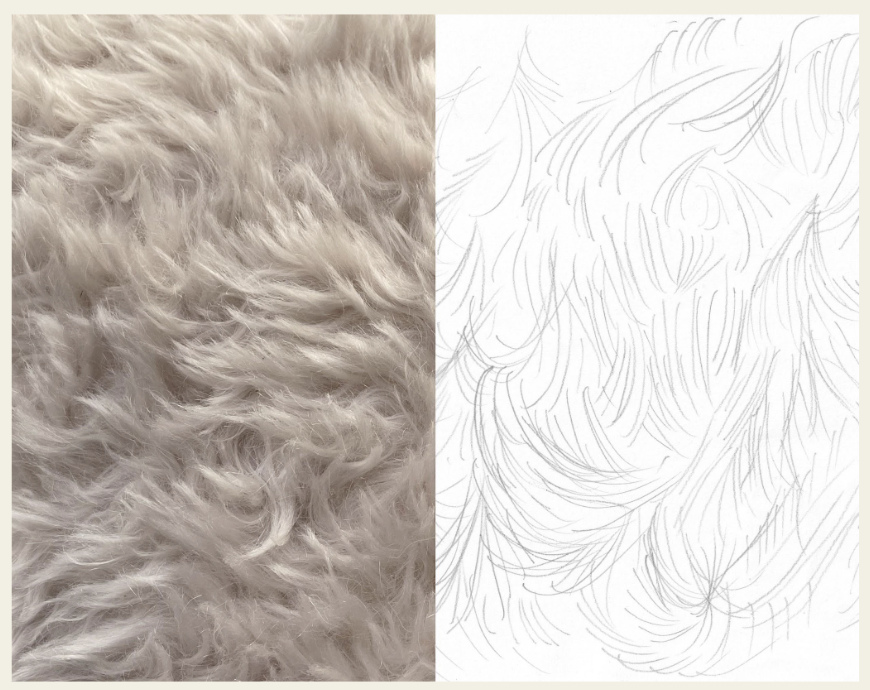
- What lines do you see?
- How are the lines organized?
- Are they next to each other or do they overlap?
Now look at the drawing of the texture. What are some of the qualities that the artist observed in the photo that they included in their drawing?
If you were to complete the drawing of this texture, what else might you include? Why?
Here are some questions to help you observe and draw your texture:
- What lines, shapes, or combinations of both will you choose to draw your texture?
- Will you overlap your chosen lines/shapes or draw them next to each other?
- Will you draw your lines/shapes in one direction, or will you need to vary the movement of the marks?
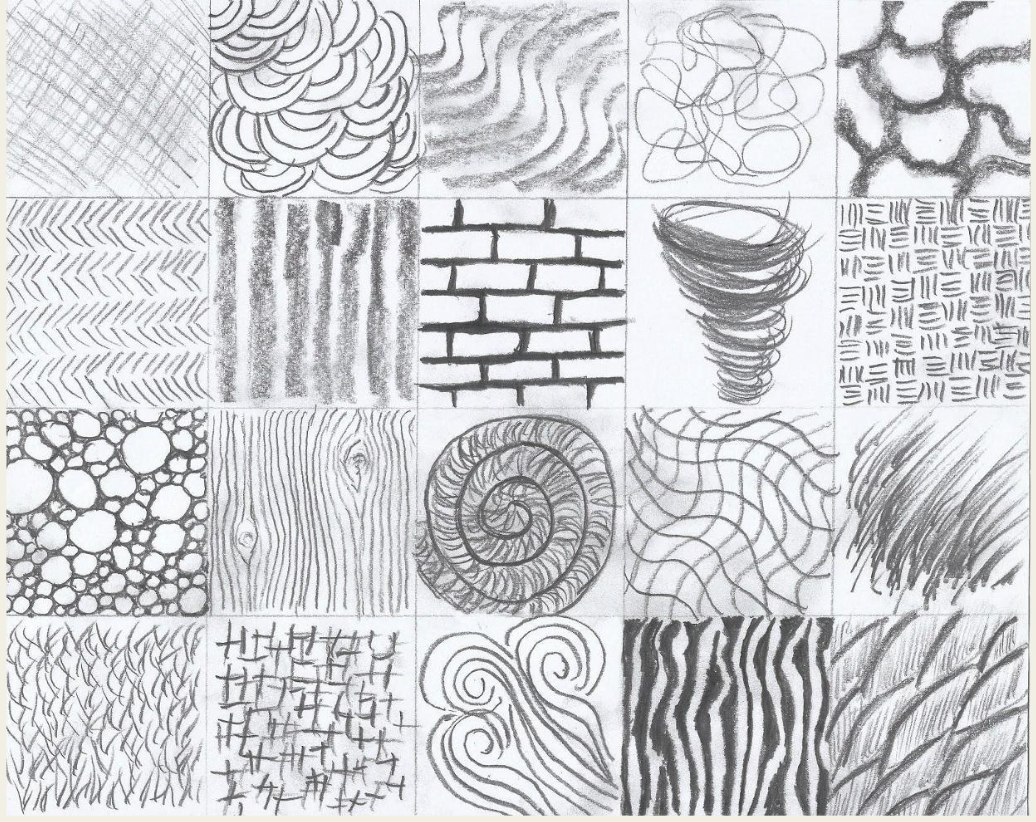
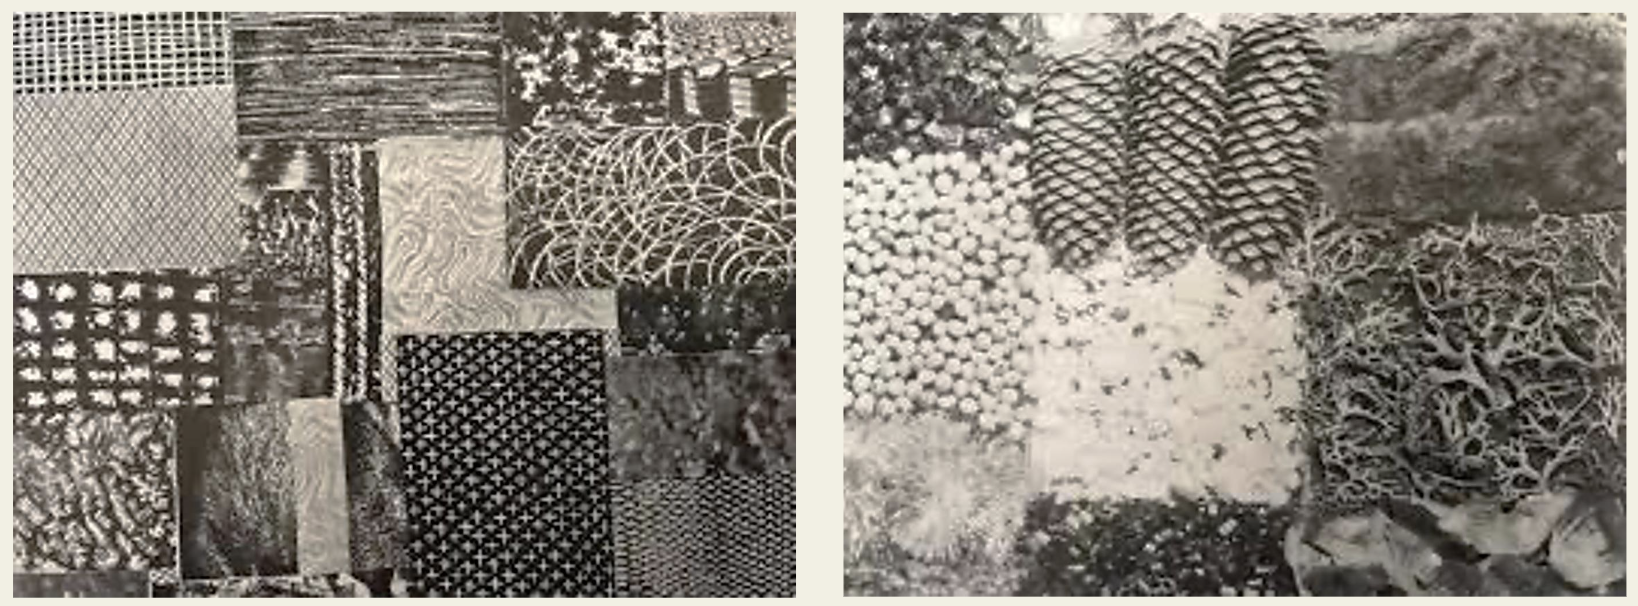
Student Slide #7 shows examples of some completed textures.
- How is the texture in the upper left-hand corner drawn differently from the one in the middle? What do you see that makes you say that?
As you work, remember to experiment with variations in line, pressure, and angle of your pencil to create your textures.
Step 5: Reflection Questions for Discussion (10 minutes)
- How did you draw a texture that looked soft?
- How did you draw a texture that looked rough?
- Do some lines appear to “feel” a certain way?
ALL NEW
Searchable by topic and grade band!
Vocabulary
Texture
Visual texture
Bumpy
Scratchy
Smooth
Rough
Soft
Spikey
Velvety
Fuzzy
Fluffy
Slippery
Crumpled
Resources

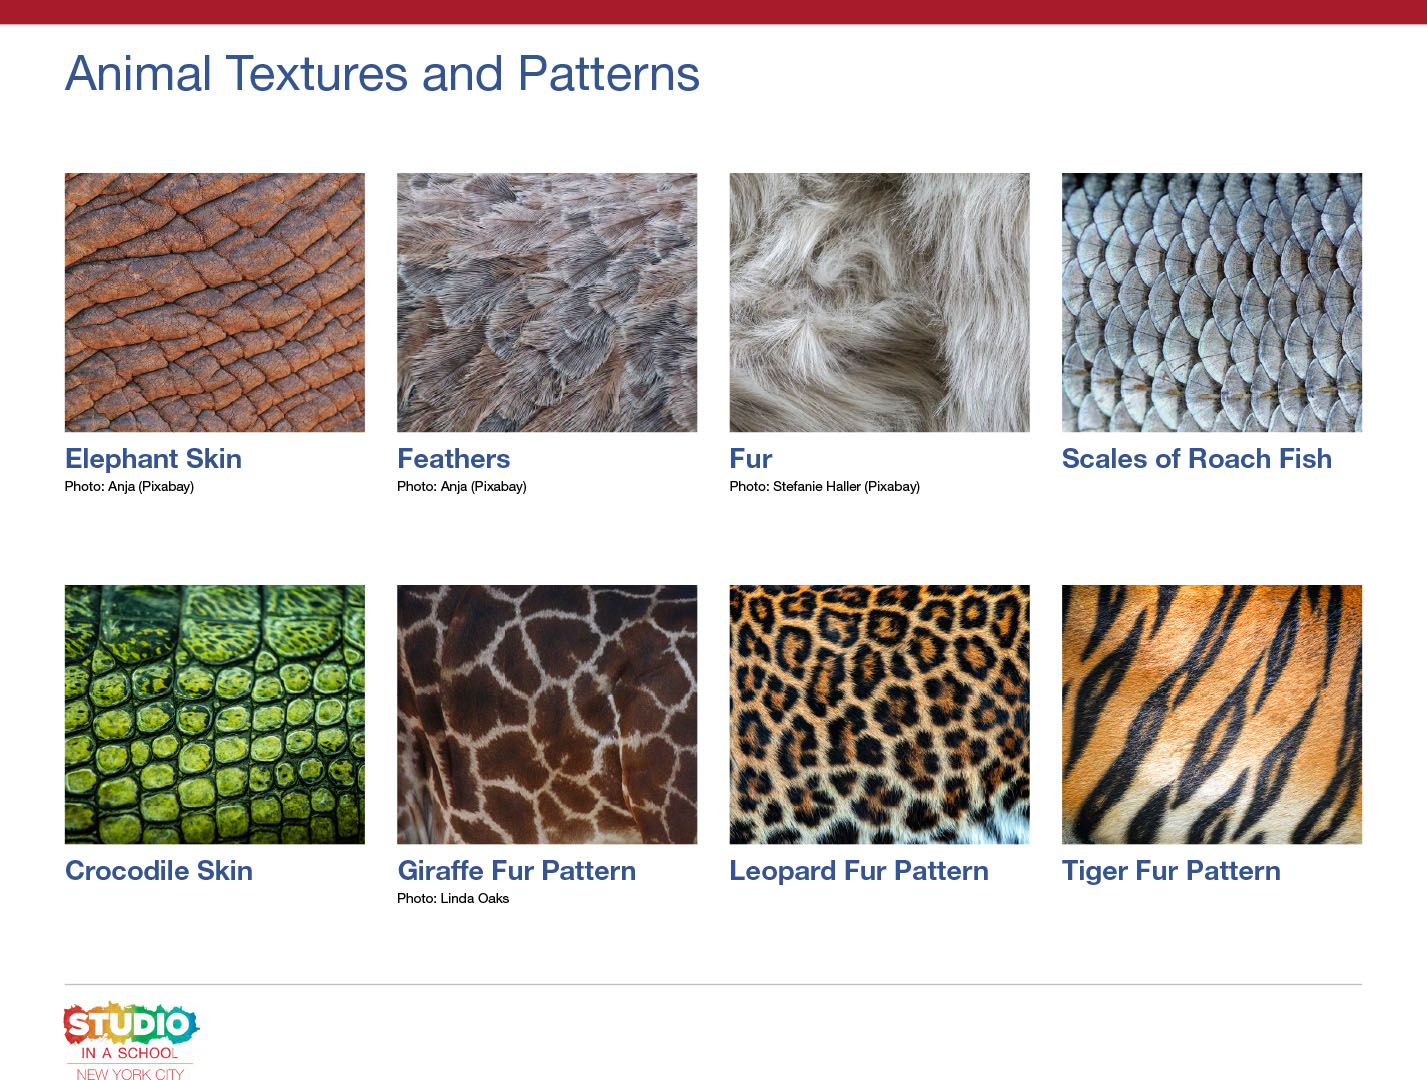
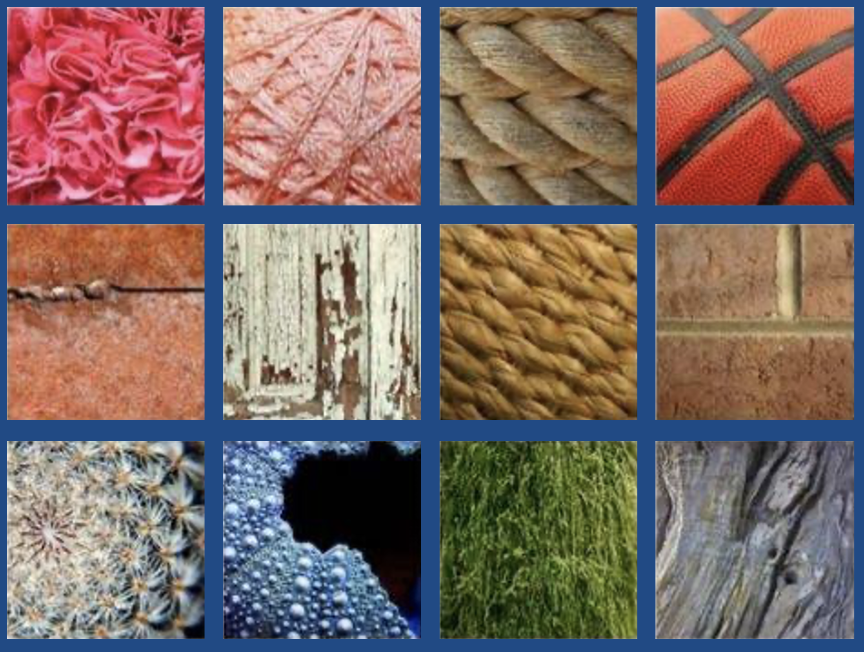
Examples of Animal Textures and Patterns
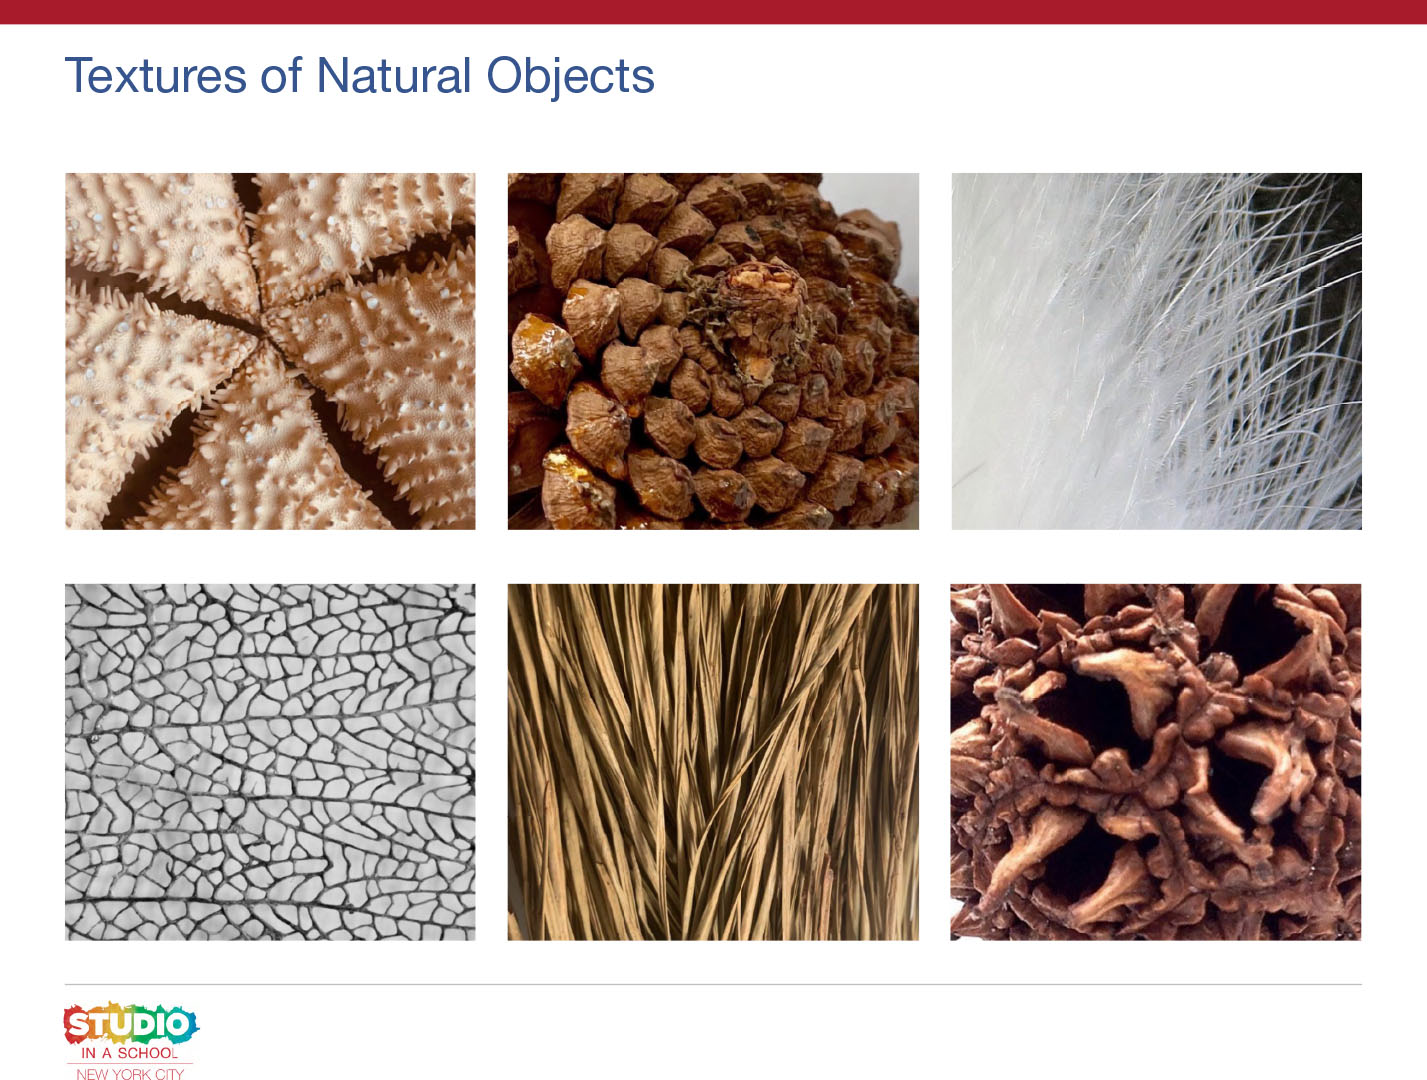
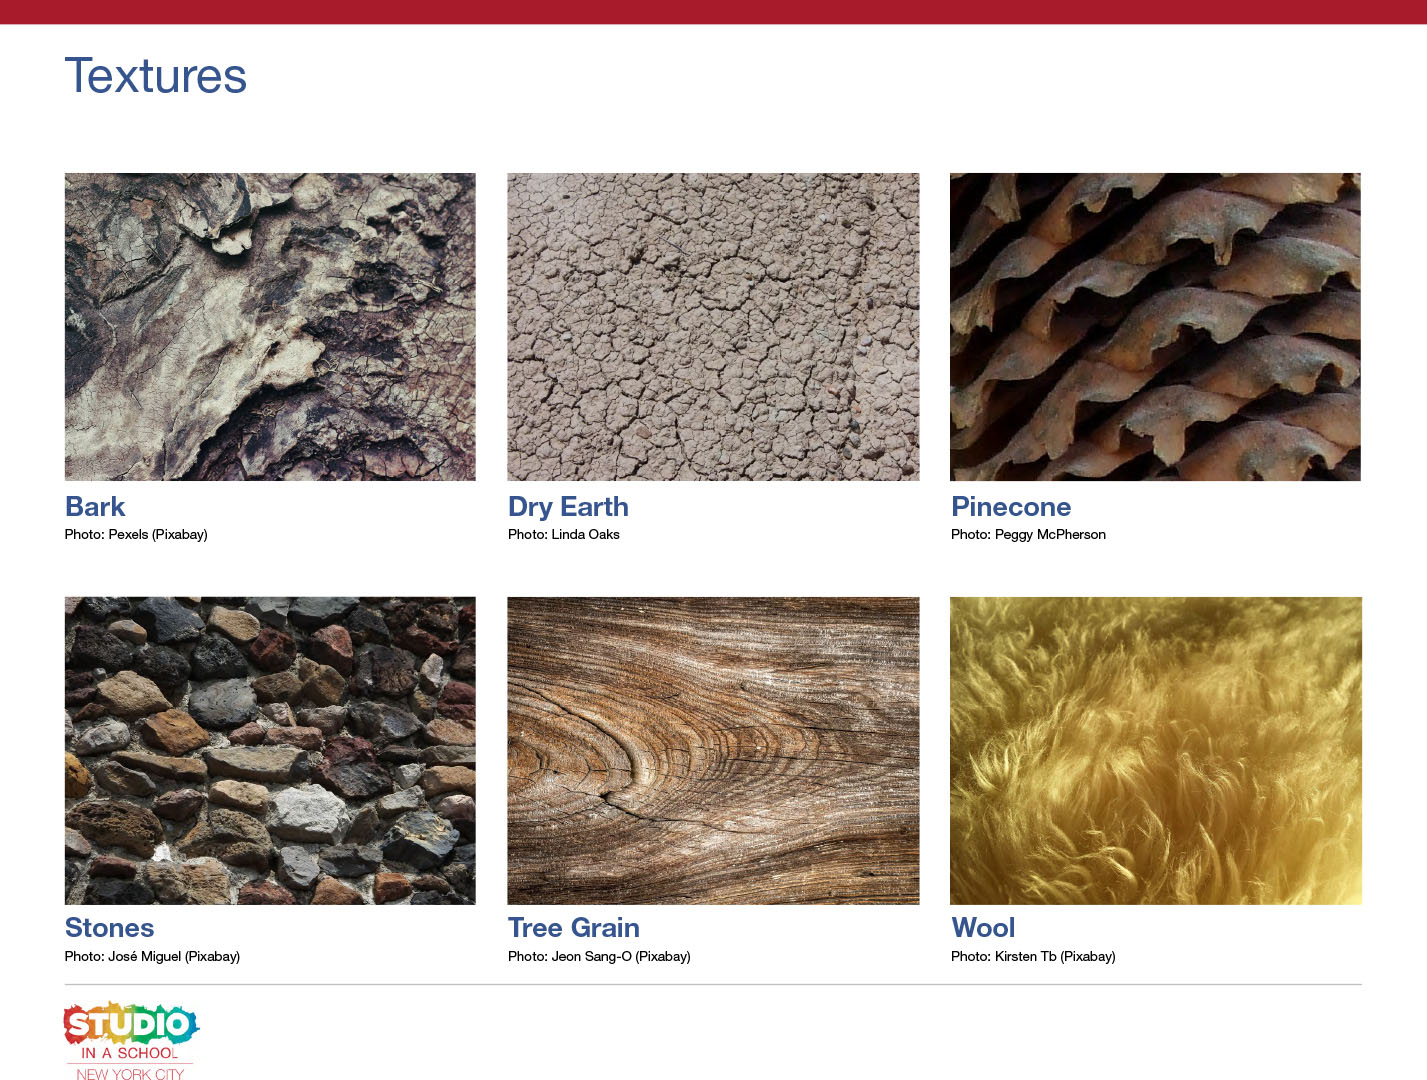
Examples of Textures of Natural Objects
Images, notes, and drawing instruction from the collection of John Ruskin: http://ruskin.ashmolean.org/welcome