Overview
Students will reflect on their art making using close-looking, speaking, writing, and/or sketchbook prompts.
Materials and Tools
- Pencil
- Sketchbook or one to two pieces of paper
- Collage from the previous lesson
Objectives
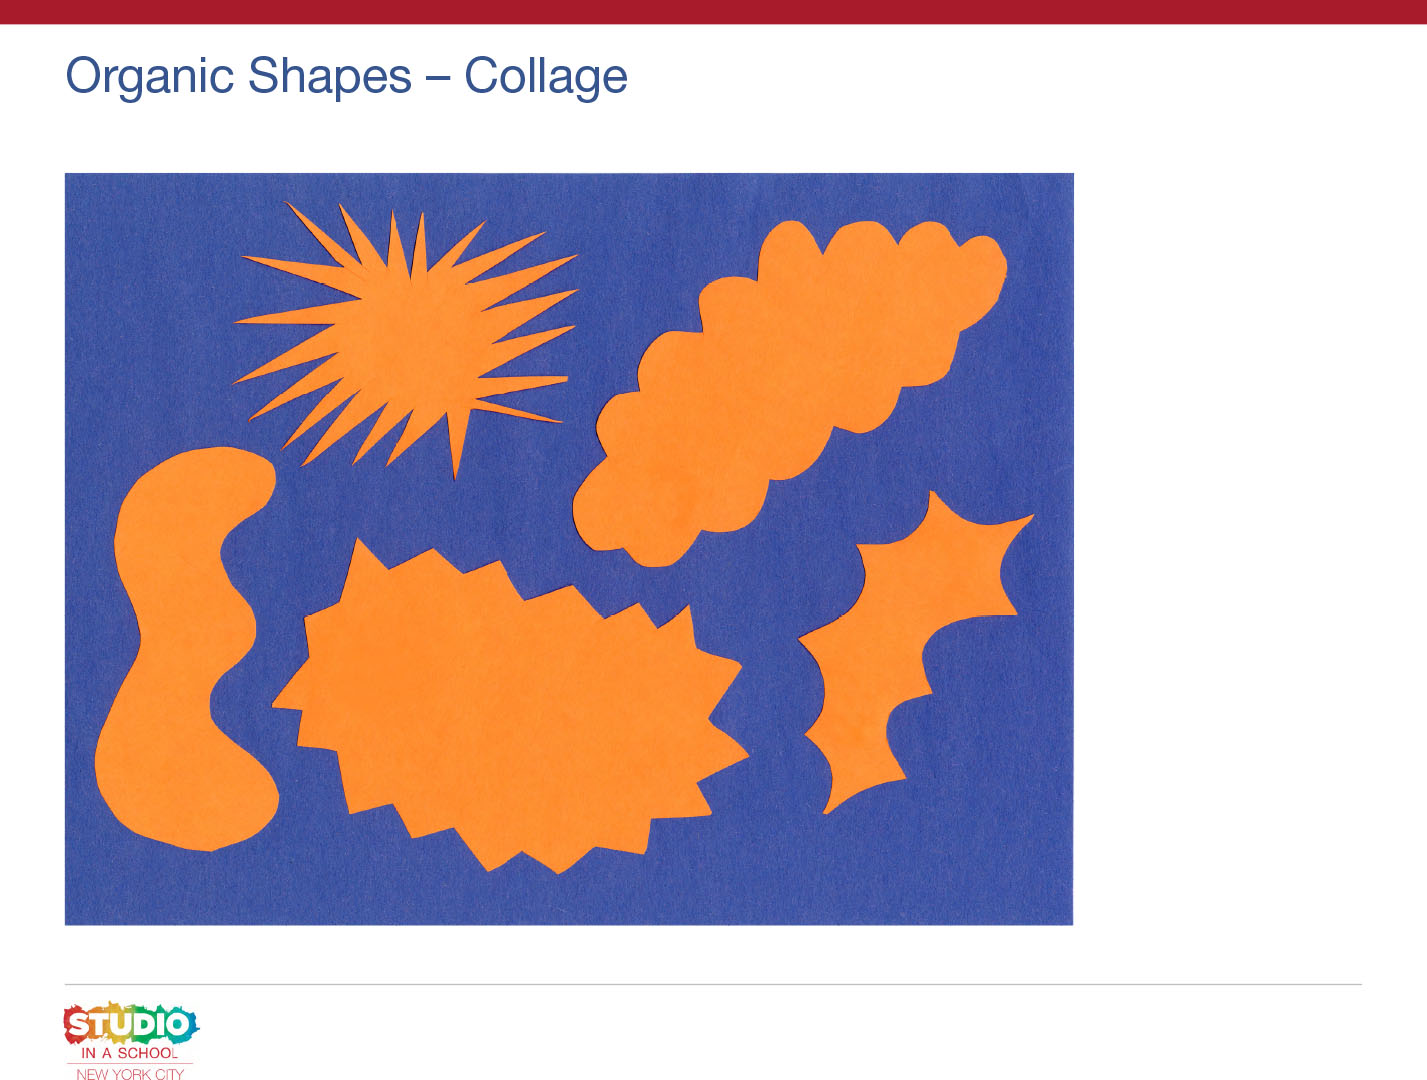
- Students will be able to identify and demonstrate how to rip and cut a variety of geometric and organic shapes to make a collage
- Students will understand that different arrangements express different ideas
- Students will apply knowledge about shapes, patterns, and arrangements to create animals, using observation and/or imagination
Students will understand that:
- Paper can be changed into shapes using hands or scissors and both actions create different kinds of shapes
- Patterns are made up of repeated shapes or colors
- Details are small additions to an artwork that create interest
Students will be able to:
- Identify and apply knowledge about shapes and ways to make them to create their own ideas
- Identify, explore, and create different types of arrangements
- Apply knowledge about shapes, arrangements, patterns, and details to create realistic and imaginary animals using torn or cut shapes
Activities
Note: The following activities are written with sample language you may use with your students. Following the art-making lesson, you may choose as many reflection activities as desired for students to work on in class or independently.
Step 1: Close-Looking Activity/Sharing Student Work (10 minutes)
Hello, artists! Today we are going to continue exploring shapes by looking closely at the collages we made when we used our hands as tools to tear paper.
Take a close look at your collage.
- What shapes do you notice?
- What do these shapes remind you of?
For students needing more support:
- I see a _______ shape. It reminds me of______. [Example: I see a long, bumpy shape. It reminds me of a tall tree.]
Model holding up your own work and describing several shapes that you tore and what they remind you of.
Step 2: Close Looking: William Kentridge (10-15 minutes)
Note to Teachers: Before teaching with a work of art, spend some time looking closely at it on your own. Familiarizing yourself with the artwork will prepare you to guide the close-looking activity.
If your students are new to looking at art together, you can introduce the activity to students in the following way:
Today we are going to spend some time looking at and discussing a work of art together. When we look at art, there are no right or wrong answers. I’m going to ask you to look closely, share your ideas about what you see, and listen respectfully to each other’s ideas. Everyone’s ideas are important. We all see things differently, and when we look at art, we can learn to see through each other’s eyes.
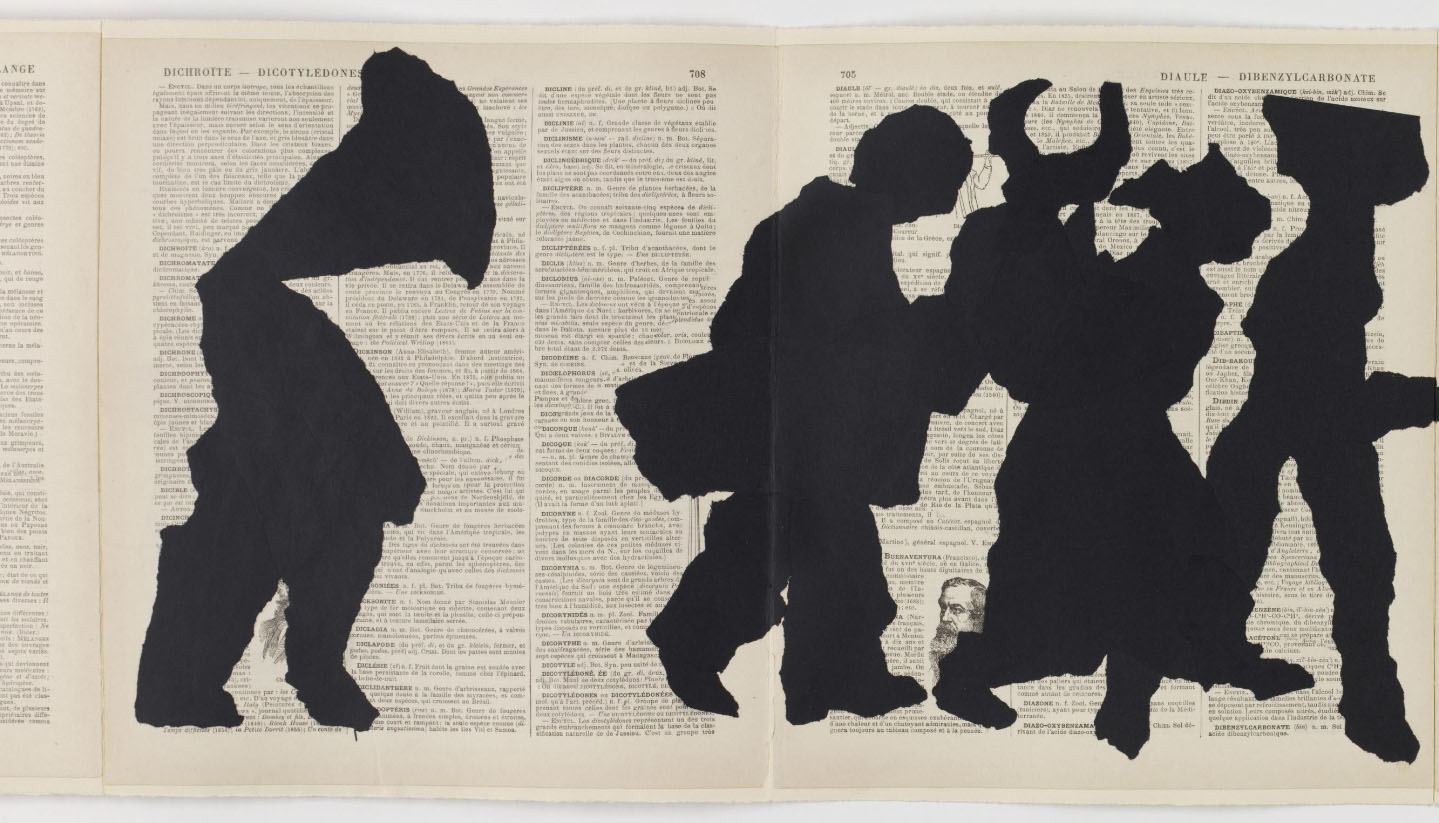
Let’s look closely at this collage by the artist William Kentridge.
- What do you think is happening in this artwork?
- What are some of the shapes that you notice?
- How do you think the artist made these shapes? How do you know?
- What can you imagine you could make with the same shapes?
For students needing more support:
- I think _________.
- I see _________ shapes.
- I think the artist made these shapes by ____________ because I see_____________.
- I could make _______________.
Step 3: Writing Activity: (10 minutes)
Now we are going to write about our artwork. Start by choosing two shapes in your collage.
- What kind of shapes are they?
- What do they remind you of?
Based on your students’ writing skills, choose from the options below:
Option 1: Write a sentence using three words to describe your shapes. Then write a sentence telling us three things that the shapes remind you of.
Option 2: Use the sentence frames below to write two sentences about your artwork.
My shape is:
___________, _____________, and ___________.
bumpy
wavy
pointy
curvy
round
small
big
thin
wide
long
short
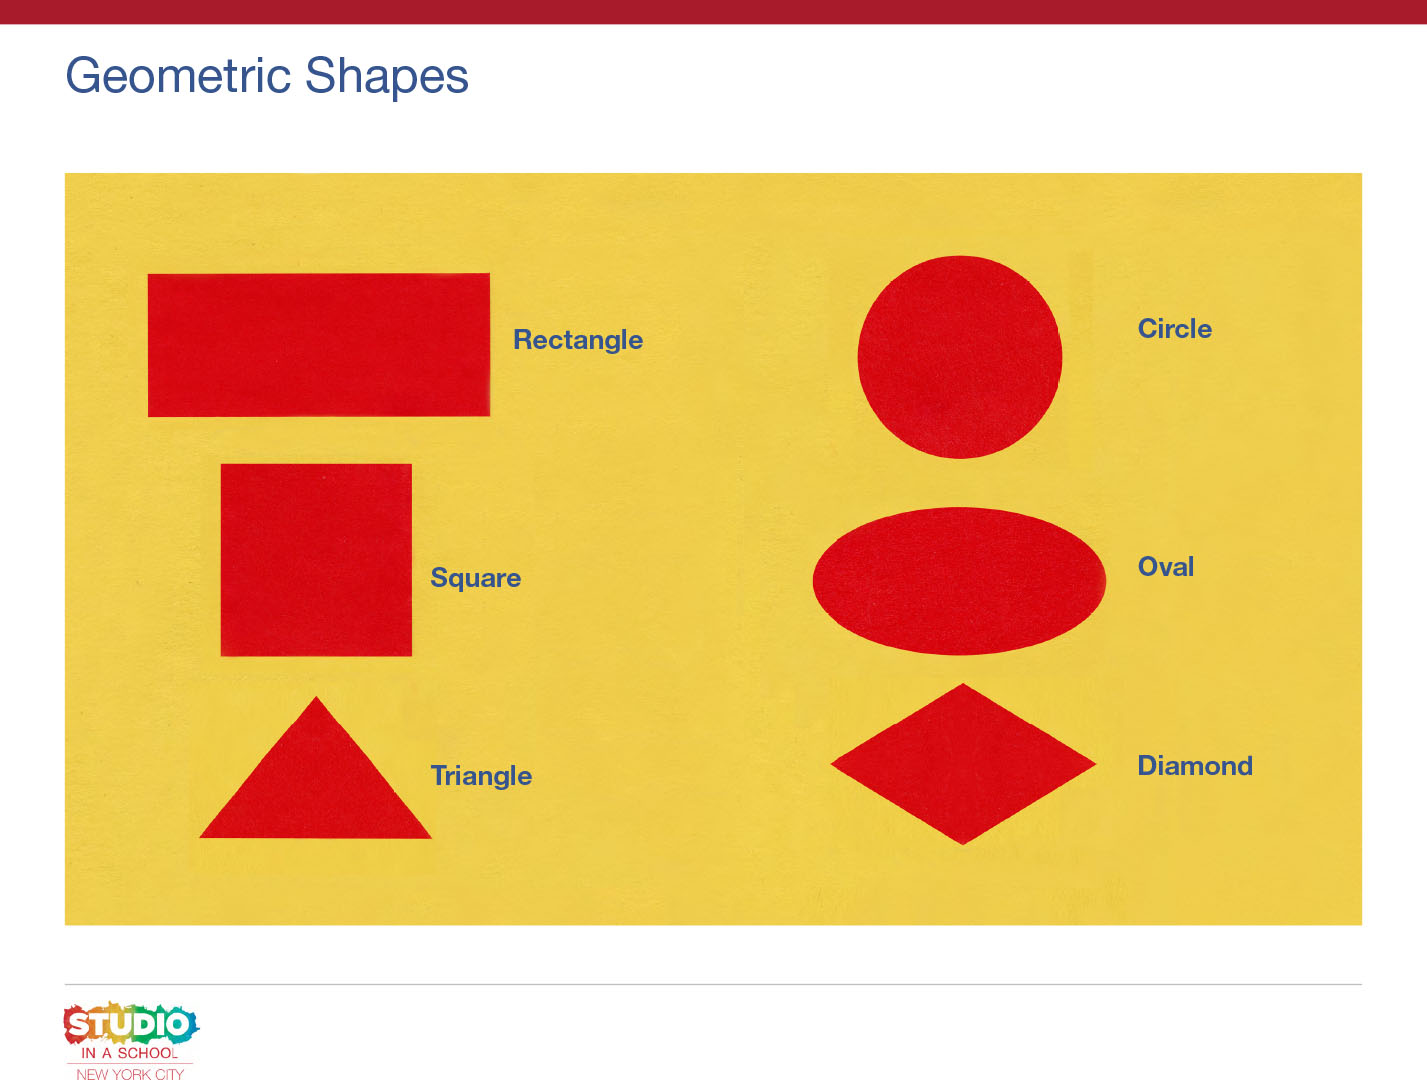
square
rectangle
triangle
circle
oval
It reminds me of a ___________, a _____________, and a ___________.
Option 3: Label your collage using the vocabulary words above and share with a grown up what you imagine each one could be.
Step 4: Sketchbook Activity (10-15 minutes)
Now that you have looked closely at the shapes in your collage, we’re going to transform or change them into something new by making a drawing.
Look at the shapes in your collage. Notice how they are arranged. Make a drawing in your sketchbook of your entire collage. Carefully look at each shape and the space around it.
Now, think about what you would like to add to your drawing. Continue your drawing by adding more shapes, lines, or details.
Model starting a drawing of a few of the shapes in your collage, noting the placement of each. You could say: For example, I’m going to start by drawing the curvy, triangle shape that I see on the bottom of my collage and the big square that I see at the top.
- What do these shapes remind you of?
Take suggestions from students.
I’m going to make my triangle into a tree by drawing a square trunk. Maybe I’ll add more trees around it.
Now it’s your turn.
- How will you transform your shapes?
- What will each shape become in your drawing?
After students finish their drawings, ask:
- How did you transform your shapes?
- What shapes, lines, or details did you add to your drawing?
Resources
Read aloud the book It Looked Like Spilt Milk by Charles Shaw