Overview
Students will draw a portrait of someone they admire from a reference image and/or memory, focusing on facial features, expressions, and details.
Grade Level
6-8
Media
Theme/Big Idea
Artists can use collage techniques to create collagraph prints of someone they admire.
Essential Questions
- How can we honor someone through our artwork?
- How can we represent the unique qualities of an individual through full-body portraiture?
Case Studies
Materials and Tools
- White charcoal pencils, black paper (12″ x 18″ if possible, or 9″ x 12″)
- Myasia Dowdell: Diana Ross (Slide 6), Beyonce (Slide 7), LL Cool J (Slide 10)
- Byron Smith: Models in Stripes (Slide 8), Model (Slide 9)
- Kenya Hanley: Reggae Greats (Slide 11)
Objectives
Students will:
- Identify someone they admire to be the subject of a portrait.
- Look closely and notice the shapes, proportions, and placement of facial features in a reference image.
- Draw a portrait from observation using a reference image.
Activities
Note: Teacher language is italicized.
Introduction: Close Looking (10 minutes)
Today we are going to make a portrait drawing of someone we admire. What is a portrait? A portrait is an artwork about another person. It could be a drawing, painting, sculpture, photo, or any other medium.
To begin, let’s look at two portraits by the artist Myasia Dowell.
Note to Teachers: Before teaching with a work of art, spend some time looking closely on your own. Familiarizing yourself with the artwork will prepare you to guide the close looking activity.
If your students are new to looking at art together, you can introduce the activity to students in the following way:
Today we are going to spend some time looking at and discussing a work of art together. When we look at art, there are no right or wrong answers. I’m going to ask you to look closely, share your ideas about what you see, and listen respectfully to others’ ideas. Everyone’s ideas are important. We all see things differently and when we look at art, we can learn to see through each other’s eyes.
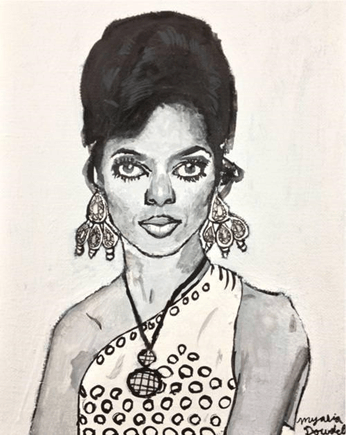
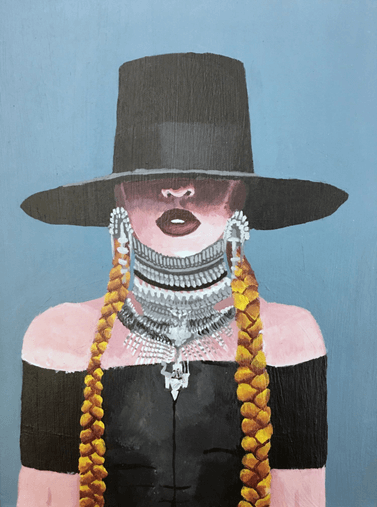
- What features stand out to you in each portrait?
- What kinds of expressions do these features communicate?
- What details did the artist add?
- What do these features and details tell us about the person in each portrait?
Artists make portraits for different reasons, but often want to share something about someone they admire. Who is someone you admire? What do you admire about them? They might be someone you know or someone you’ve learned about. They might be famous or someone who does great things that only a few people know.
Demonstration (10 minutes)
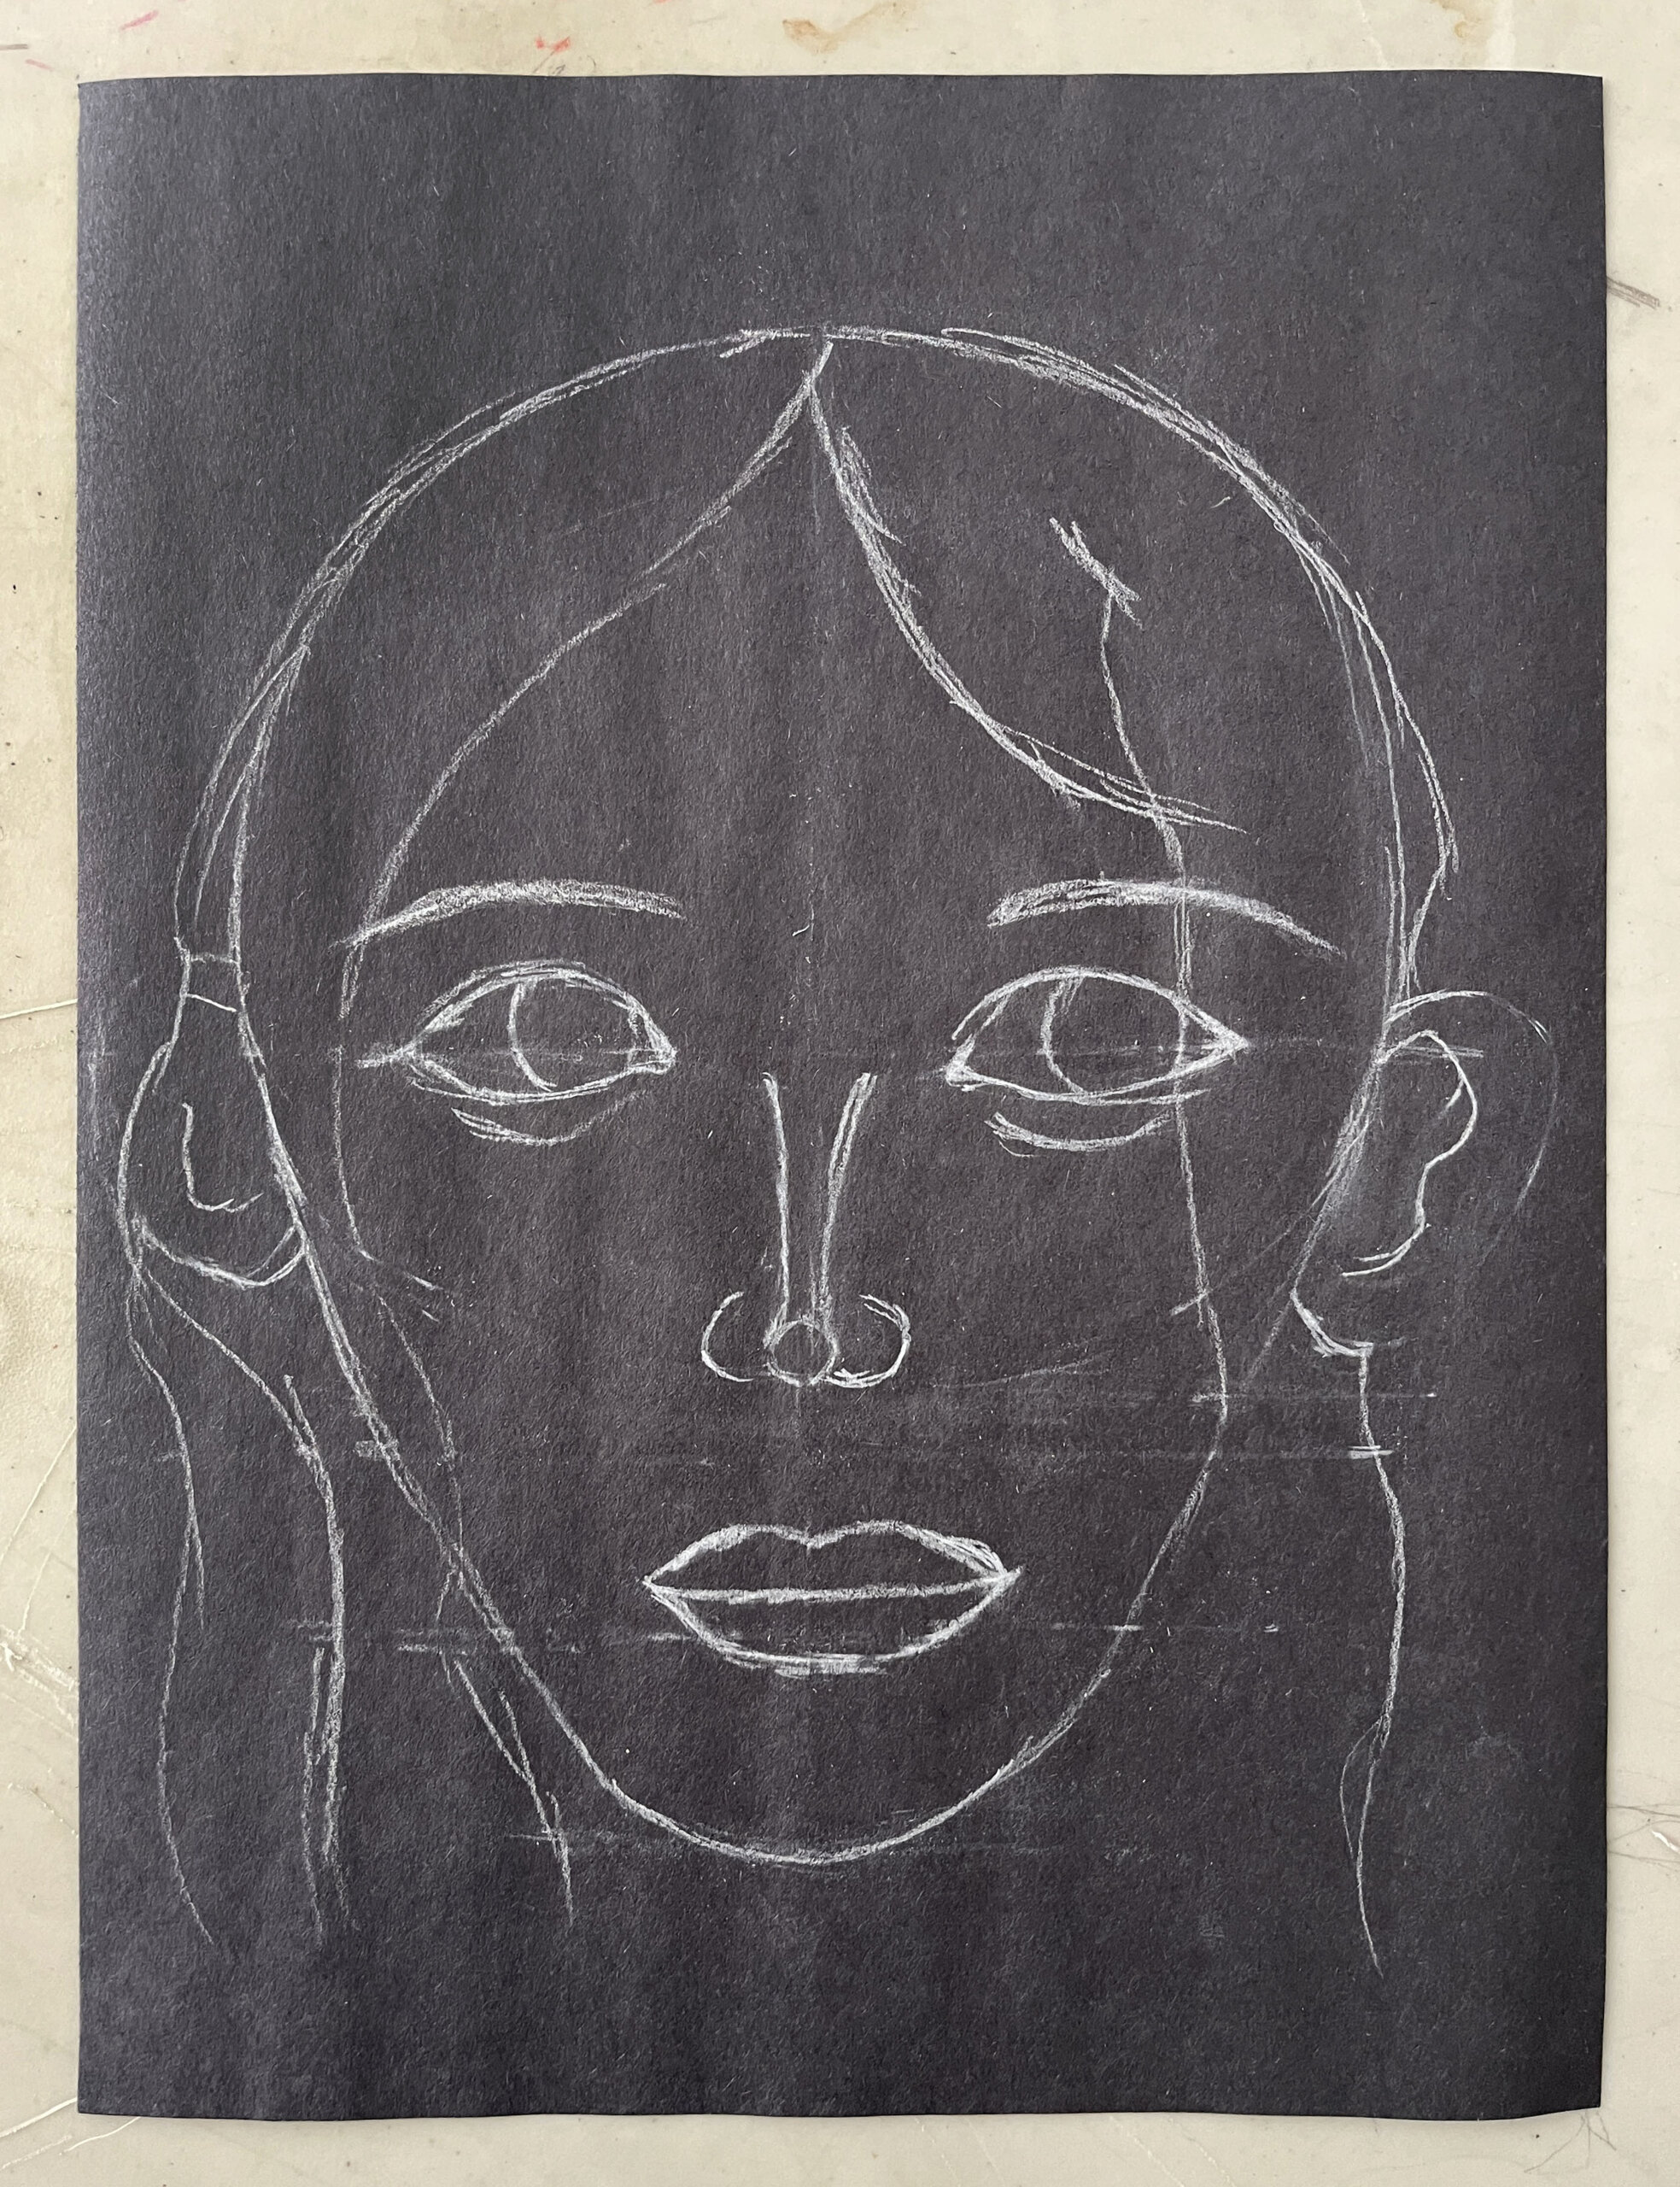
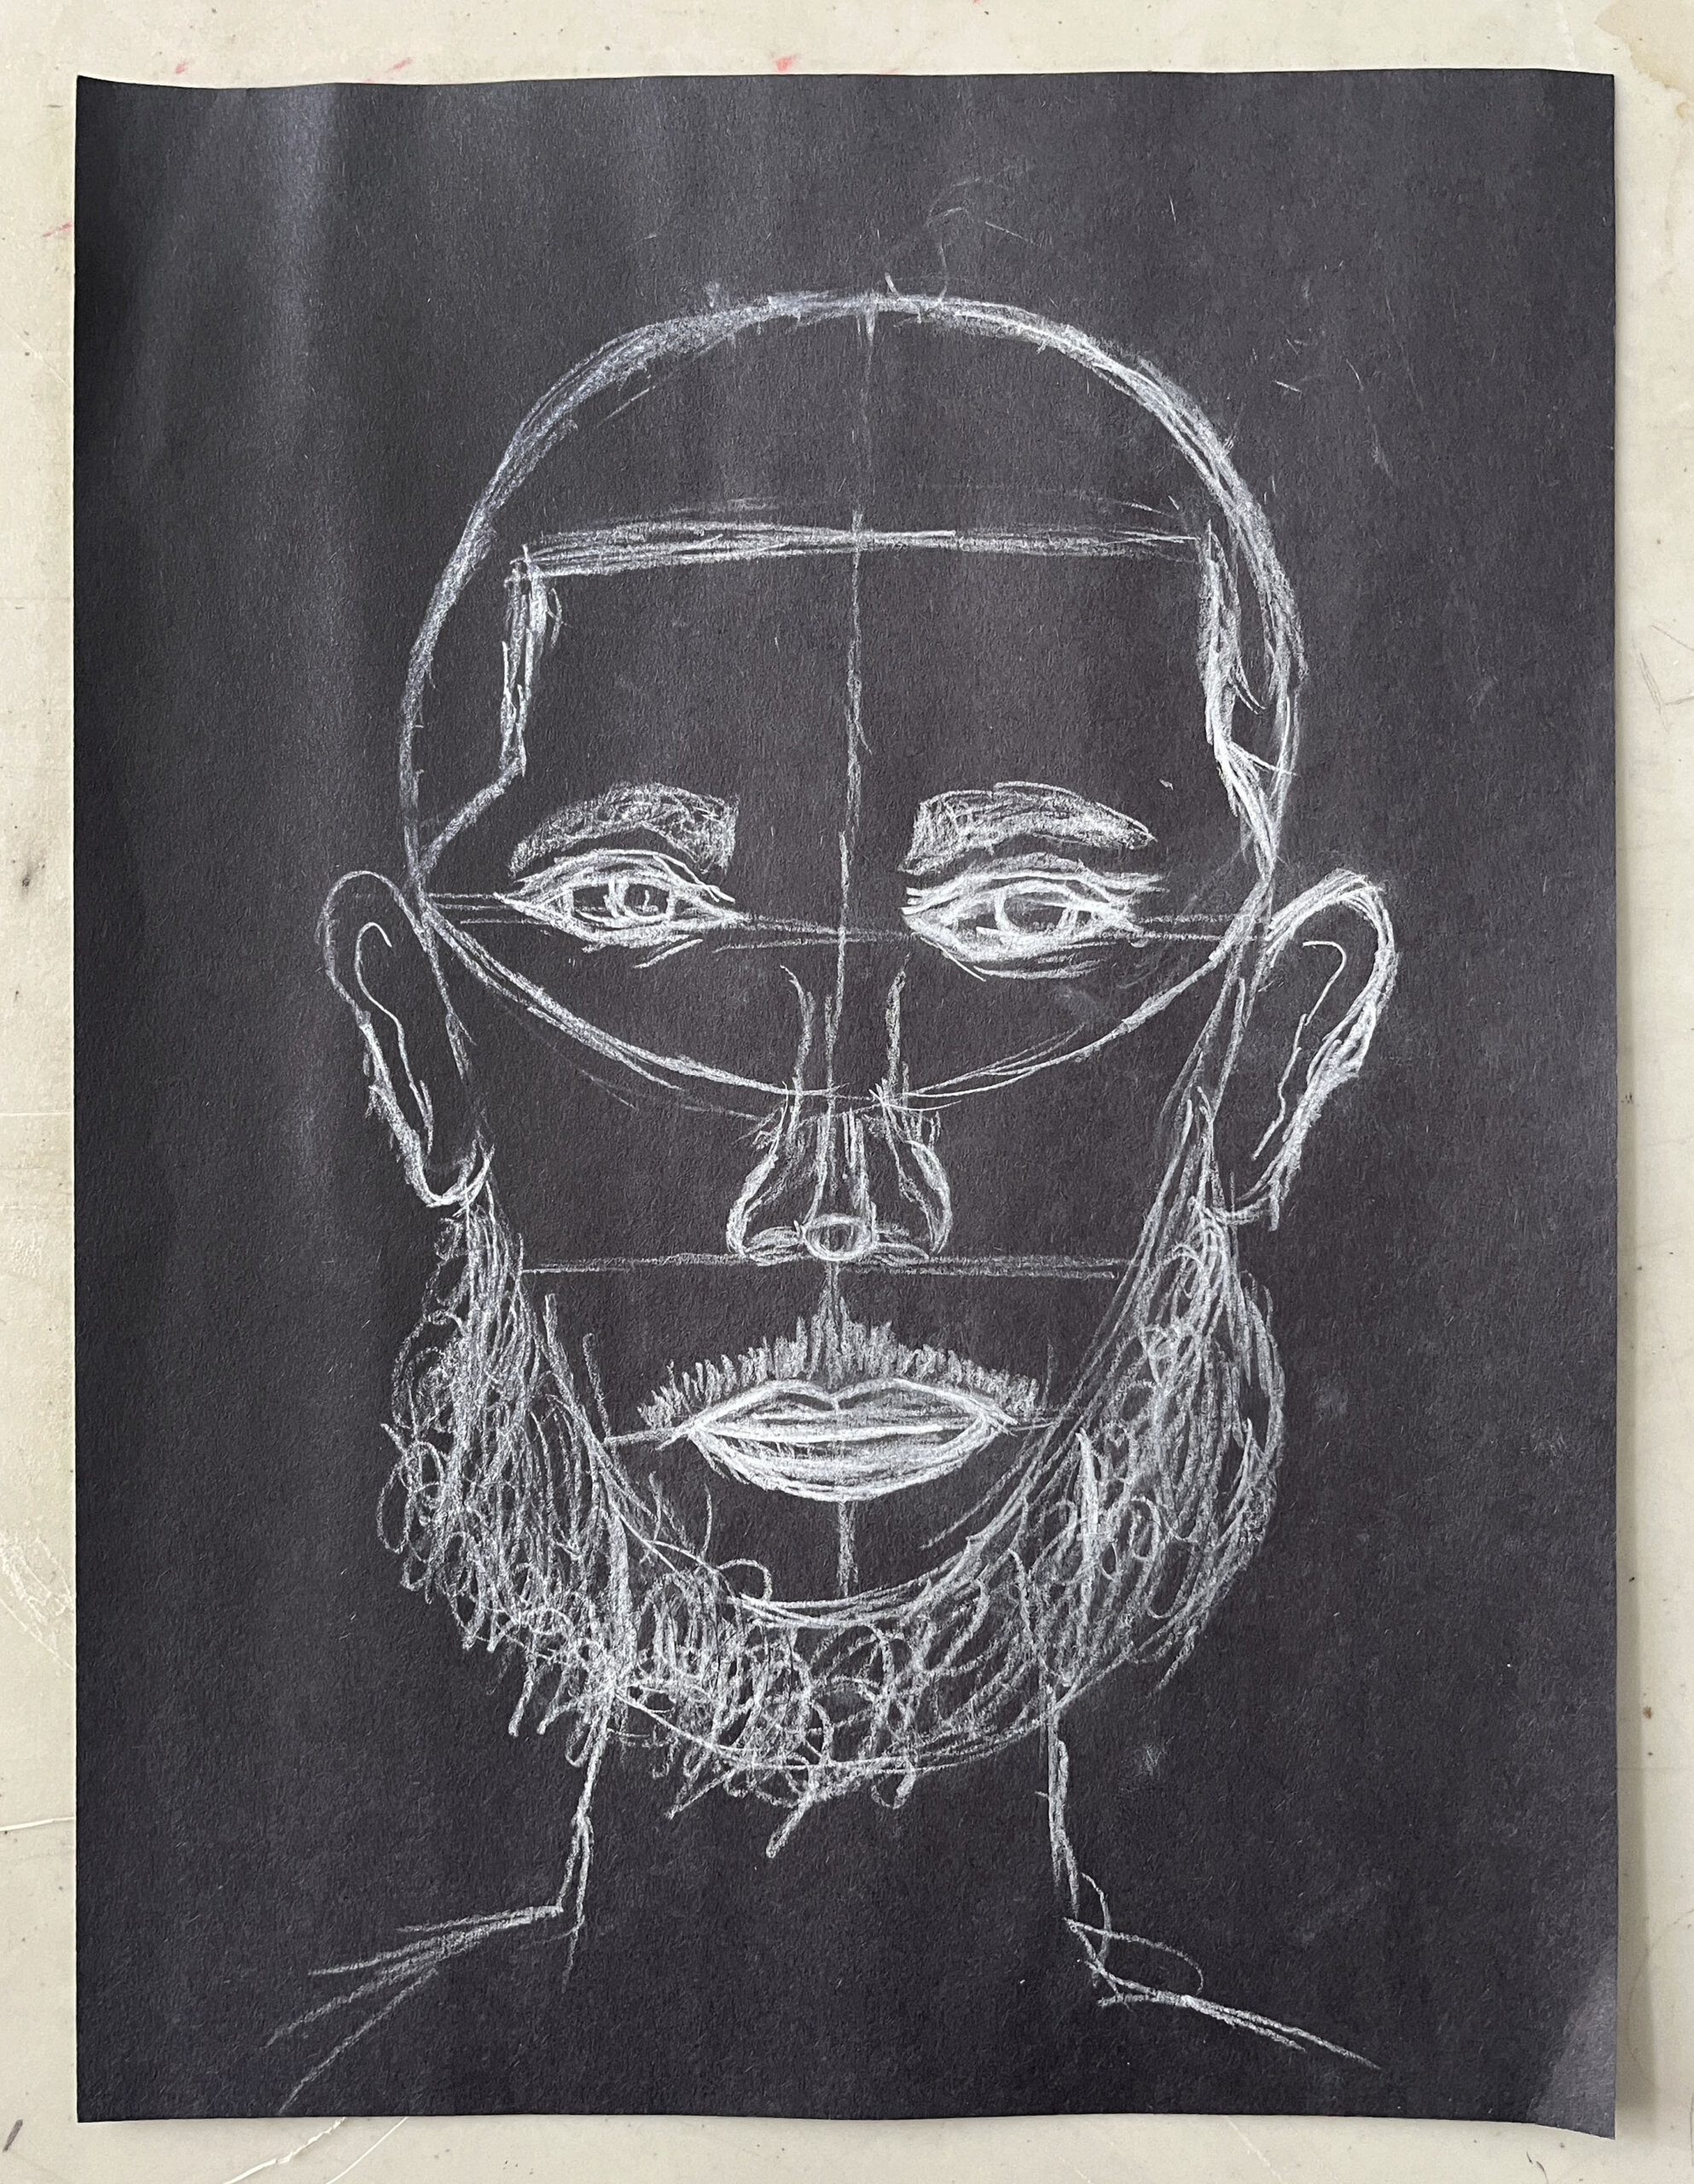
We’re going to make portrait sketches focusing on facial features, expressions, and details, using a reference image to draw from observation. You can also add details from memory.
I’m going to make a sketch of (choose a person that you will use as an example) to demonstrate. I chose (name of person) because (share something you admire about that person).
- What kind of expression does this person have in this photo?
- What facial features show that expression?
- Where do this person’s eyes appear to be looking?
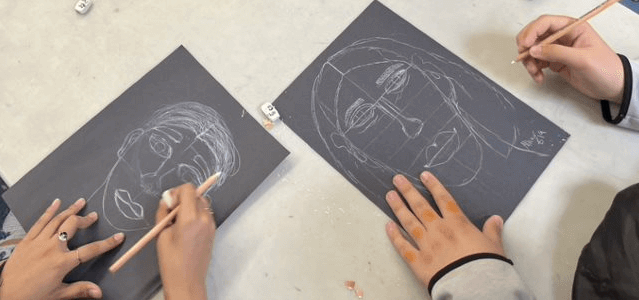
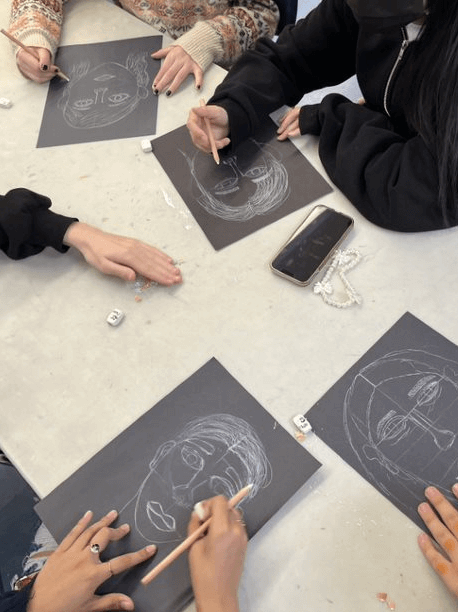
- We’re going to use a white charcoal pencil on black paper. If you make a mistake, you can smudge the line away and keep going.
- How can we draw the different shapes of the face we see in my example?
- What do you notice about the proportions—the relative sizes of each feature?
- Where should I place each shape on the face?
- How can we use lines and shapes to draw hair?
Have students describe the shapes they see as you draw each one. Think aloud as you slowly draw each shape, noting general proportions and placement.
What details can I add to show more about this person?
Even if not included in the reference photo, choose an example detail to add.
Group or Independent Work (25 minutes)
Set students up to work on their own portraits by asking the following questions:
- How can we express someone’s personality through a portrait?
- How will you show their expression?
- What details are important to add?
Encourage students not to worry about making everything perfect as they draw—remind them that this is just a sketch that will help them notice different shapes.
Reflection Questions for Discussion (10 minutes)
Share your work with a person sitting near you. Talk about the following questions:
- Who did you choose to draw for your portrait? Why did you choose this person?
- What features are most important in your drawing? How do these features communicate what you admire about this person?
- What details did you add?
After students reflect with their partners, have some students share their partner’s work and their answers to these questions with the whole class.
Vocabulary
Portrait, proportion, observation, reference
Resources
Myasia Dowdell via LAND Gallery
Adaptations
Alternative Ways of Working:
- Students may work on several small drawings of different people, or the same person
- Students can work on larger or smaller paper
- Students can use adapted drawing tools—thick oil pastels, markers, etc.
- Students can use iPads or other technology to draw
Extensions
Sketchbook:
Try drawing a second portrait of the same person with a different expression in your sketchbook. You can find a different photo for reference or look in a mirror to see how the facial features might change.
NYC Blueprint Strands Addressed
#1 Artmaking
#2 Developing Visual Arts Literacy
#3 Making Connections through Visual Arts