Overview
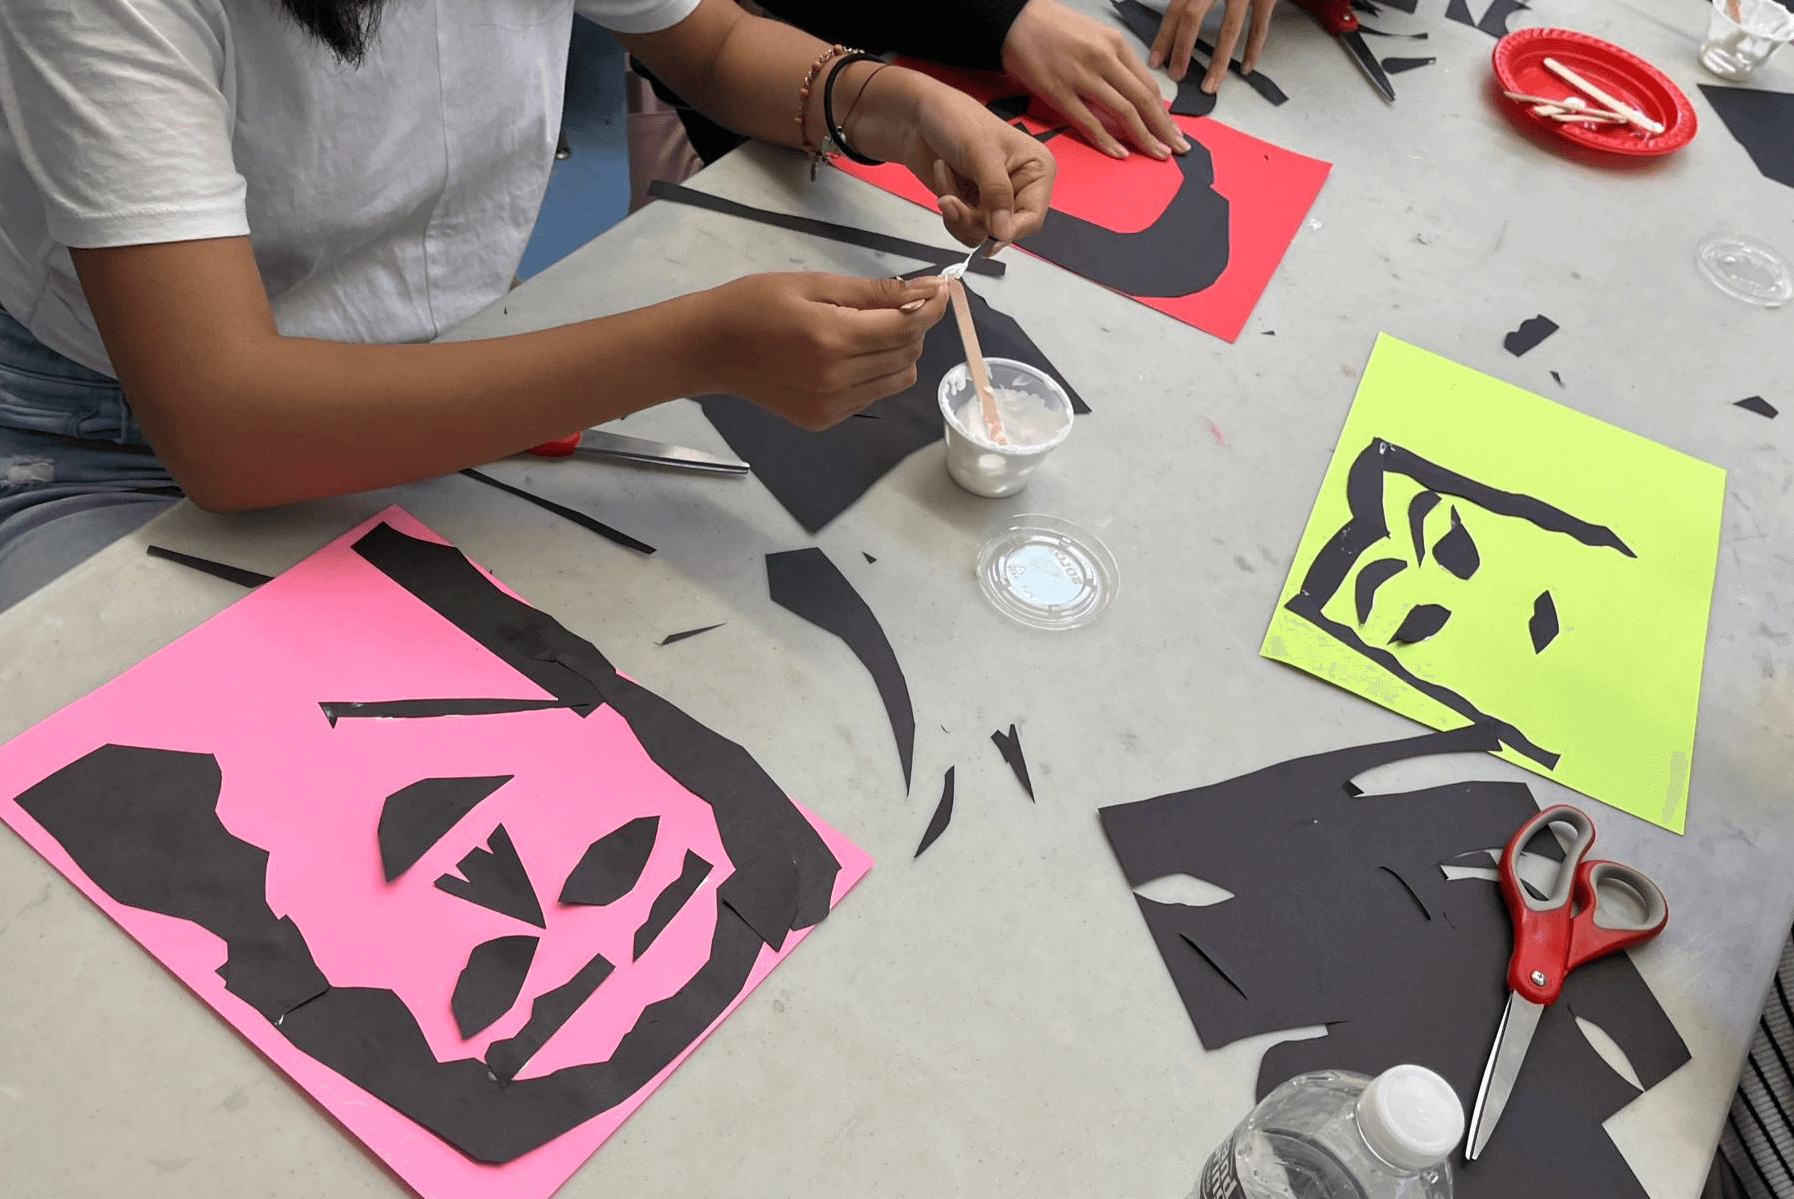
Students will explore cutting, tearing and arranging shapes to represent facial features that show different expressions.
Grade Level
6-8
Media
Theme/Big Idea
Artists can use collage techniques to create collagraph prints of someone they admire.
Essential Questions
- How can we honor someone through our artwork?
- How can we represent the unique qualities of an individual through full-body portraiture?
Materials and Tools
- Scissors
- Glue (in cups)
- Popsicle sticks
- Half-sheets of colored 9 x 12″ construction paper or fadeless paper
- 9 x 12″ sheets of black paper
- Racquel Albarran. All Types of Mouths, Slide 5
Objectives
Students will:
- Cut and/or tear a variety of geometric and organic shapes to represent facial features.
- Identify how the shapes of different facial features can express different feelings.
- Arrange and glue shapes to make different facial expressions.
Activities
Note: Teacher language is italicized.
Introduction: Close Looking (10 minutes)
In our last lesson, we learned about some artists with disabilities and looked at portraits by Bill Bruckner to get inspiration for the portraits we will create.
Today we are going to make a design using the shapes of different facial features. This will help us get ready to create our own portraits of people we would like to honor.
Let’s look at an artwork by the artist Racquel Albarran.
Note to Teachers: Before teaching with a work of art, spend some time looking closely on your own. Familiarizing yourself with the artwork will prepare you to guide the close looking activity.
If your students are new to looking at art together, you can introduce the activity to students in the following way:
Today we are going to spend some time looking at and discussing a work of art together. When we look at art, there are no right or wrong answers. I’m going to ask you to look closely, share your ideas about what you see, and listen respectfully to others’ ideas. Everyone’s ideas are important. We all see things differently and when we look at art, we can learn to see through each other’s eyes.
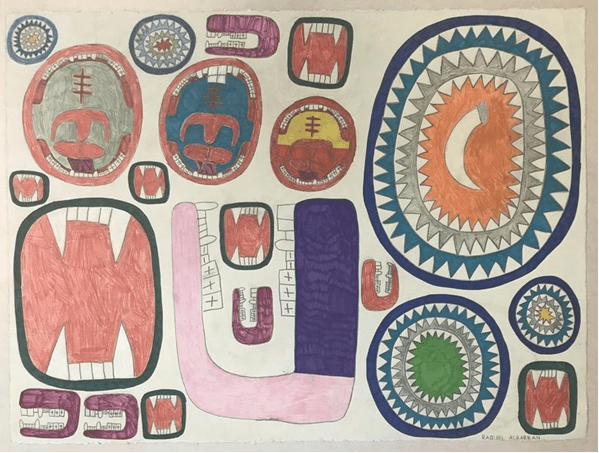
- What are some of the shapes that you notice in this image?
- What do these shapes remind you of?
- What different points of view do you notice?
- What emotions do the different kinds of mouths express to you?
- We’re going to work with collage to make our own designs incorporating different facial features today.
- What is a collage? Collage is an artwork made from paper or other materials attached to a surface.
Demonstration (10 minutes)
We’re going to use scissors and/or our hands to make the shapes of different facial features.
What are the shapes of different facial features? How many different shapes could there be for a nose? What sizes can these be?
I’m going to cut some of these shapes from my colored paper. I’ll make some larger and some smaller.
Demonstrate cutting different nose shapes, emphasize going slow and closing the scissors as you cut to make subtle curves.
What about an eye, what shapes can there be for an eye? What are the different parts of an eye? How can we make these with collage?
What different expressions can eyes show? (Eyes open wide, eye partially closed, looking different directions)
Demonstrate cutting an eye shape and playing with expressions, layering the iris, pupil, eyelid, etc.
How can I make an interesting composition using these shapes?
Arrange shapes into a composition trying a few different ways—organized into sections, in a radial formation, or lined up.
Show students how to carefully spread and glue around the edges of each shape and press to adhere.
*Based on the level of experience of your students, you may spend more time demonstrating how to cut different types of shapes.
Group or Independent Work (25 minutes)
How can we cut the shapes of different facial features using scissors, or our hands? How can we make an interesting composition by arranging these shapes?
Pick two facial features (eyes, noses, mouths, ears, hair) to focus on and try to make as many types of those two features as you can. How many different kinds of mouths can you make? How many kinds of eyes? How can you add details to these?
Encourage students to make at least 3 of each feature they pick, cut different shapes for each and add details. (12 minutes)
After they’ve arranged several compositions, distribute glue. (12 minutes)
Reflection Questions for Discussion (10 minutes)
Turn and talk: share your collage with a neighbor and discuss:
- How did you choose to arrange the different shapes in your collage?
- What emotions do the different facial features in your collage express?
Note to Teachers
In the next lesson, students will draw portraits of someone they admire—either someone close to them or someone they admire from afar. In preparation, students will need reference images. Here are some options:
- Have students find and print an image beforehand.
- Have students share who they’d like to focus on and select and print images for them.
- Have students email images for you to print for them.
- Have students find and draw images using their phones.
Vocabulary
Collage, compose, point of view, layer, express
Resources
Raquel Albaran via LAND Gallery
Adaptations
Alternative Ways of Working:
- Students can use alternative cutting tools, modified scissors or punches to create shapes.
- Students can tear shapes if cutting is difficult.
- Students can use pre-cut shapes to arrange.
- Students can focus on the tactile feel of shapes and collages.
- Provide images showing different facial expressions.
NYC Blueprint Strands Addressed
#1 Art Making
#2 Developing Visual Arts Literacy