Overview
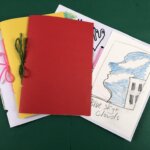
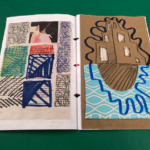
Students will make a sketchbook with materials found at home. They will understand different ways to use a sketchbook as a tool.
Lessons
Materials and Tools
- 5 sheets of paper or construction paper
- About 20 inches of string (or yarn, shoelace, ribbon)
- Scissors
- Pencil (crayon, marker, other drawing tool)
Objectives
- Students will construct a sketchbook with materials found at home.
- Students will understand that the sketchbook is a place for many kinds of exploration.
- Students will generate ideas for future sketchbook use.
Student Outcomes
- Students will be able to fold and bind to construct a simple book.
- Students will be able to use this sketchbook to collect ideas and experiment.
- Students will be inspired by the ways that contemporary artists have made and use sketchbooks.
Students will understand that:
- They can use sketchbooks in personal and meaningful ways.
- Everyday materials can be resources and inspiration for artmaking.
- Problem-solving is essential to the art-making process.
Students will be able to:
- Manipulate materials with their hands to create a well-constructed book.
- Find and collect materials to create their sketchbook, draw with, and to add to the pages of their book.
- Explore mark making with different materials in their sketchbooks.
Resources
Betye Saar sketchbooks at The Morgan Library
Betye Saar at the Morgan Library
Horace Pippin sketchbooks
Horace Pippin
Shinro Ohtake sketchbooks
Shinro Ohtake
Adaptations
For Students with Disabilities
- Practice folding paper beforehand.
- Emphasize and explore the sensory aspects of the tactile differences between papers and drawing tools used in the lessons.
- Choose materials and tools appropriate to the needs of each student—can staple folded sheets or use a hole punch to make holes.
For Multilingual Learners
- Step-by-step photos of the sketchbook assembly process.
- Emphasize repetition of new vocabulary and spiral vocabulary to activate students’ prior knowledge.
Extensions
- Sketch Prompt: Limiting your time to one minute, make a drawing about you. It could be a quick self-portrait or you could draw some part of you or your life that you want your future biographer to know.
- Make multiple signature sketchbooks by making a few sketchbooks and gluing or sewing them together.
- Use a “found” or old, discarded book and fill it with your own drawings, gluing each one over the existing pages.
- Using a hole punch, place one hole in the upper left-hand corner of a stack of different papers. Use a ring binder to connect these to make a sketchbook.
- Gather “found” drawings that you have already made and attach them together with a ring binder and hole punch, brass connector, or even a grommet maker.
- Gather at least ten papers made of different textures and materials. This could include “found” paper such as a paper bag, an old calendar or poster, and textural paper such as sandpaper or transparent paper. Assemble the papers with a ring binder and hole punch, or brass connector, or even a grommet maker. Then, approach drawing in the book by responding to the paper itself. Use different drawing materials: pencils, charcoal, or oil pastels. React to the touch and feel of the paper and make marks accordingly.
- Other materials that can be used to make sketchbooks: brass connector, grommet tool, ring binder/hole punch, better quality paper, textured paper, or collected paper.
Using Sketchbooks to Connect to Curriculum
Science:
- Students can use observational drawing to record and study the natural world.
- Students can create observational drawings of different environments and/or habitats.
- Students can record their experimentations with color mixing.
Social Studies
- Students can imagine and sketch what life might be like in different places and points in time.
- Students can visit The Met’s Timeline of Art History to find works of art from any period in history and sketch what they discover.
- Students can sketch ideas for historical fiction based on specific moments in history.
Math
- Students can explore concepts of geometry in their sketchbooks, such as pattern, shape, and angle.
- Students can create observational drawings using proportion, scale and volume.
- Students can explore perspective in their sketchbooks.
Language Arts
- Students can use sketchbooks to respond to and/or illustrate their reading in words and images.
- Students can develop their own characters and narratives in their sketchbooks.
- Students can create scenes and settings in their sketchbooks.
- Students can add details to depictions of scenes, settings, character features, emotions, temperature, seasons, etc.
- Students can develop graphic novels based on their reading. For example, they can create a graphic novel from the perspective of a character other than the protagonist.
- Students can look at narrative works of art and sketch what they think came before and after the moment in the artwork.
- Sketchbooks can be used as journals for students to draw and write about their experiences, ideas and emotions.
New York Teaching & Learning in Visual Arts Standards
Art Making: Drawing, Collage
Literacy in the Arts
- Looking at and Discussing Art
- Developing Visual Arts Vocabulary
- Reading and Writing About Art
- Problem Solving: Interpreting and Analyzing Art
Making Connections
- Recognizing the Societal, Cultural, and Historical Significance of Art; Connecting Art to Other Disciplines
- Observing and Interpreting the World
Community and Cultural Resources
- Cultural Institutions
- Online Resources and Libraries
Careers and Lifelong Learning
- Awareness of Careers in Visual Arts
- Art for Enjoyment and Lifelong Learning
NYS Learning Standards for the Arts
Artistic Process: Creating
Anchor Standards:
- Anchor Standard 1: Generate and conceptualize artistic ideas and work
- Anchor Standard 2: Organize and develop artistic ideas and work
Artistic Process: Presenting
Anchor Standards:
- Anchor Standard 4: Select, analyze, and interpret artistic work for presentation
Artistic Process: Responding
Anchor Standards:
- Anchor Standard 7: Perceive and analyze artistic work.
- Anchor Standard 8: Interpret meaning in artistic work
Artistic Process: Connecting
Anchor Standards:
- Anchor Standard 10: Relate and synthesize knowledge and personal experiences to inspire and inform artistic work
- Anchor Standard 11: Investigate ways that artistic work is influenced by societal, cultural, and historical context and, in turn, how artistic ideas shape cultures past, present, and future.
Credits
Written By:
Pamela Lawton, Artist Instructor
Anne-Marie McIntyre, Artist Instructor
Copyright © 2023 Studio in a School NYC LLC


