Overview
Students will combine their new skills to create a final drawing that transforms an object from observation to imaginary.
Materials and Tools
- Pencil
- Paper
- Eraser
- Pencil sharpener
- Household object to draw
- Fantastical Drawing video
- Fantastical Drawing student slides
Objectives
Students will understand that:
- Artists often combine observational drawing skills with imagination to demonstrate their own unique ideas or point of view
- Objects can be transformed by combining them with another object or by developing a personality for them
Students will be able to:
- Identify and choose what characteristics they want to keep and which they’d like to change to transform their object
- Apply knowledge about drawing from observation and use new ideas from imagination to draw their object using lines, shapes, point of view, texture, and details
Activities
Note: The following steps are written with sample language you may use with your students as you go through the lesson. Explain to students that the slides and the video they see during the lesson will be shared with them so they can review the lesson on their own and continue to make more art.
Step 1: Introduction, Watch Fantastical Drawing Video (12 minutes)
Welcome, artists. In previous lessons, we explored mark making, proportion, texture, and point of view to create drawings from observation. In our final drawing we will be combining our observational drawing skills with our imagination. Watch the Fantastical Drawing video to learn how to transform an object from realistic to imaginary.
Step 2: Close Looking, with Student Slides #4-5 (5-10 minutes)
Look at Slide #4 to observe a drawing that combines observation with imagination.
- What parts of this drawing do you suppose were created from observation? What do you see that makes you say that?
- Which aspects are imaginary? Why?
- Why do you suppose the artist wanted to create an imaginary shoe city? How does this imagined city help us think about our city in a new way?
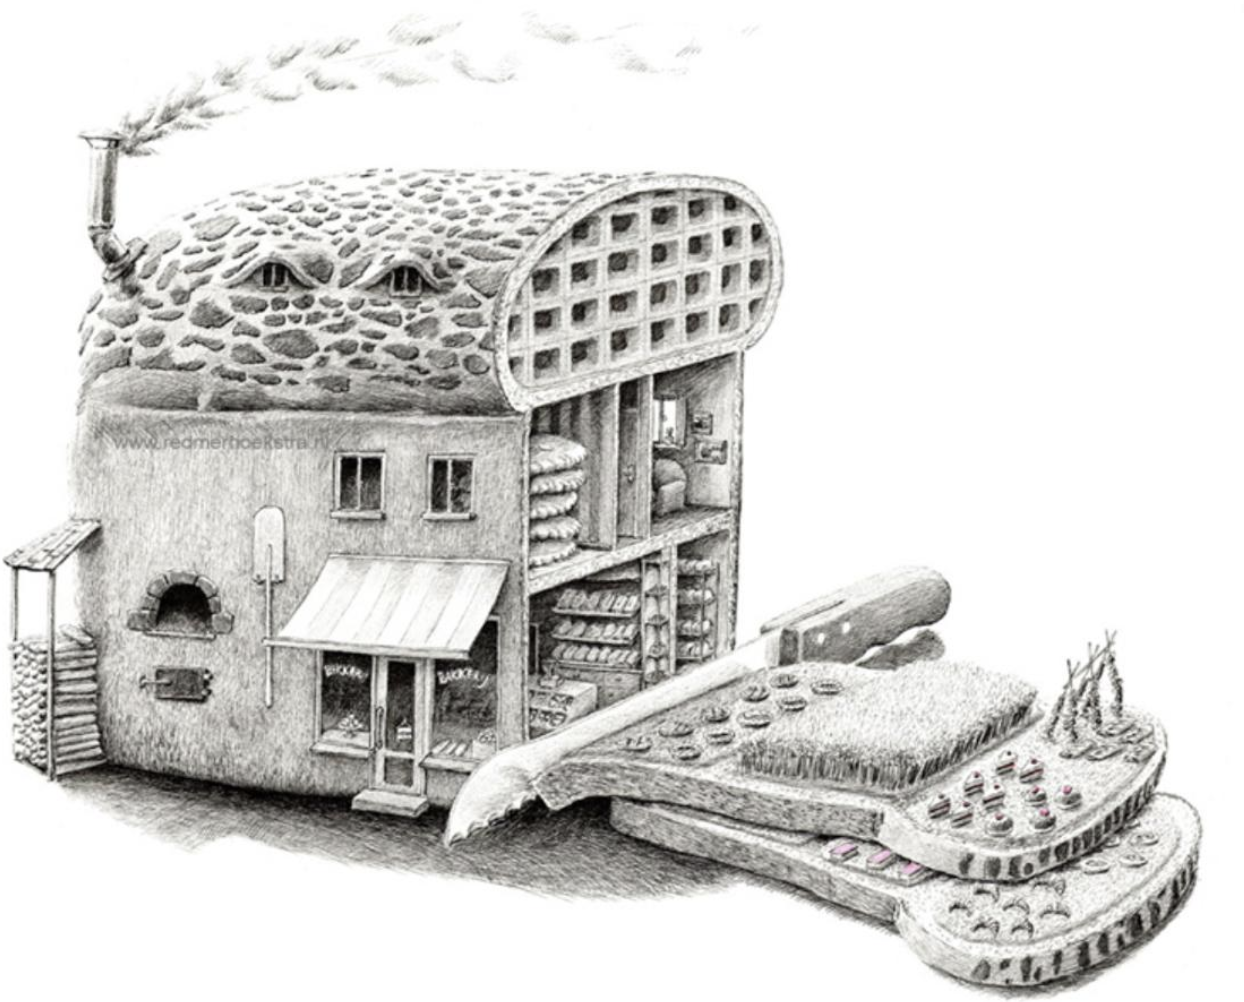
Look at Slide #5, which is of another drawing that combines observation and imagination.

- What everyday object sparked this artist’s imagination?
- What did the artist notice about the object that made them think of creating an imaginary character? What do you see that makes you say that?
- What additional imaginary details did the artist add to further develop their idea?
- How does this imaginary transformation help us think about everyday objects in a new way?
- Which of the imaginary transformations did you find more interesting, the shoe city or the scissor character? Why?
Step 3: Brainstorming Ideas, with Student Slides #7-9 (10-15 minutes)
Slide #7 shows us one way we can approach creating an imaginary transformation of our observed object. Look at the sketches on the slide.
- What step did the artist take to create a tape-measure flower?
- What do you see that makes you say that?
- What would be another way that a tape measure could be combined with a flower?
Now you try. Choose an object that you would like to draw from observation and transform with your imagination. Feel free to select something you drew in previous lessons. Now think about another object or element you would like to combine it with. This could be another object you drew previously or something new. As you work, think about what parts from each object you would like to blend together. Feel free to explore more than one option.
Let’s look at Slide #8 to consider an additional way of playing with observation and imagination.
- How is this approach different from the one we previously explored?
- What steps do you suppose the artist took to create a character inspired by the tape measure?
- Do you think the artist stopped to observe and think about what parts of the tape measure could show facial features? What do you see that makes you say that?
Let’s try it out. Closely observe your object.
- What parts of your object could represent facial features?
To spark your imagination further, take a moment to answer the questions on the right side of the slide. Go ahead and begin drawing your ideas when you are ready.
Look at Slide #9 for more suggestions on getting started.
Step 4: Adding Textures and Details, with Student Slide #10 (10 minutes)
Look at Slide #10.
- What textures and details did the artist add to their work?
- What do you notice about the use of lines and marks in the drawing?
- How do these additions help further describe the personality of the imaginary character?
Select your favorite drawing and think about what more you would like us to learn about your idea.
- How will you use texture, details, and marks to further describe your imaginary transformation?
Step 5: Reflection Questions for Discussion (10 minutes)
- How did you transform your object?
- Which parts did you draw from observation? Which parts did you transform from imagination?
- Different people can draw the same object, but each will see it in a unique way because each one of us is working from our own perspective and experience. How do you think your perspective or experience influenced your drawing and made it unique to you?
Vocabulary
Imaginary
Fantastical
Resources
Redmer Hoekstra. Untitled. 2012: https://mymodernmet.com/redmer-hoekstra-illustrations/
Redmer Hoekstra. Untitled. 2017: https://www.photographize.co/articles/redmer-hoekstra/
More work by Redmer Hoekstra: https://www.thisiscolossal.com/2019/06/redmer-hoekstra-2/