Overview
In this lesson, students will identify an animal, then tear and cut the shapes to create that animal with details.
Materials and Tools
- Scissors
- Three or more sheets of different colored paper—one for background, at least two to cut or tear
- Glue or tape
- Making A Collage Animal video
- Making A Collage Animal student slides

Objectives
Students will understand that:
- Everything we see is made up of lines and shapes
- We can look closely at photographs of animals to identify their shapes
- Artists can get ideas for their work by looking at photographs
- Details and patterns add interest and describe the attributes of a subject
Students will be able to:
- Identify the shapes, details, and patterns of an animal of their choosing
- Demonstrate use of scissors or tearing to create the large shapes, details, and patterns needed to make their animal
- Arrange and glue shapes, details, and patterns to create an animal
Activities
Note: The following steps are written with sample language you may use with your students as you go through the lesson. Explain to students that the slides and the video they see during the lesson will be shared with them so they can review the lesson on their own and continue to make more art.
Step 1: Introduction/Watch Making a Collage Animal Video (15 minutes)
Hello, artists. In our last lesson, we learned how to create patterns with shapes.
- What shapes did you use to create your pattern?
Today we are going to use all our knowledge about collage to create an animal. Watch the Making a Collage Animal video to learn more about the process.
Step 2: Close Looking and Finding Inspiration, with Student Slides #2-6 (10 minutes)
Slide #2 shows a photograph of a butterfly next to a collage inspired by the photograph.
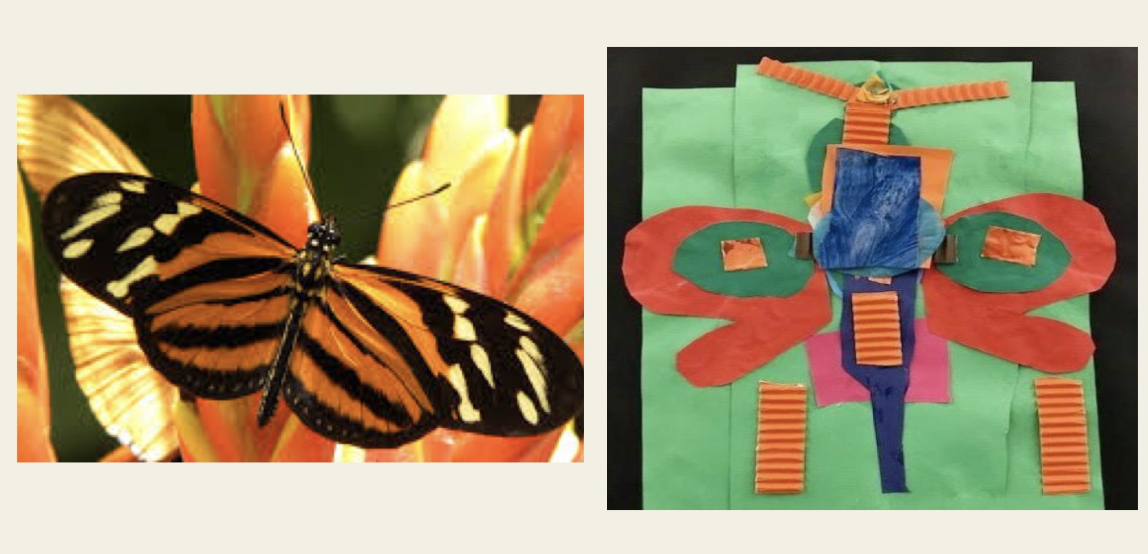
Artists often get ideas, or are inspired by, photographs.
- What ideas did the artist get from the photograph to create their butterfly collage?
- What do you see that makes you say that?
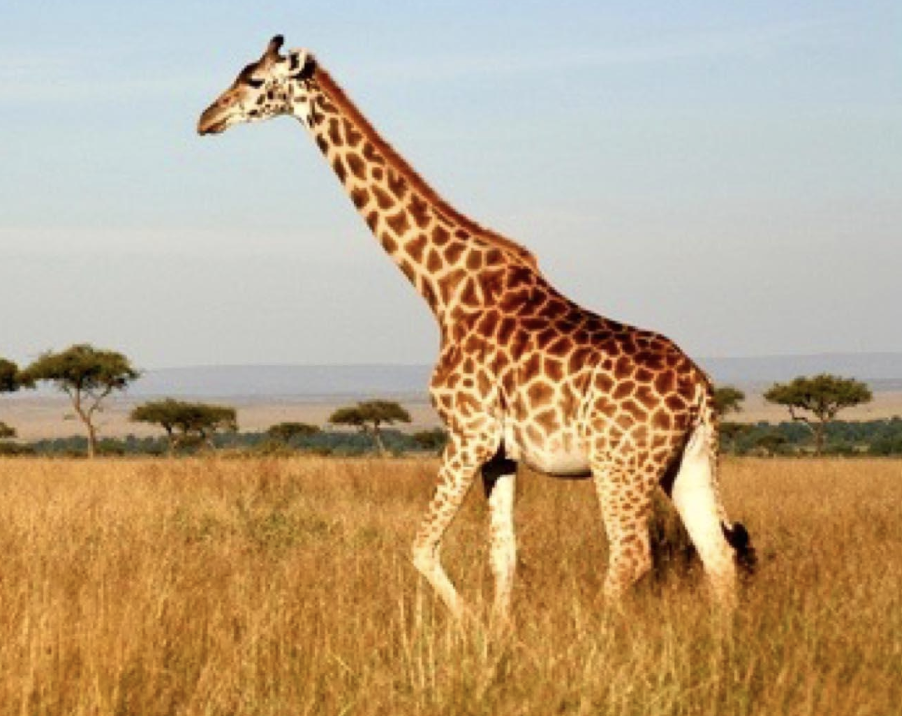
Take a moment to review Slides #3 and 4 to learn how to identify the shapes and special details of a giraffe by looking at a photograph.
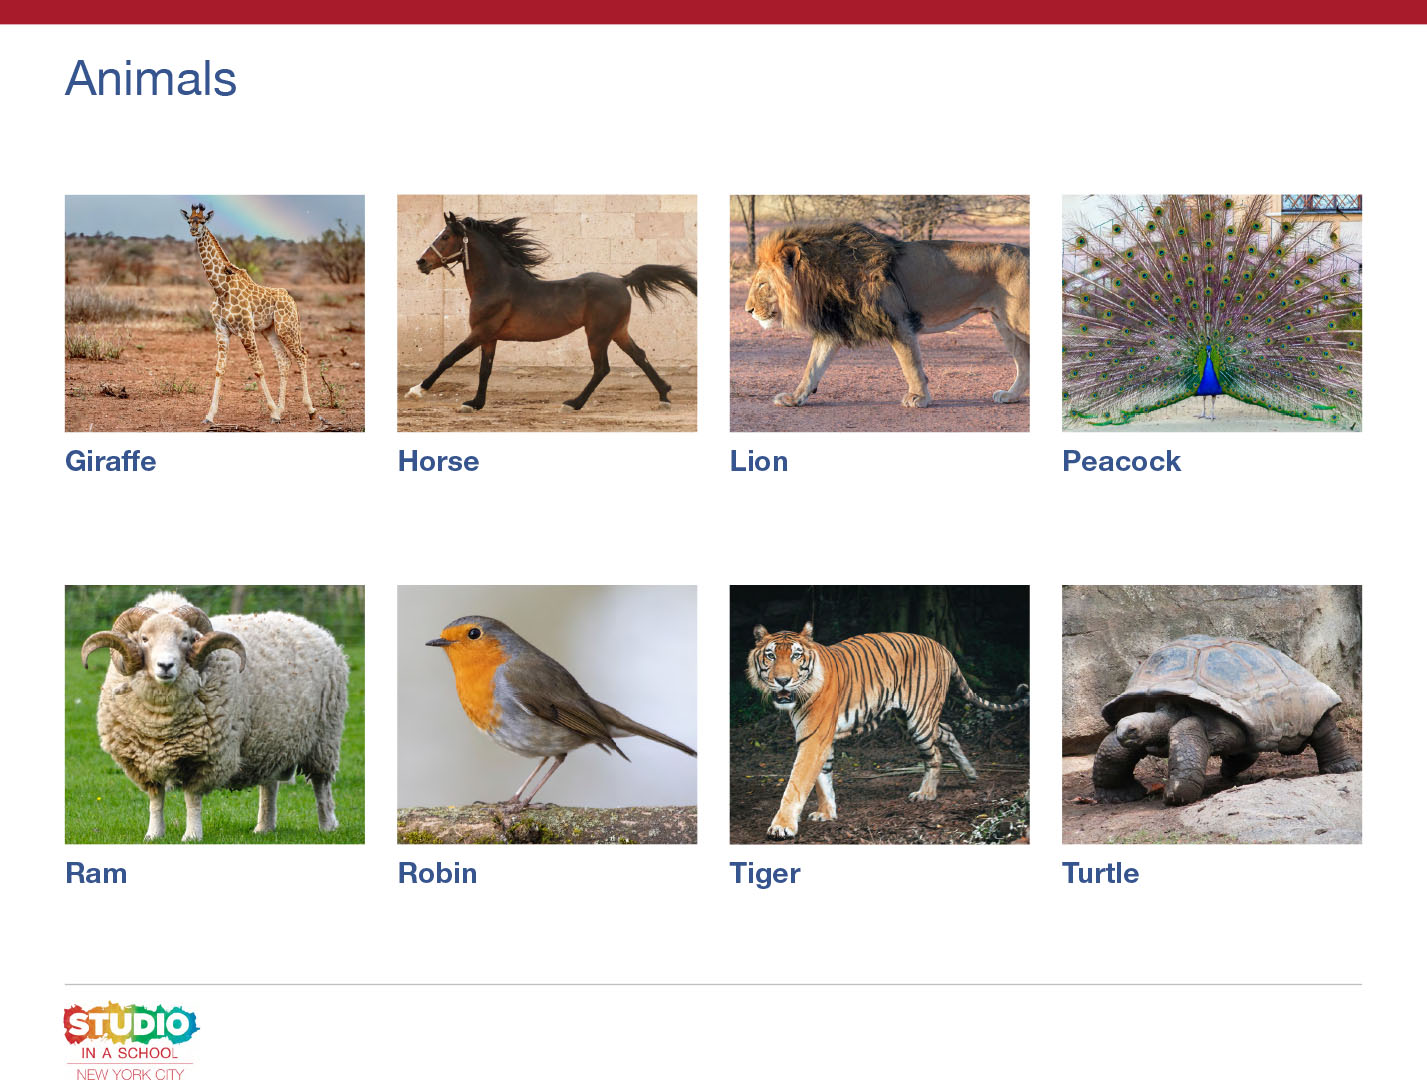
Now it’s your turn to find a photograph to inspire your animal collage. Magazines, books, and the internet are great places to find pictures of animals. Slides #3-6 also have animal photographs that you can use to inspire your work.
If you plan to search for a photo online, be sure to choose one that is large enough that you can see all the details of the animal clearly. You can also create an animal from memory if you are not able to find a photograph.
Step 3: Cutting, Arranging, and Gluing Large Shapes, with Student Slide #9 (15 minutes)
Let’s look at Slide #9 and observe the image on the left.
- What can we learn about cutting the shapes for our animal’s body based on the picture?
- What do you see that makes you say that?
Take a moment to look at your animal photograph and identify the large shapes for the body. Once you are ready, begin cutting your shapes.
Next, it’s time to compose and glue your animal’s body. Notice how the image on the right on Slide #9 shows the way the shapes are arranged to create the final overall shape for the giraffe’s body.
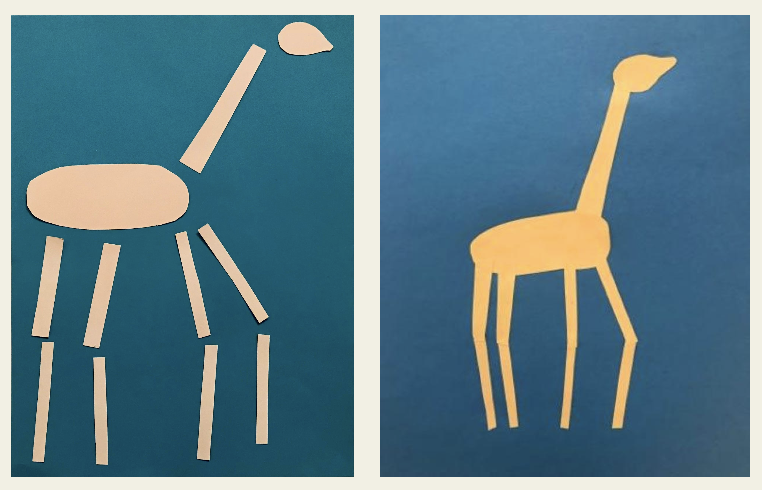
The collage also shows the action or movement of the giraffe.
- How did the artist arrange the shapes for the legs to show that the giraffe is walking?
- How would you change the arrangement of the shapes to show the giraffe bending down to drink water?
Take a few minutes to play with different ways of arranging the shapes for your animal’s body. You may use the list of words below to inspire the action of your animal:
Running
Jumping
Reaching
Bending
Kneeling
Stretching
Once you have found an arrangement for your animal that you are happy with, glue it down.
Step 4: Adding Details and Patterns, with Student Slide #9-10 (15 minutes)
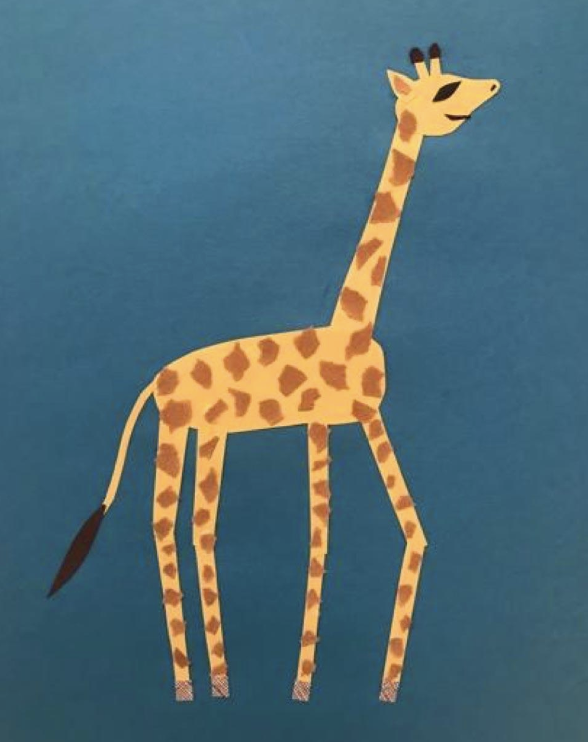
Let’s look at the image on the left on Slide #9.
- What details did the artist add to their giraffe?
- What can we learn about the giraffe from the details?
- How would the collage be different if it didn’t have these details?
Observe your animal photograph.
- What details will you add to your collage to help us learn more about your animal?
Once you have found the details, cut or tear them out and glue them to your animal’s body.
- Does your animal have a pattern?
- What shapes will you cut or tear to create the pattern?
If you need a bit of inspiration, look back at Slide #10 to see how the artist created a pattern for their giraffe.
Step 5: Reflection Questions for Discussion (5-7 minutes)
- What shapes did you use to make your animal?
- What special details did you add?
- Did you add a pattern? What color or shape repeats?
Extension Activity
Add an environment for your animal using torn or cut shapes.
Vocabulary
Pattern
Special details
Resources
Books:
Steve Jenkins. (1997). Biggest, Strongest, Fastest. Clarion Books.
Rambharos Jha. (2012). Waterlife. Tara Books.
Eric Carle & Bill Martin, Jr. (1967). Brown Bear, Brown Bear, What Do You See? Henry Holt and Co.
Eric Carle. (1989). Animals, Animals. Penguin Random House.
Animal Photos:
https://kids.nationalgeographic.com/animals/
Animal Collages:
Lois Ehlert. (2010). Lots of Spots. Beach Lane Books/Simon and Schuster