Overview
Students will observe and identify the lines, shapes and textures of a natural object, and translate these into a drawing.
Materials and Tools
- 1 sheet of white paper, 9 x 12” or 12 x 18”
- An Ebony or regular pencil
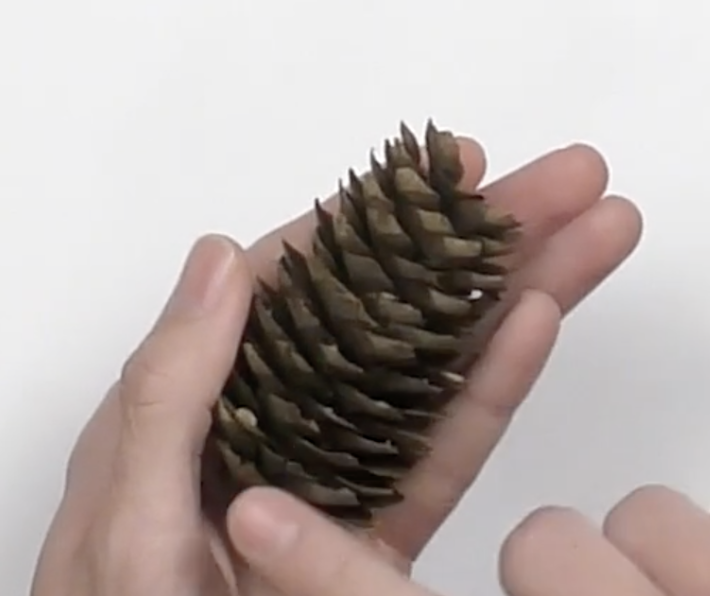
- Natural objects with texture: rocks, leaves, pinecones, bark, wood pieces, seed pods, seashells, etc. OR photos on slides #13 – 20
- Drawing from Observation video
- Drawing from Observation student slides
Objectives
Students will understand that:
- An object can be seen as a larger shape, or edge, made up of smaller shapes.
- The shapes and textures of an object can be translated into lines and marks.
- Close observation helps us see things that we might not otherwise notice.
Students will be able to:
- Look closely to identify the lines, shapes and textures of a natural object.
- Use and combine different lines, shapes and marks to draw a natural object.
- Identify and describe how close observation helps us draw what we see.
Activities
Step 1: Introduction to the lesson, view Drawing from Observation video (10 minutes)
Hello artists! In the last lesson, we looked closely and drew the textures of different natural objects. In this lesson, we are going to draw a whole natural object from observation.
What does the word “observation” mean? What comes to mind when you think about this word?
Observing is looking closely and noticing details. Observation helps us gain information to understand or learn more about something.
Why do you think it’s important for artists to observe things? Let’s find out. View the Drawing from Observation video to learn how an artist uses close observation to draw a natural object.
Step 2: Observing an Object with Our Senses, with student slides #4 – 5 (5 minutes)
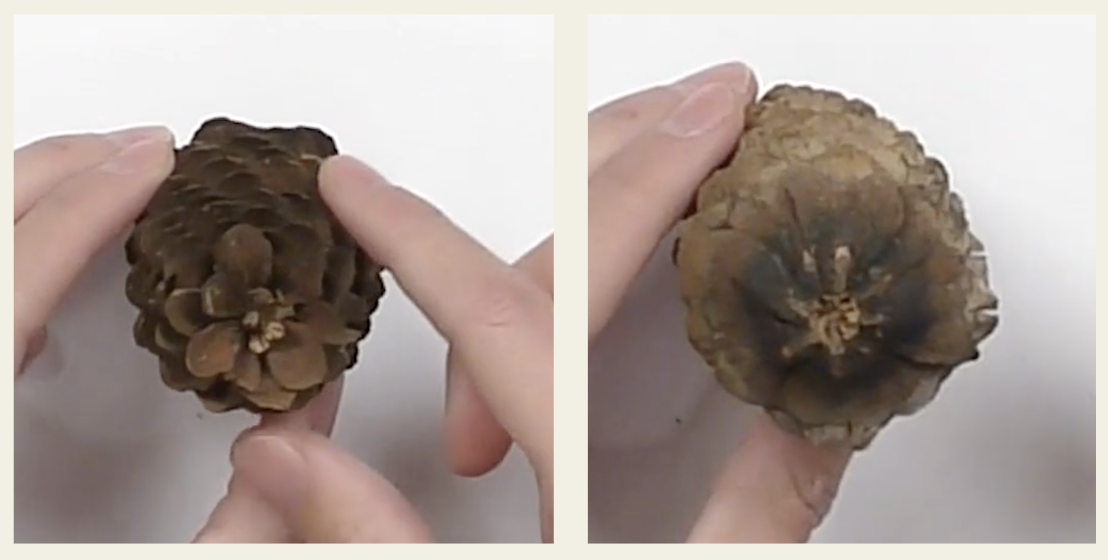
Let’s begin by exploring one of the natural objects from last week with our five senses. (Use objects or the photos on student slides #13 – 20.)
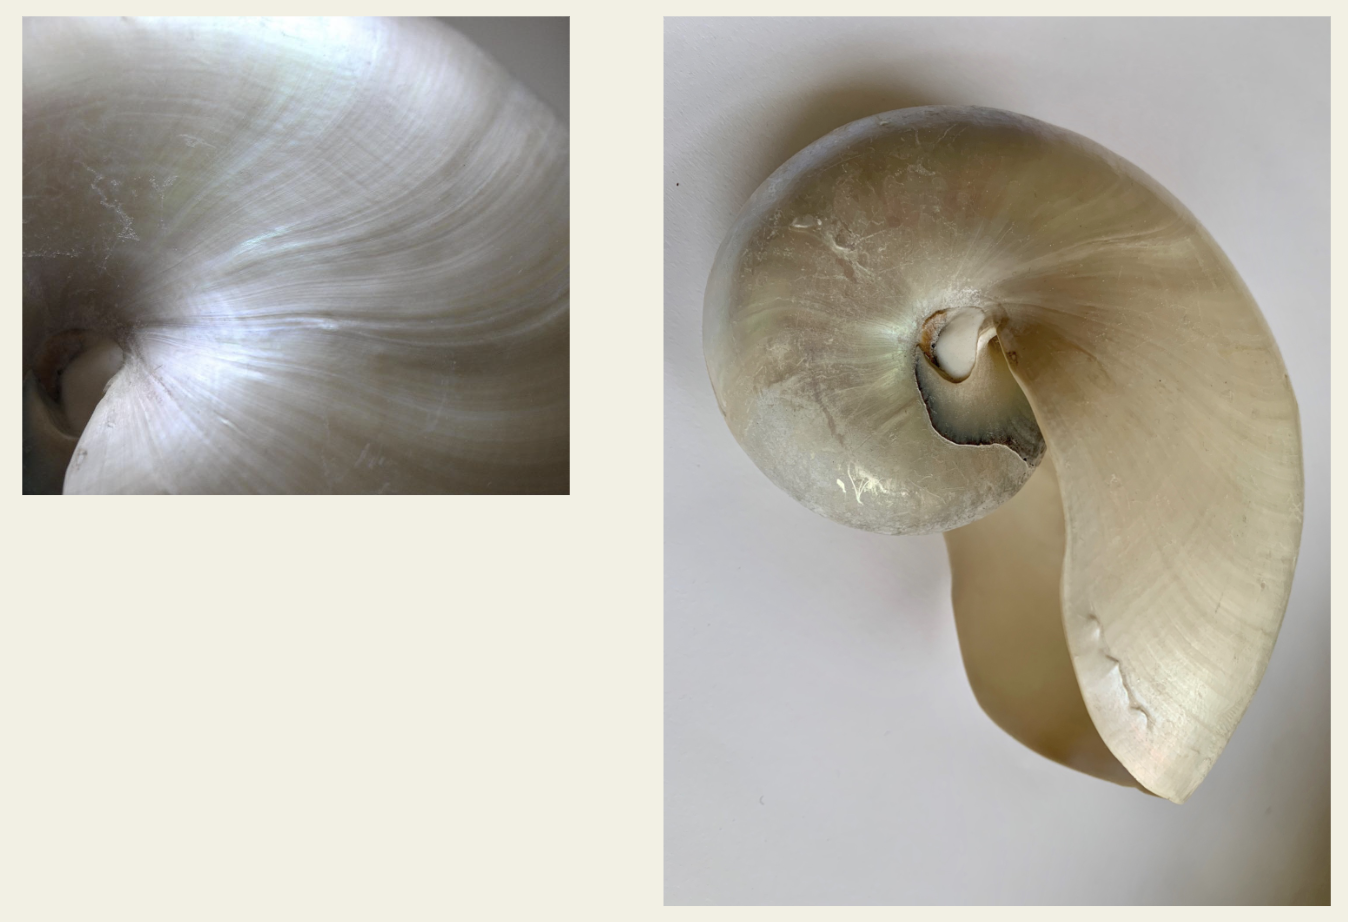
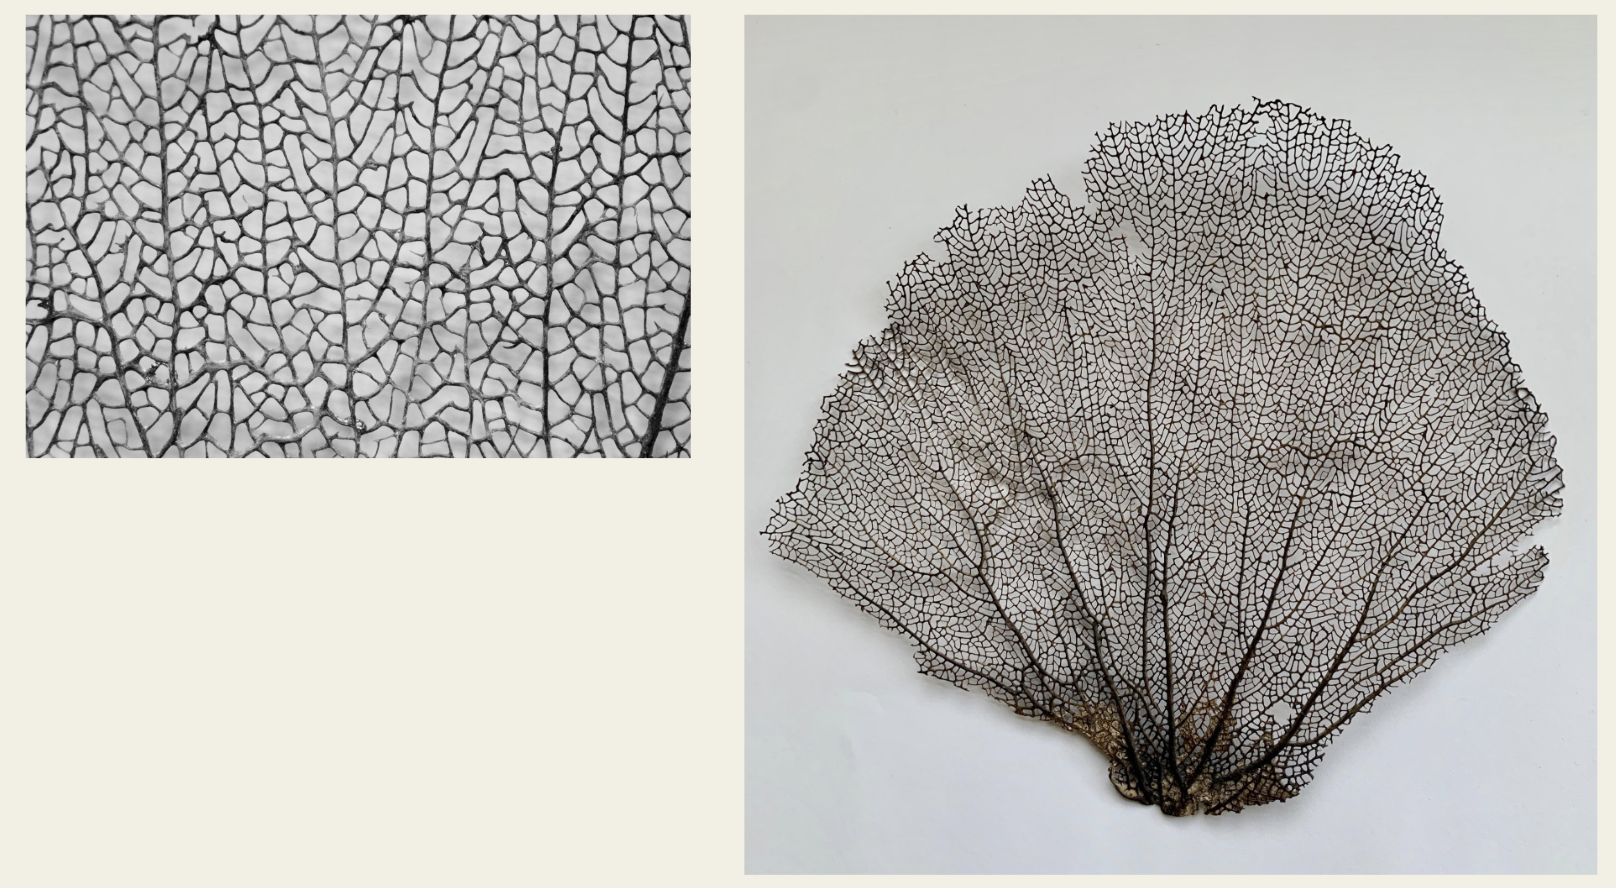
If you have the actual object, start by feeling it with your hands. If you don’t have an actual object, look at one of the images and try to imagine the answers to these questions.
- Have you seen an object like this before? If so, where?
- How does the object feel?
- What texture does it have?
- Is it heavy or light?
- Does it make a sound?
- Does it have a smell?
Now, let’s look closely at the object.
- What is the largest shape of the object?
- Is it made up of different shapes put together?
- Is the object tall or wide? Which parts are larger and which parts are smaller?
- Where do you see lines? What kinds of lines are they?
- What kinds of lines, shapes or patterns show the texture?
- What other details do you notice?
Step 3: Drawing from observation, with student slides #6 – 10 (15 minutes)
Now, let’s get ready to begin your drawing. Put your object in front of you where you can clearly see it. Try positioning your object in a few different ways and choose the most interesting position to draw. What do you think makes one position more interesting than another?
Take out your drawing paper. Think about the following prompts to plan your drawing:
- Do you want your drawing paper to be vertical or horizontal?
- Where on your page will you draw the largest shape of your object?
- How big do you need to draw your object to fill your paper?
Then, trace the shape of the object on your paper with your finger. Make a mark with your pencil where your object will hit the edges of your page.
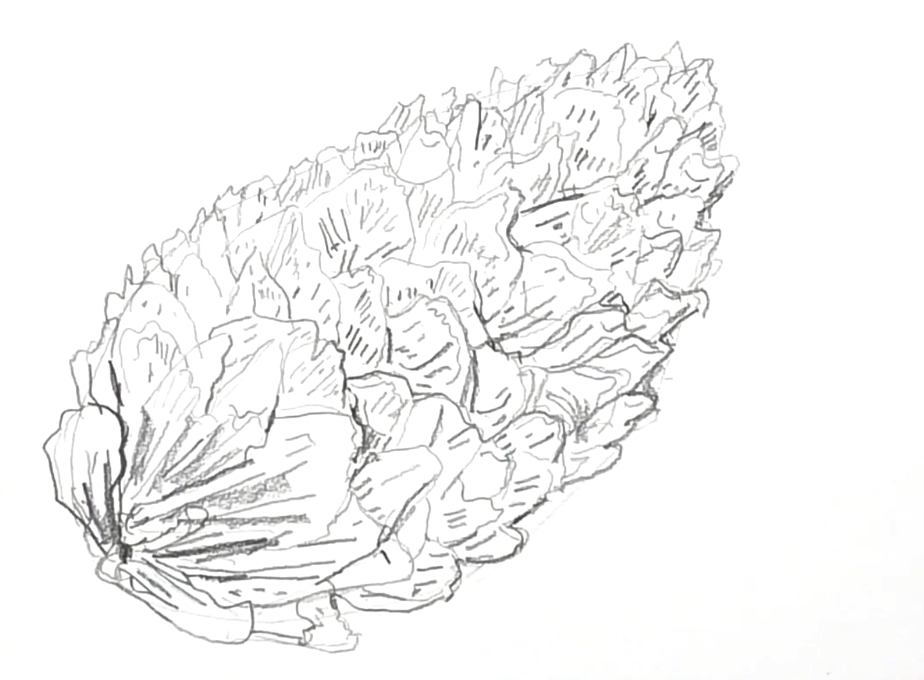
Look at your object and begin drawing the largest shapes that you see. Start by lightly drawing the shapes of your object. What kind of lines make up the edge of the shape? Are they thick or thin?
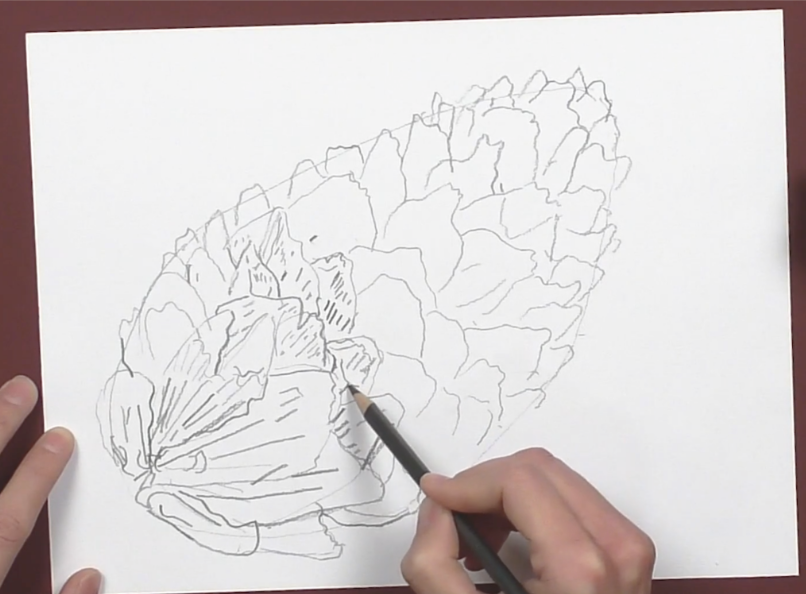
Once you draw the lines that best describe your object, go over these to make them darker. You don’t need to erase anything.
Keep drawing slowly. When artists draw from observation, they spend just as much time looking at the object as they do drawing it on the paper.
After drawing the large shapes of your object, add any smaller shapes.
What details do you notice? Add these to your drawing. Draw the textures that you see.
Remember, every artist draws differently. An artist’s drawing expresses their personal way of seeing, and it will always look different from the object itself.
Step 4: Reflection Questions for Discussion (10 minutes)
Questions for Individual Artists
- What shapes did you notice in your object?
- What lines did you notice?
- What details did you draw?
- What textures did you draw?
Questions for Whole Group
Compare/contrast to share how different artists draw the same object differently:
- How did each artist choose to draw their object on the paper?
- What shapes did each artist use to draw their object?
- How did each artist show the visual texture of the object?
- What details did they add?
Vocabulary
Observation
Resources
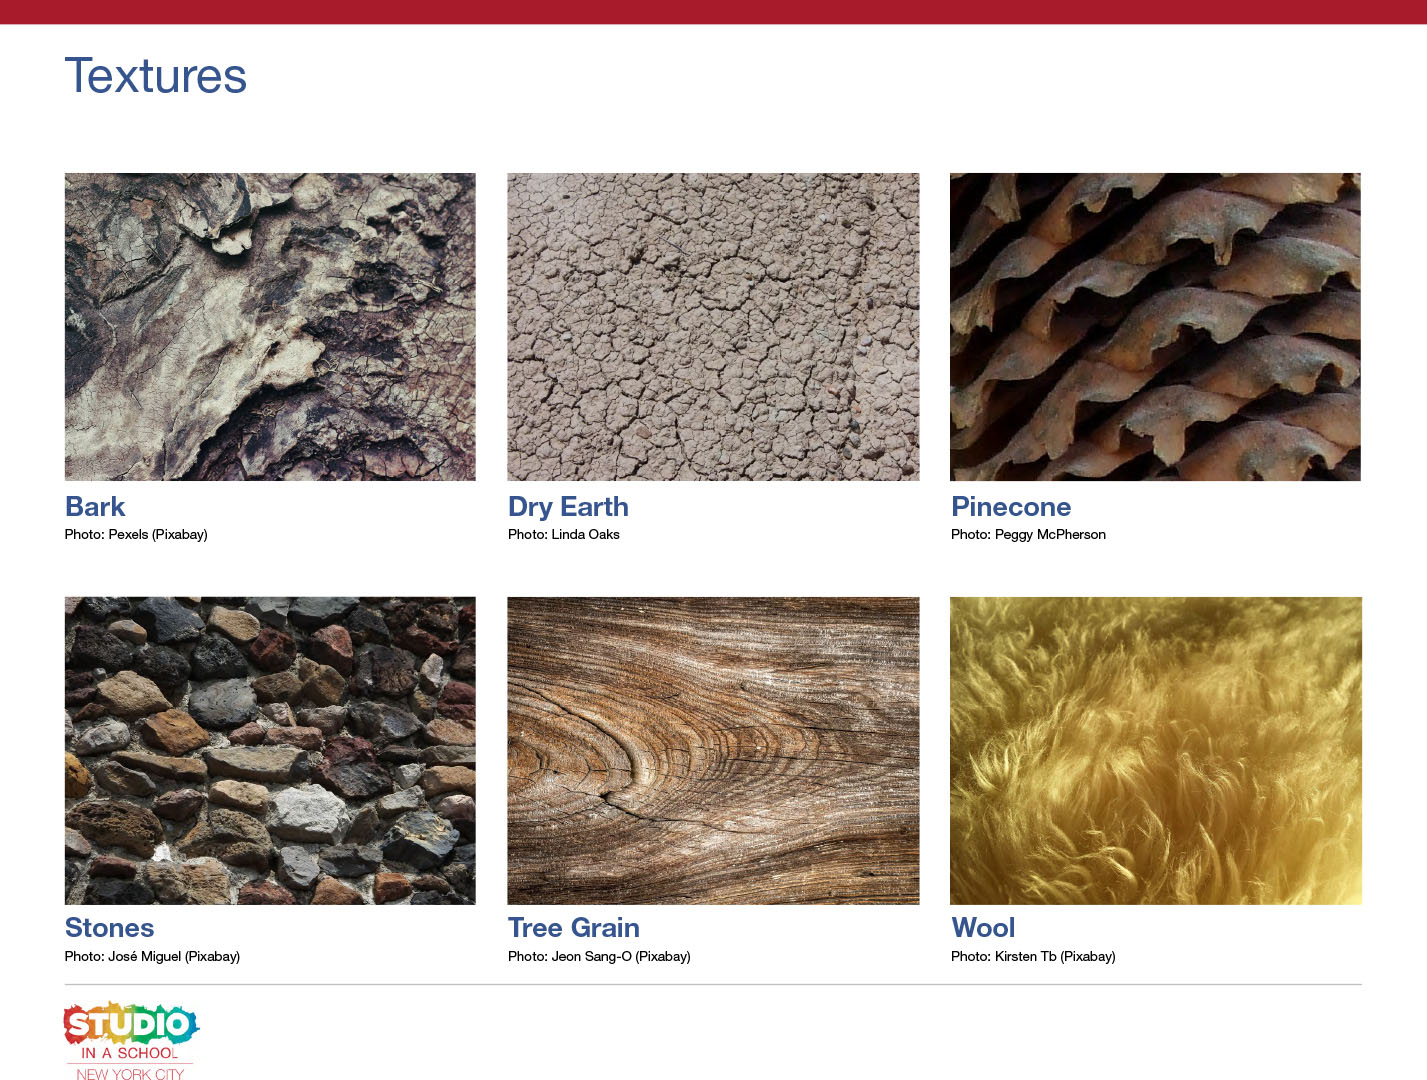

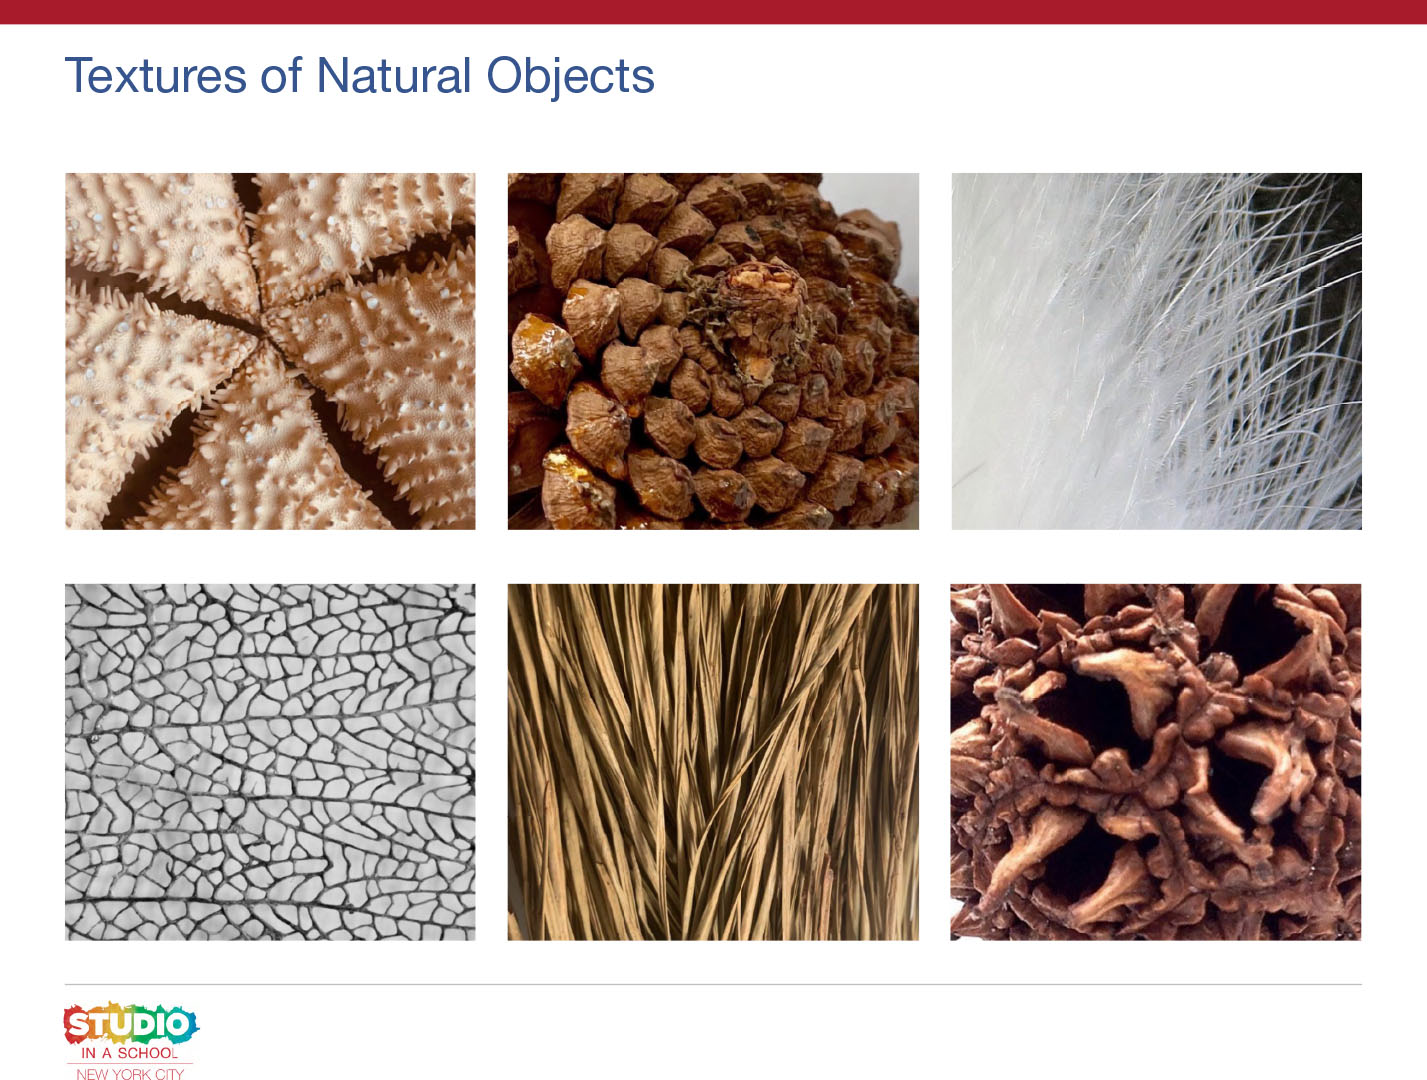
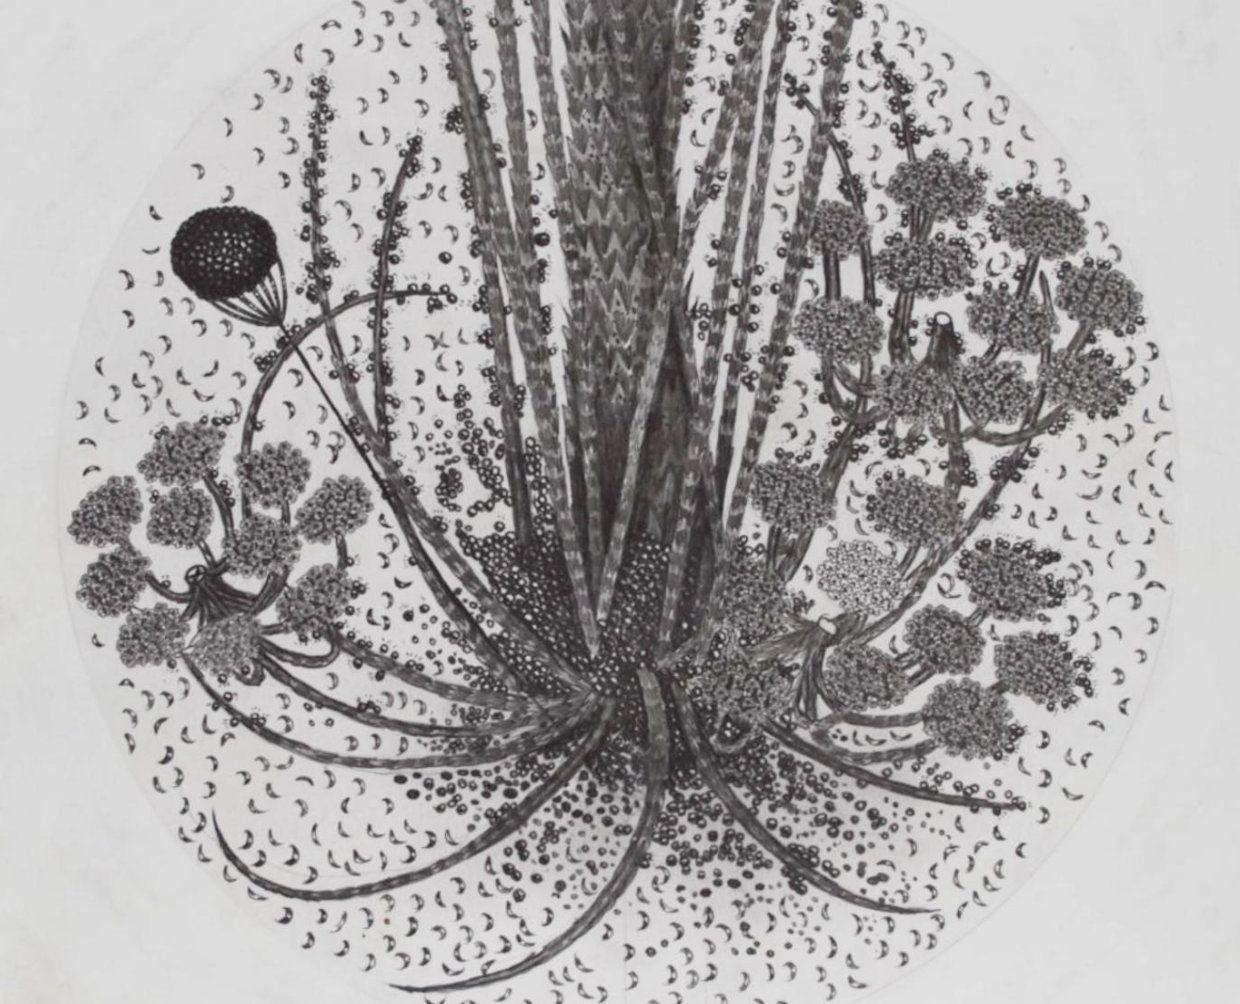
Examples of Textures of Natural Objects
Hipkiss. Bulwark (detail) from The Towers. 2017, Graphite, silver ink, silver tape, and metal leaf on Fabriano 4 paper, 89 x 16 in. each
Hipkiss,The Towers: Imaginary plants made from combined weeds
Resource: The Drawing Center book with artist’s statement on The Towers
Adaptations
For Multilingual Learners
- Explore objects with the 5 senses, pairing vocabulary with experience.
- Have students who want to draw the same object sit in a group and share their observations about the object with the group before drawing.
- Connect to prior knowledge—ask students to share if they’ve seen natural objects like these before and what they know about them.
Extensions
Explore Observation Through Touch
Place objects in individual paper bags and have students reach inside to feel them. Have students describe the shapes and textures that they feel before seeing the object.
Draw Your Natural Object Using Different Drawing Tools
Try drawing your natural object with different kinds of drawing tools: pens, markers, crayons or oil pastels. Use watercolor and a paintbrush to paint your object. How do the different materials change your drawing?
Explore the Expressive Qualities of Fruits and Vegetables
Observe and draw the shapes, lines and textures of different fruits and vegetables.
The Plants Around Us: Art and Science Lesson
Learn about plants, and drawing plants, from observation using contour lines: https://www.educationworld.com/a_lesson/plants-science-and-art.shtml