Overview
Students will create new letter forms and continue to experiment with arrangement to convey meaning.
Materials and Tools
- Cut-out letters from Lesson 3
- Scissors
- Two solid-colored pieces of paper for background
- Papers found in the home: newspaper, magazines, mail, bags, packing material
- Tape
- Glue
- Arrangement and Meaning video
- Arrangement and Meaning student slides
Objectives
- Students will learn about and implement the elements of art and principles of design
- Students will build problem-solving skills through experimentation with composition
- Students will understand that they can express aspects of themselves through their artistic choices
Students will understand that:
- Visual elements of a work of art express ideas
- Color, shape, texture, and line are foundational to design
- An artist conveys personal meaning in a self-portrait
Students will be able to:
- Explore a new design possibility by using their previously made letter template
- Use the elements and principles of design to create a visually dynamic and meaningful composition
Activities
Note: The following steps are written with sample language you may use with your students as you go through the lesson. Explain to students that the slides and the video they see during the lesson will be shared with them so they can review the lesson on their own and continue to make more art.
Step 1: Introduction, Watch Arrangement and Meaning Video (10 minutes), Close Looking, with Student Slide #2 (10 minutes)
In the last lesson we explored how typography, or letter design, can be used to create meaning in a work of art. You have also learned how paper choice, shape, and arrangement are integral in creating a thoughtful design. Today we will begin to analyze these concepts in relationship to each other.
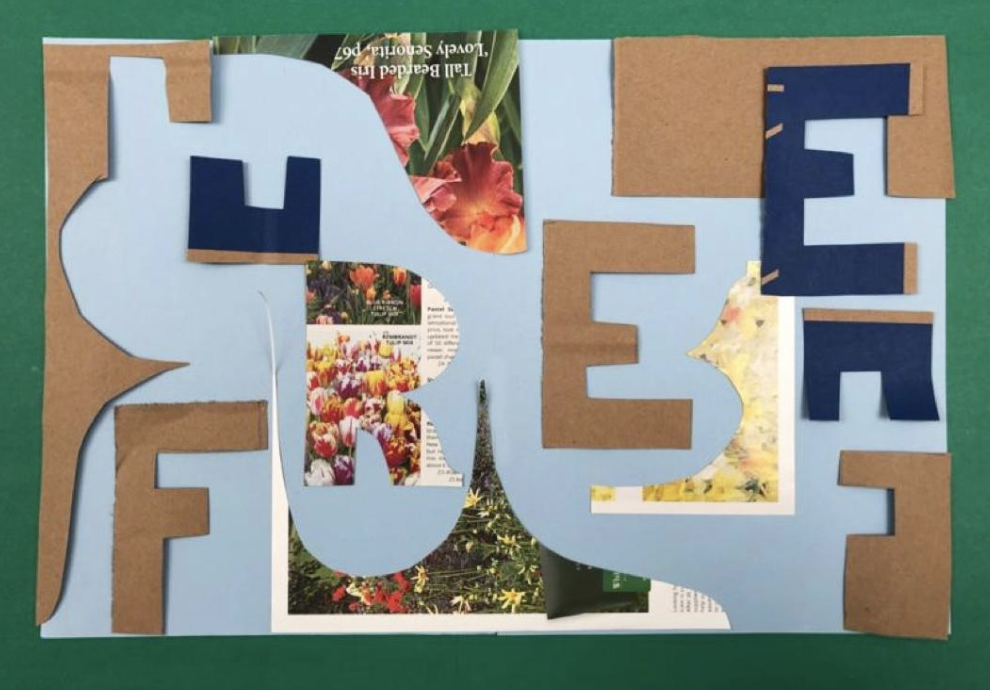
Look at Slide #2. Observe the two pieces describing the word free. Based on your previous design work, think about how the letter design, paper choice, and arrangement in each collage help us think differently about the word.
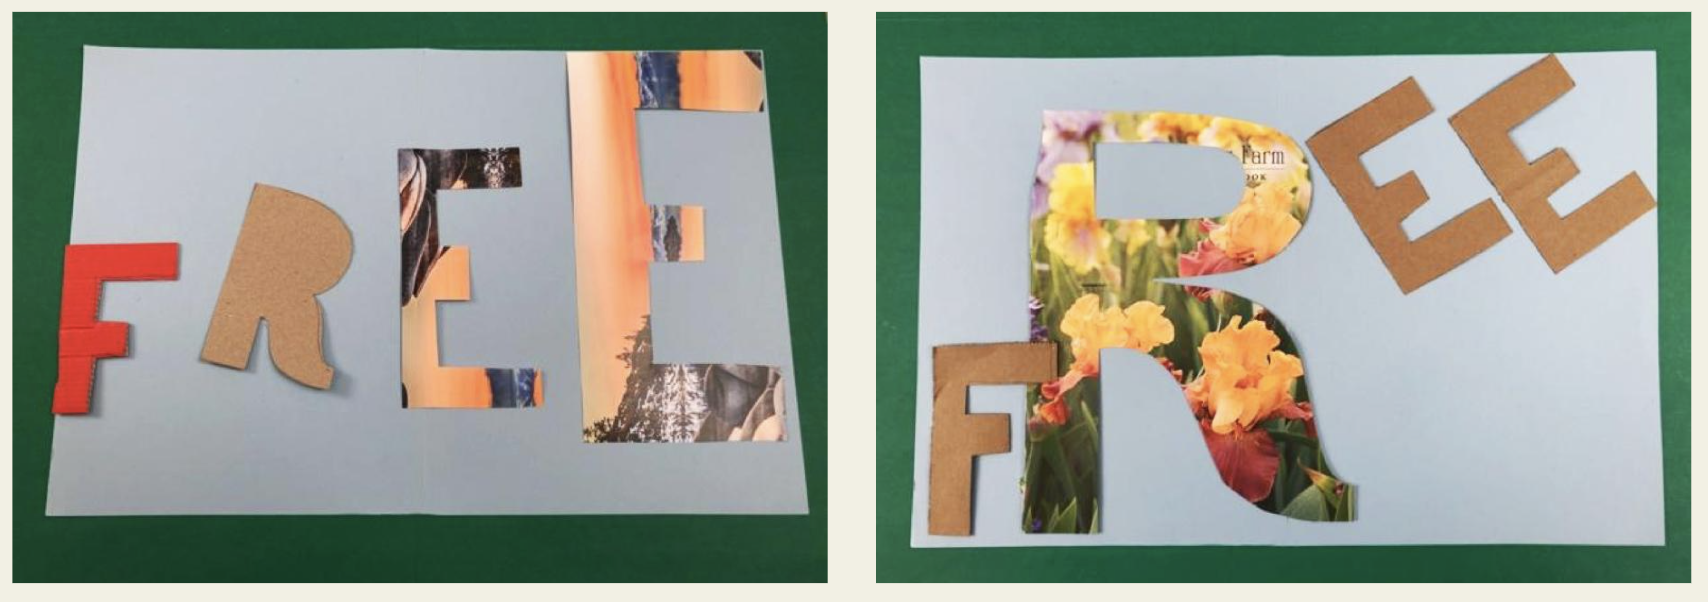
- Which design do you think best illustrates the feeling of being free? What do you see that makes you say that?
Step 2: Making and Arranging New Letters with Found Paper, with Student Slides #3-5 (15 minutes)
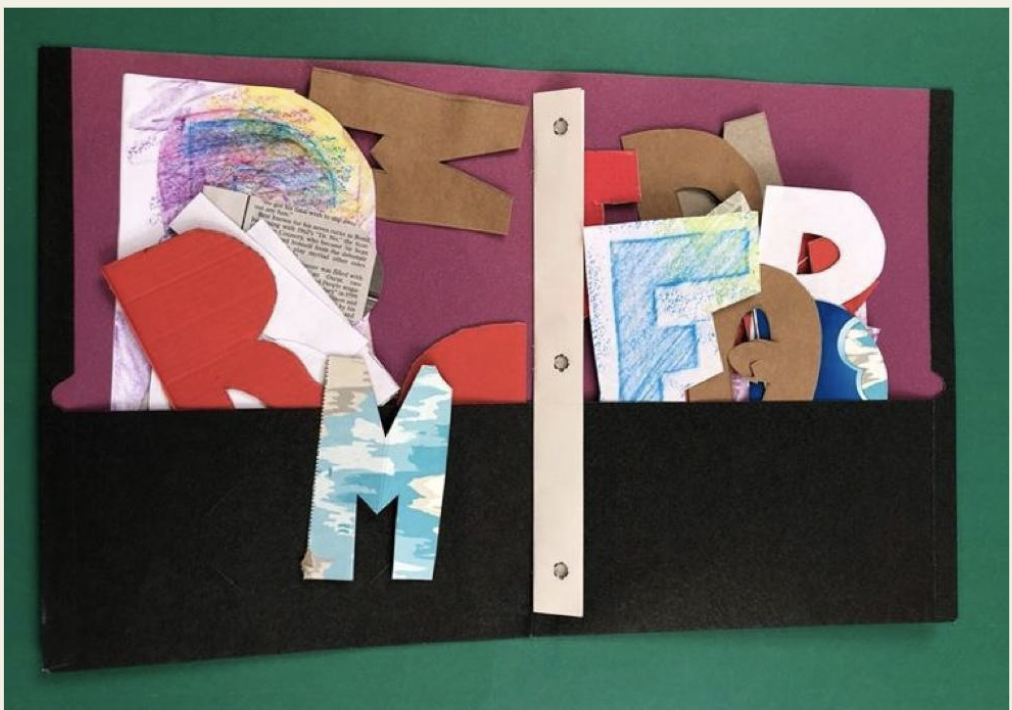
Look at Slide #3 to prepare your materials for today’s activity. Be sure to have your letter templates on hand from the last lesson. You will be working with them shortly.
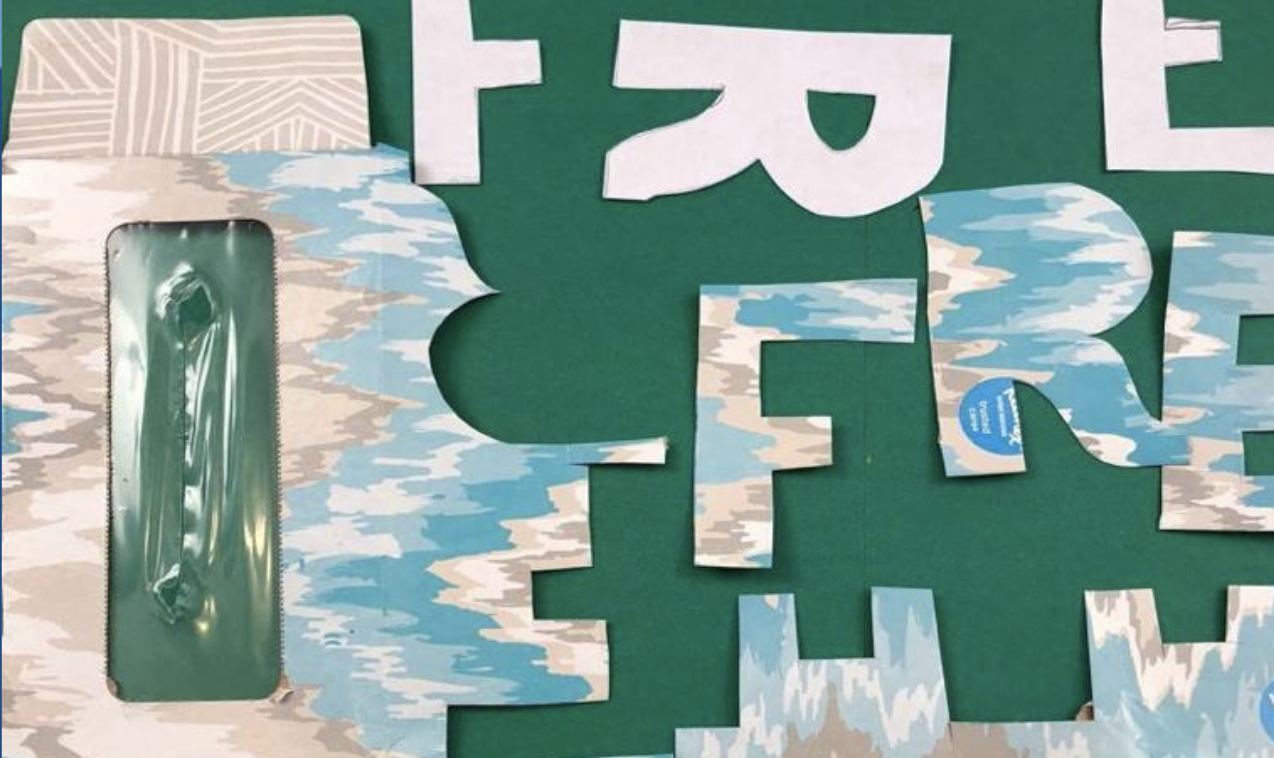
Observe the image in Slide #4.
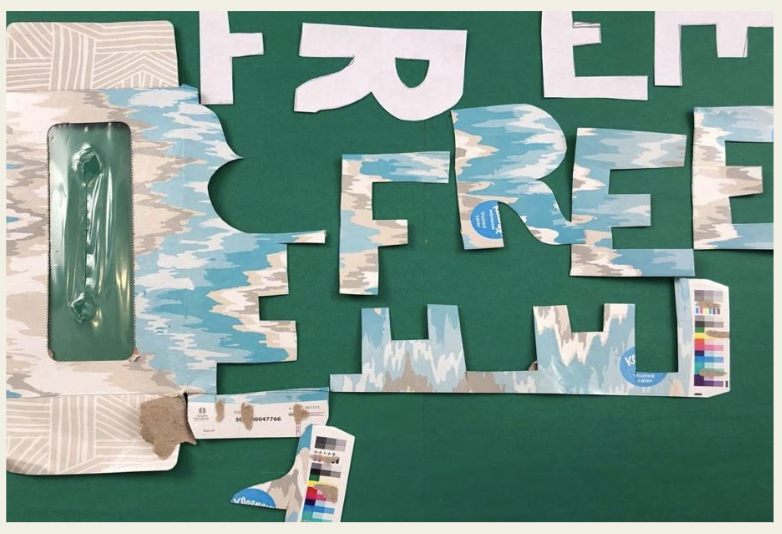
- What material did the artist use to create new letters? Does the pattern and color on the tissue box resonate with the word free? Why?
Take a moment to look closely at your collected papers. Think about the story that the patterns and colors of each paper create.
- Which pieces do you think best describe the meaning or mood of the word you worked with last time?
Read Slide #4 to help you with the process of using your previously created templates to cut new letters from your selected found papers.
Now that you have cut new letters, you will begin thinking about arrangement. Slide #5 has an example of how letter arrangement supports multiple interpretations of the word free. Read and answer the questions on the slide to inspire your thinking.
Be sure to tape two pieces of paper to make a large working surface. This will allow you to try many different arrangements.
Step 3: Making Letters of Different Sizes, with Student Slide #6 and Review of Slide #2 (15 minutes)
Size is also an important element in creating meaning in a work of art.
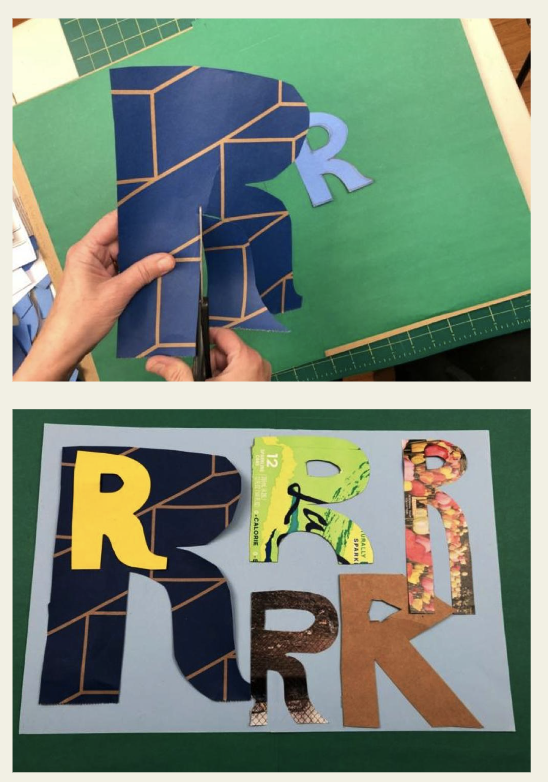
Turn back to Slide #2. Observe the design on the left.
- How do the letters change size from left to right? What does the change in size communicate about the word free?
- Imagine if the letters were changing in size from large to small instead of small to large. Would the meaning of the word change or stay the same? Why?
Now observe the design on the right.
- What does the exaggerated size of the letter R convey?
- Imagine if the letter R was the smallest one in the design?
- How does the meaning of the word change?
Now take a moment to think about your chosen word.
- What letter(s) are you interested in making bigger or smaller?
- What will this change communicate?
Turn to Slide #6 to guide you through the process of making letters of different sizes.
Step 4: Gluing Down Design, with Student Slide #7 (10 minutes)
Explore creating new arrangements with your letters of different sizes. As suggested by Slide #7, document all your arrangements with photos or sketches.
Review your documentation and select the arrangement that you feel best represents the meaning of your word. Glue down your design.
Step 5: Reflection Questions for Discussion (5-7 minutes)
- Which of your choices had the most impact?
- How did your choice of scale, color, pattern, or image affect the meaning of your word?
Close Looking
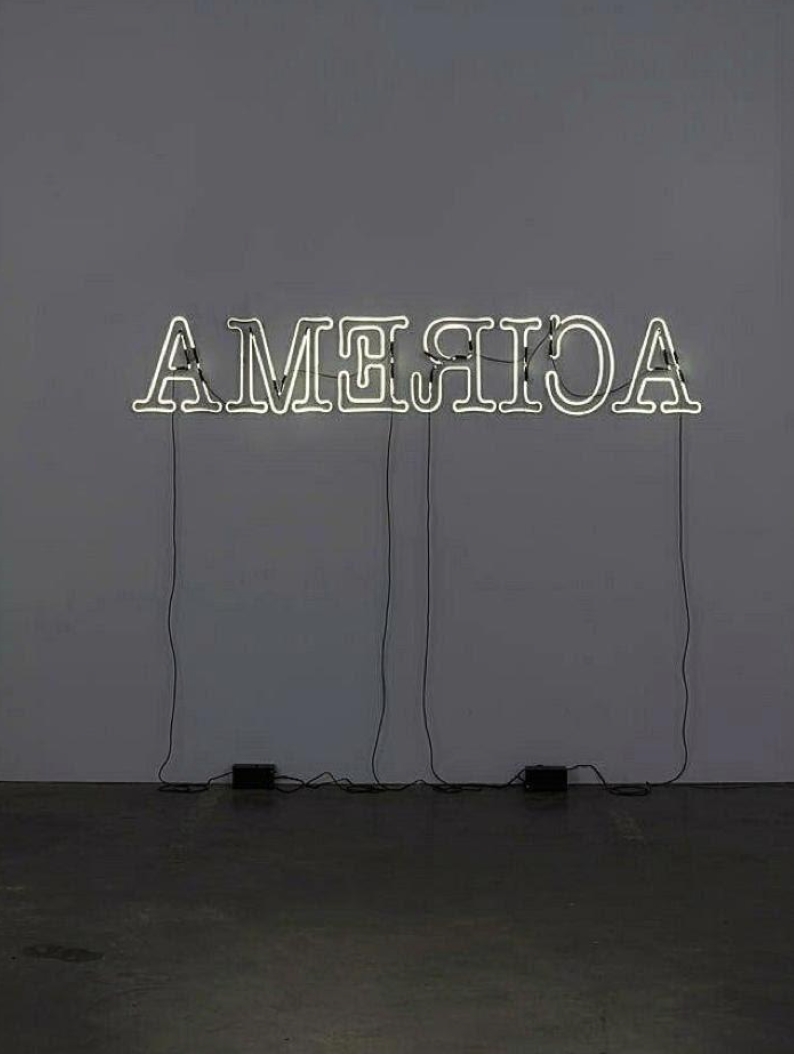
Take a close look at this artwork by Glenn Ligon.
- What do you notice?
- How did he arrange the letters in the word AMERICA?
- What possible meanings does this arrangement convey?
Teaching Extension for Lesson 5
Students can make a collage using only the negative, or scrap, shapes.
Vocabulary
Design
Arrangement
Composition
Template
Scale