Overview
We will create relief tiles and use our hands and clay tools to add texture and pattern. Students will be able to roll or press a clay slab, then use hands and tools to make textures in the clay.
Materials
- Clay
- Clay tools
- Plastic rolling pin (optional)
- Square cardboard template (optional)
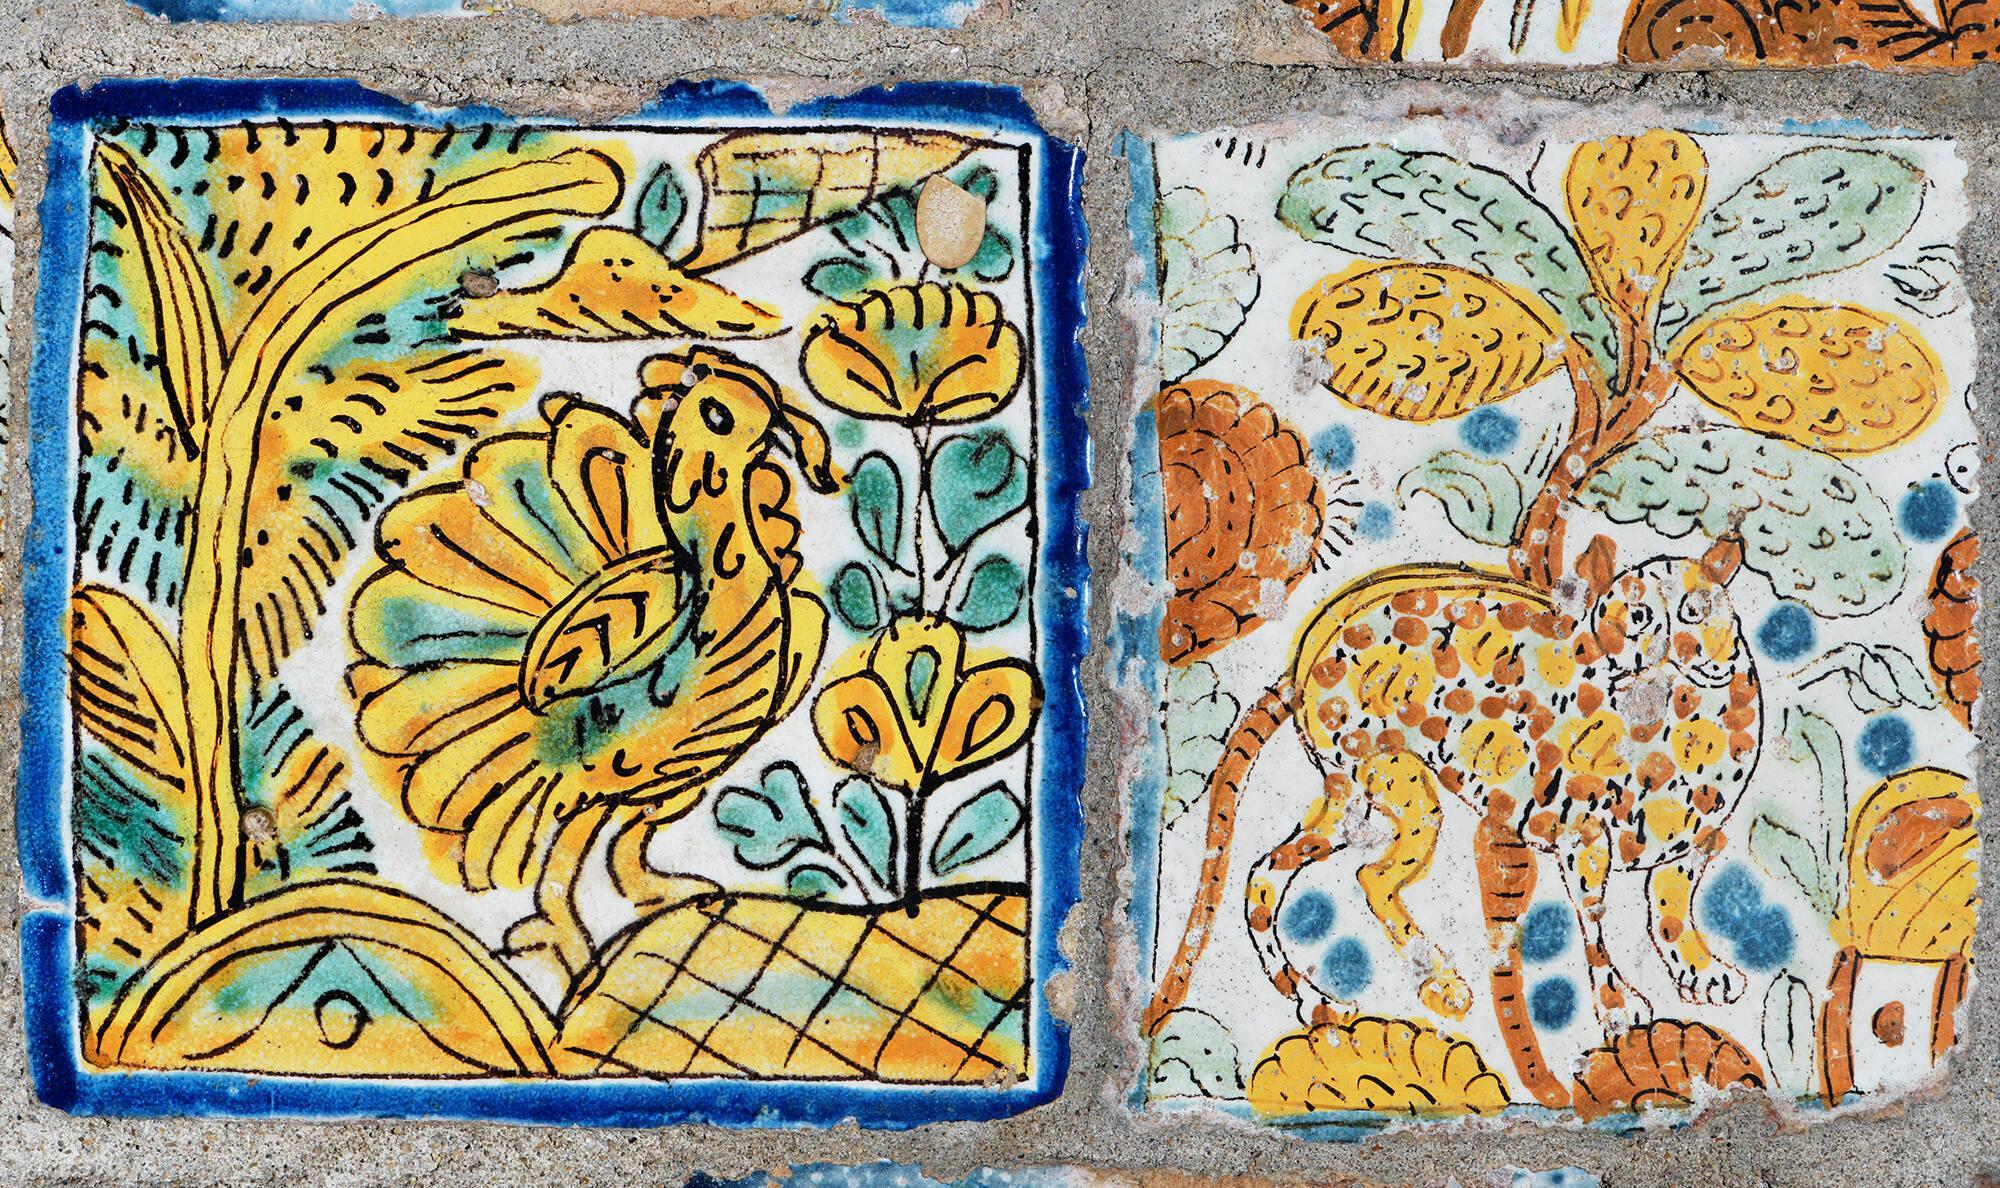
- Resource: clay relief tiles from Mexico
Activities
Step 1
Introduce clay. Describe where it comes from and how people use it.
Step 2
Demonstrate pressing or rolling and cutting clay to make a tile. What is texture? How can we change the texture of the tile? Ask students for input and demonstrate how to poke, press, and pinch. Demonstrate using tools to press hard or softly, drag, poke, or press the whole flat tool into the clay. Feel and name the different textures with students. To make texture in clay, we must repeat the same action over and over to change the surface.
Step 3
Have students roll tiles. Have students explore making textures using their hands and tools.
Reflection
- Can you describe one texture you created on your clay tile and how you made it?
- Did you prefer using your hands or clay tools to create textures? Why?
Sketchbook Prompt (Optional):
Work in sketchbooks to make additional drawings of imaginary pets.
Vocabulary
Clay, relief, tile
Resources