Overview
Students will explore how to make their sculptures stand up. Students will deepen their understanding of what three-dimensional means: a student will be able to view a work of art from all sides.
Grade Level
Kindergarten
Media
Clay
Essential Question
How can I make a standing sculpture using clay?
Materials
- Fist-sized pieces of clay
- Additional clay (for students who request more as they work)
- Cardboard square base
- Wire clay cutter
- Canvas or other covering to lay on the floor during engagement
- Plastic scraper for clean up
- Table covers (optional)
Activities
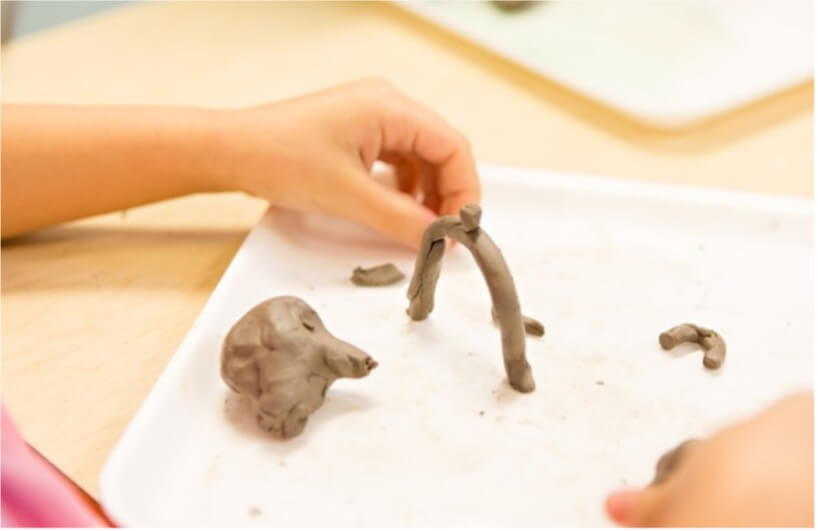
Step 1: Invitation to Explore
- What did we make last week?
- Let’s make four different pieces of clay using four different ways of changing clay. Invite one student at a time to change a piece of clay into a sphere, coil, cube, cylinder, or a flattened piece.
- Lay out the four pieces so that all students can see them.
- Let’s try to put these pieces together and make the clay stand up! Invite one student at a time to put the pieces together, using the square of cardboard as a base, so that the pieces stand up when all of the pieces are put together.
- Pick up the sculpture and turn it around so students can see all four sides.
- What do you notice?
- Let’s create sculptures that stand up and are three-dimensional.
Step 2: Work-time
- Encourage students to create shapes or forms with their clay.
- Encourage students to make their clay pieces stand up.
- Circulate the classroom. Notice how students use their hands and arrange their clay forms.
- Choose and set aside two different sculptures. Place them on cardboard bases and bring them to the meeting area for reflection. Tell students that at the end of reflection the two pieces you have chosen will be returned to the clay container. Ask all of the other students to collapse and return their chunks of clay.
Step 3: Reflection
- Hold up the two sculptures and then rotate them. Place them in a central area so that all of the students can see them.
- What do you notice that is the same about these sculptures?
- What do you notice is different about these sculptures?
Tips
- Since you are not saving sculptures, you can photograph them.
- If time permits, students can draw their sculptures.
Vocabulary
Clay, sculpture, three-dimensional, base, tool, roll, pinch, pull, poke, twist, fold, squeeze, sphere, coil, pyramid, cube, arrange, rearrange, stack, on top of, next to