Overview
Students will translate the textures of natural objects into marks, lines and patterns.
Materials and Tools
- 2 sheets of white paper, 9 x 12” or 12 x 18”
- An Ebony or regular pencil
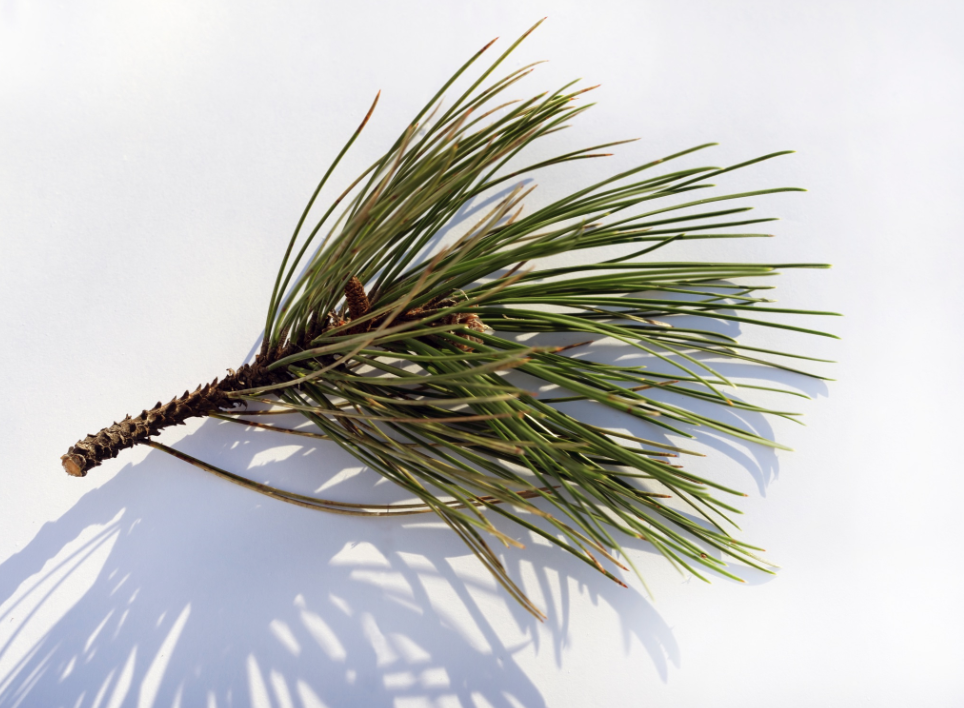
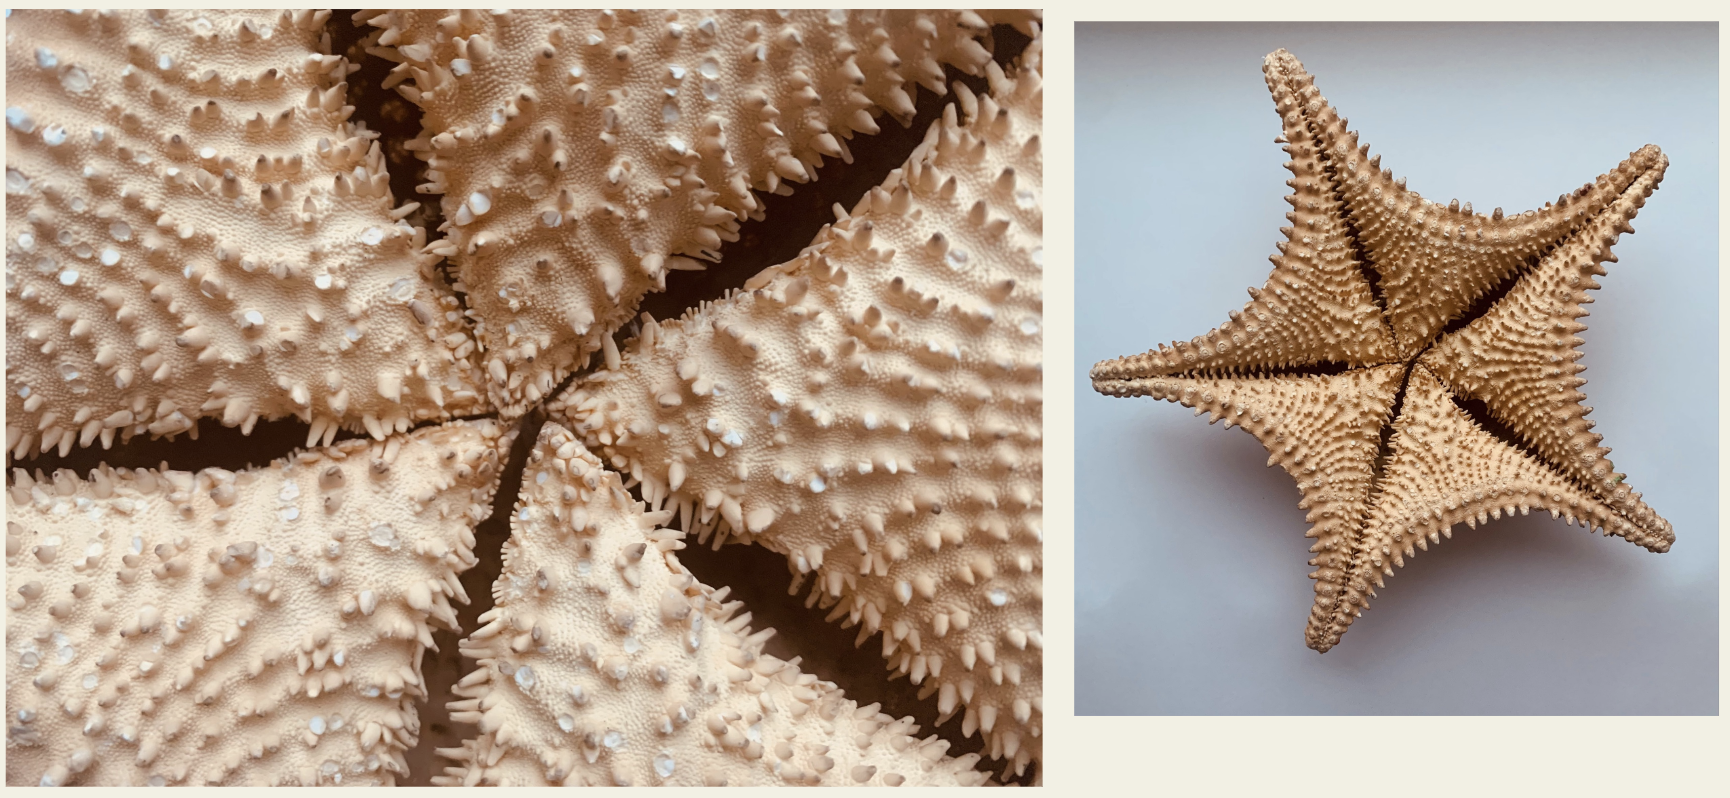
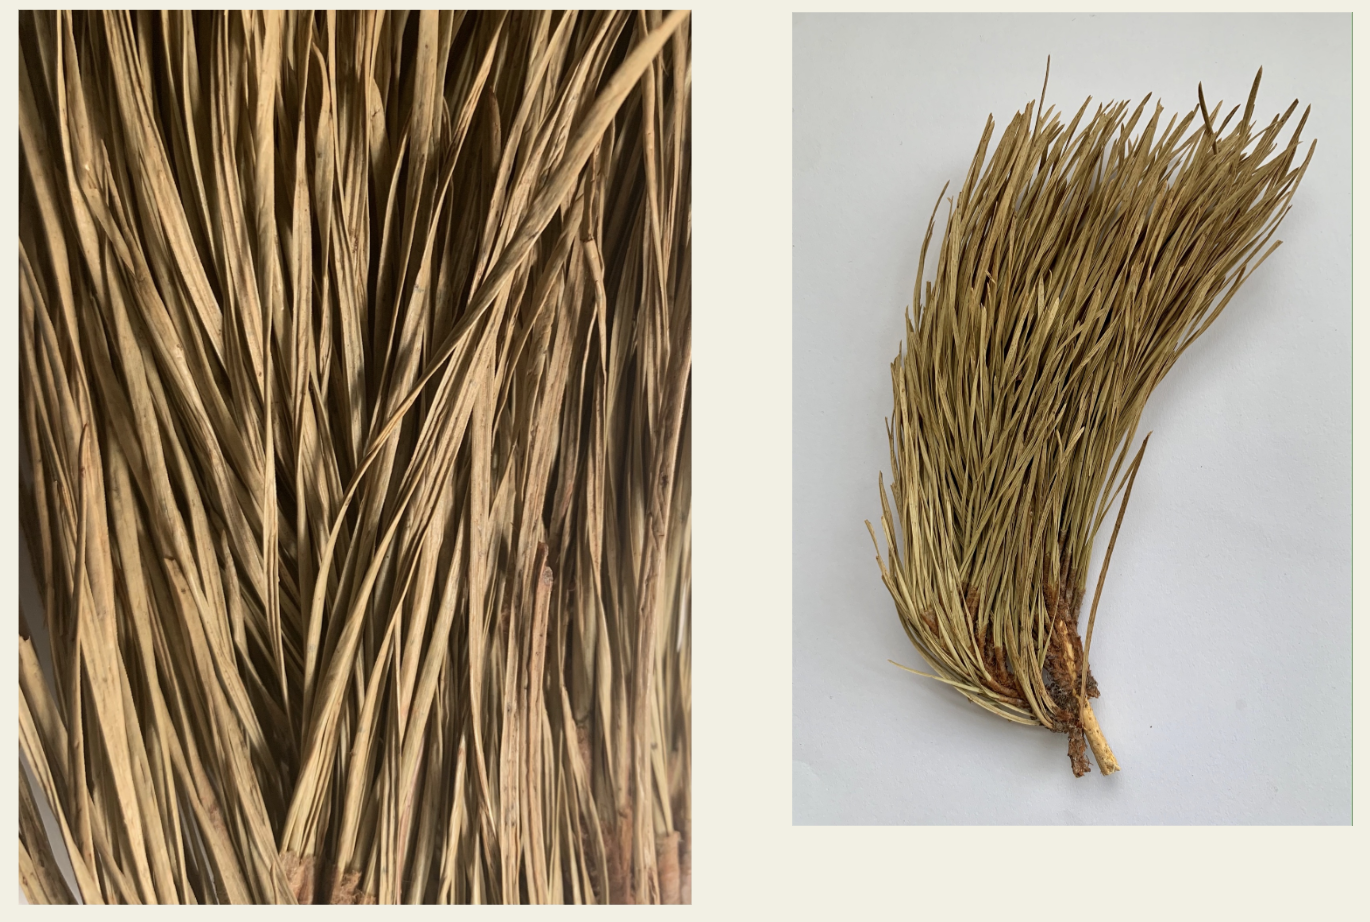
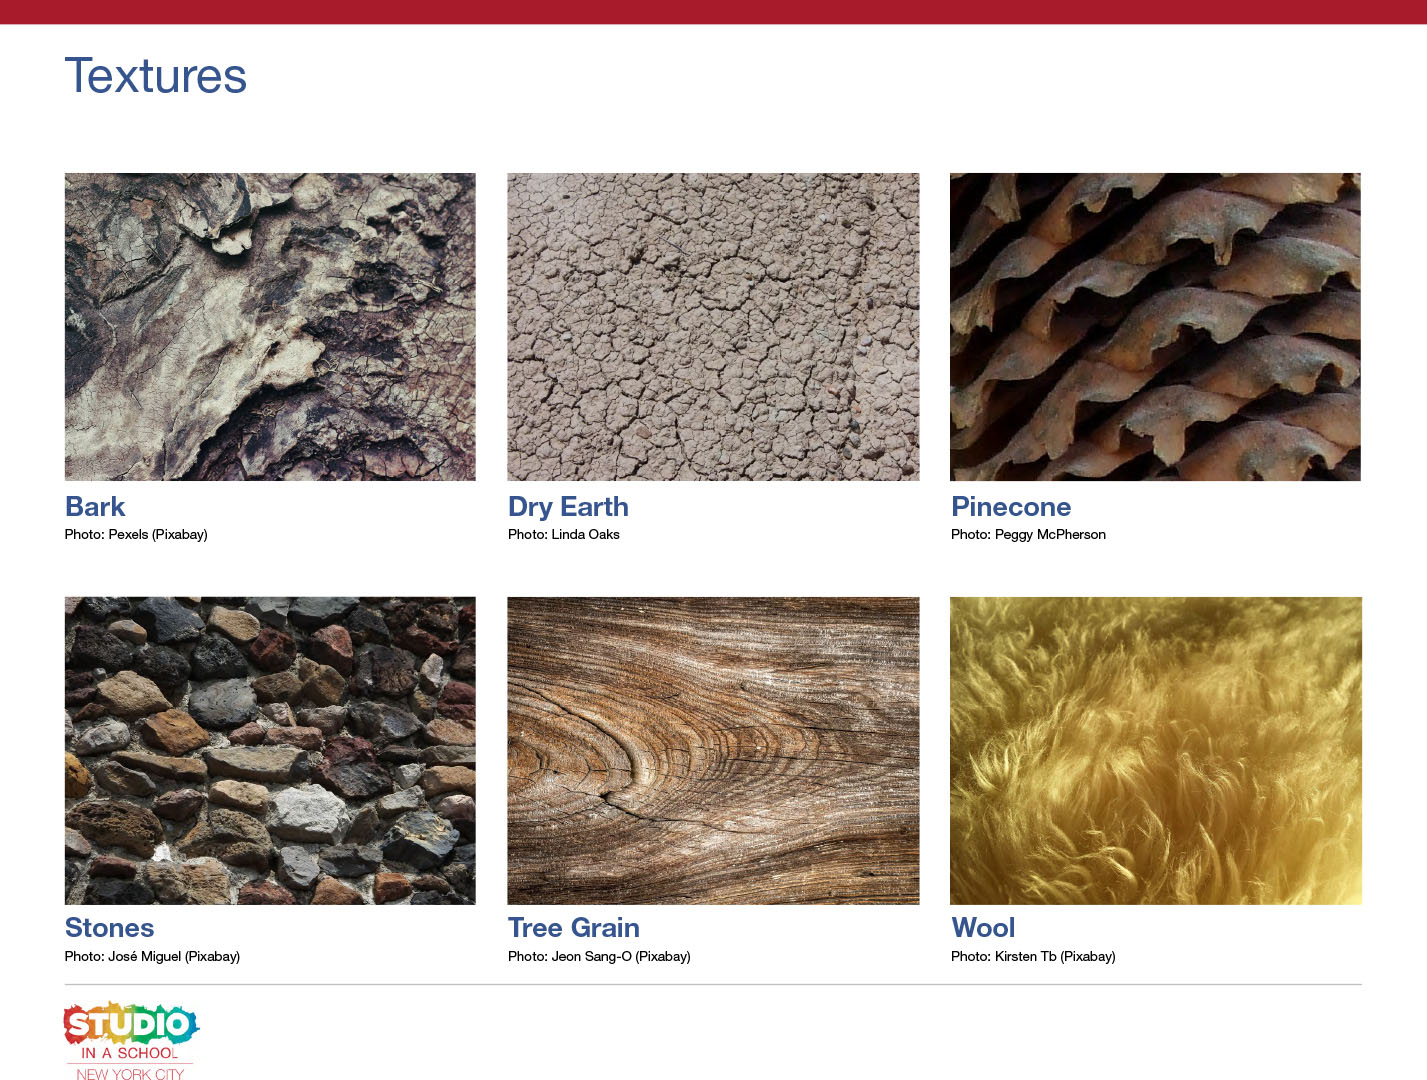
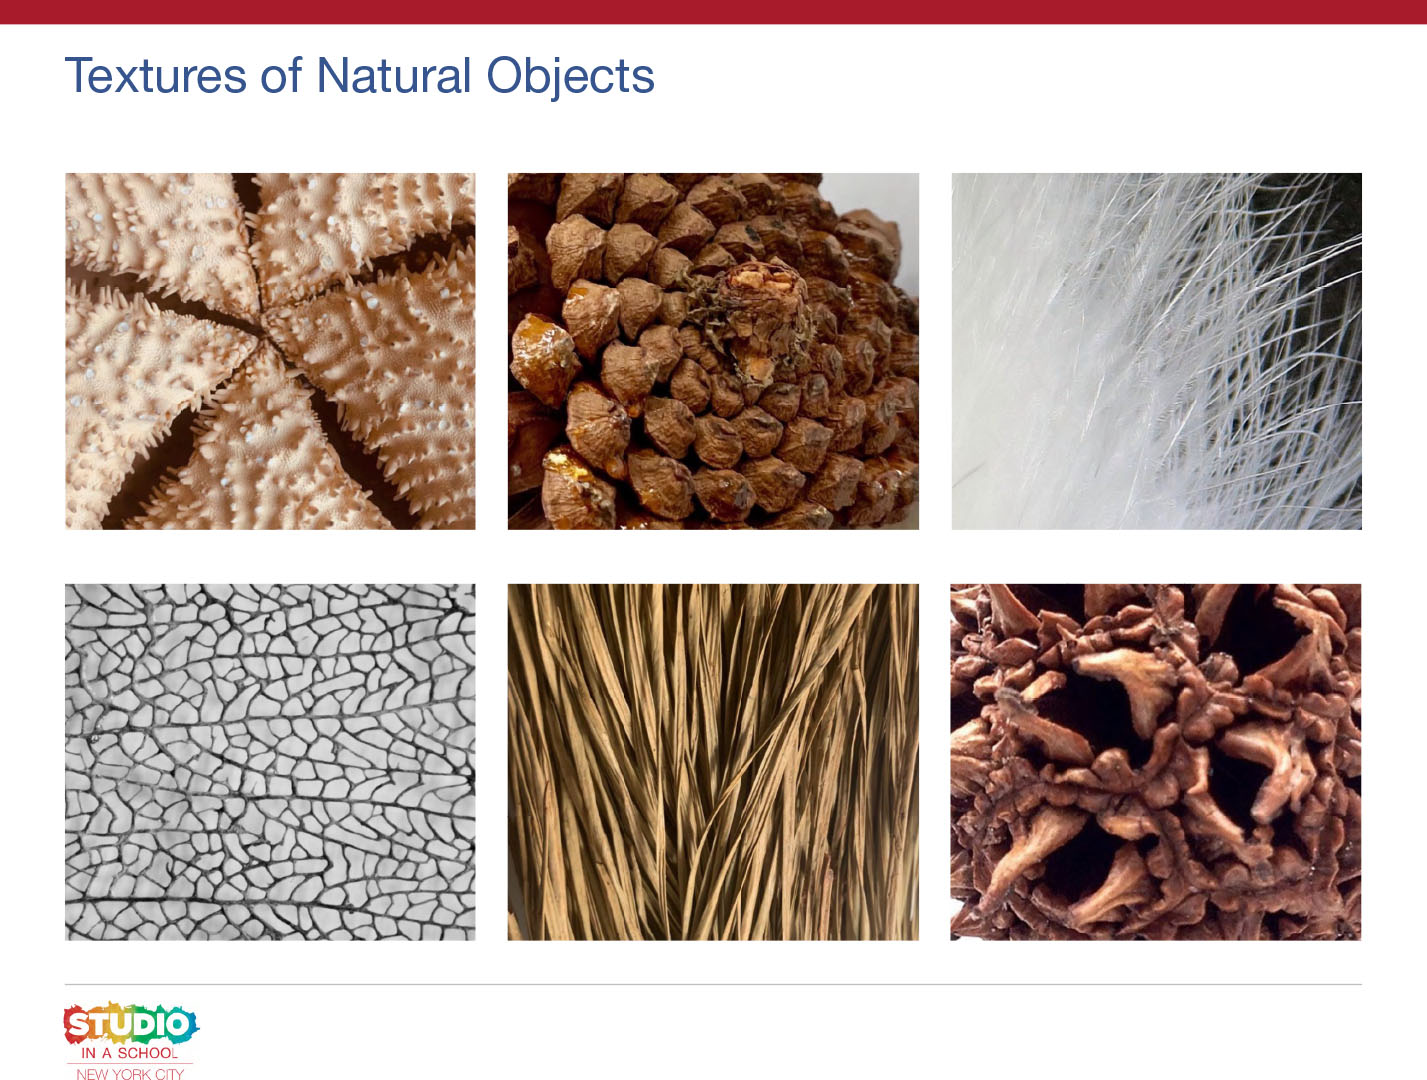
- Natural objects with texture: rocks, leaves, pinecones, bark, wood pieces, seed pods, seashells, etc. OR photos on slides #10 – 17
- Optional: magnifying glass
- Marks and Visual Texture video
- Marks and Visual Texture student slides
Objectives
Students will understand that:
- Marks are very short lines or dots made by the pencil hitting the paper. Marks can have different qualities, just like lines.
- Objects have texture. Artists use marks, lines and patterns to create visual texture, which represents a physical texture in a work of art.
- Looking closely at an object helps us to notice the marks, lines, shapes or patterns that make up its texture.
Students will be able to:
- Identify the difference between texture and visual texture.
- Observe and identify the marks, lines, shapes and patterns that make up the textures of different natural objects.
- Use repeating marks and lines to draw the visual textures of different natural objects.
Activities
Step 1: Introduction to the lesson
Hello artists! In this lesson we are going to explore texture and visual texture. In the last lesson, we drew and discussed lines and shapes. Today we are going to start by making marks with our pencil.
- What is a mark?
Short lines or dots are called marks. Any time your pencil hits a paper, it makes a mark.
Marks that continue become lines.
- How can we draw different kinds of marks with a pencil?
Step 2: Exploring marks, with student slides #3 – 4 (5 minutes)
Let’s try making some marks. Student slide #4 shows a variety of marks made with a pencil. How do you think the artist used their pencil to make these different marks? Think about how we created different line qualities, like light and dark, thick and thin.
Take out your paper and lightly tap your pencil to the paper.
What kind of mark did it make? How can you make a lighter or darker mark?
How can you hold your pencil in different ways to make different kinds of marks?
Now it’s your turn to continue drawing different kinds of marks. Try all the suggestions on slide #4 and see what else you can do.
Here are the suggestions:
- Make a few of each kind of mark on slide #4.
- Try drawing them close together and far apart.
- Make new marks by overlapping them.
- Invent your own marks.
Step 3: Texture and visual texture, with student slides #5 – 6 (5 minutes)
Let’s talk about texture. What is texture? Texture is the way something feels when you touch it. Look at the photo on a branch from a tree on student slide #5. How do you think this might feel? What do you see that makes you say that?
Artists often create something called “visual texture.” What do you think “visual texture” could be?
Visual texture is created when lines or marks are used in a drawing or painting to show how an object feels when you touch it.
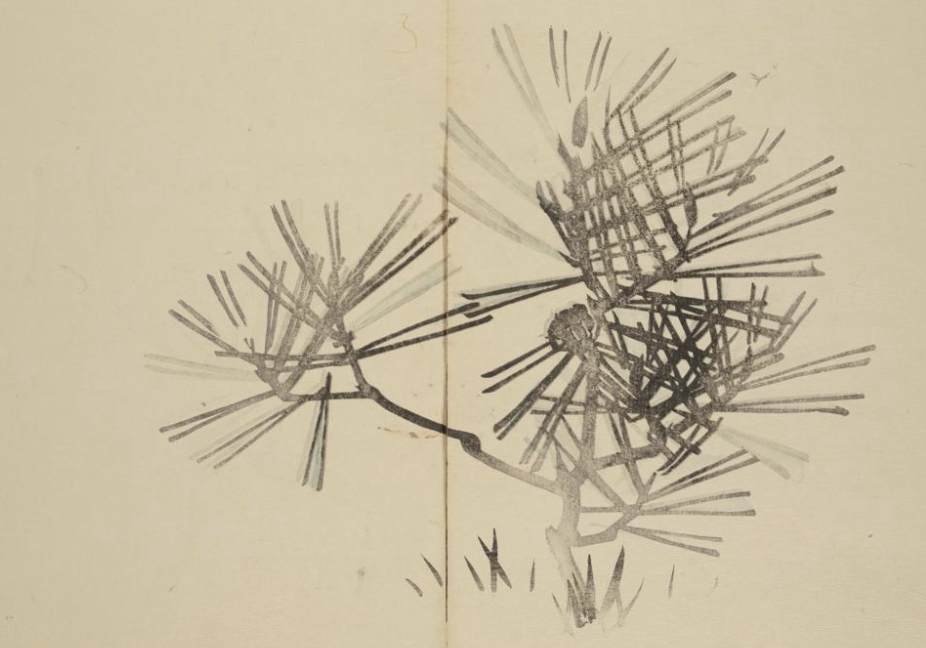
Look at the woodblock print by Matsumura Keibun on student slide #6. How did this artist create visual texture? What lines or marks do you notice? How can we use lines and marks to create other visual textures? Let’s find out. View the Marks and Visual Texture video to learn how to draw the visual textures of different natural objects.
Step 4: Looking closely and drawing visual textures (25 minutes)
Now, look at one of the objects that you’ve collected or one of the photos on student slides #10 – 17.
- Have you ever seen an object like this before? If so, where?
- How can you describe this object?
- Does it have spikes? Hair? Fringed edges?
- How does the object feel when you touch it?
- If you’re looking at a photo, how do you imagine this object might feel?
(Smooth, rough, bumpy, soft, hairy, fuzzy, sharp, prickly)
- Look closely at the object again. What marks or lines repeat to create this texture?
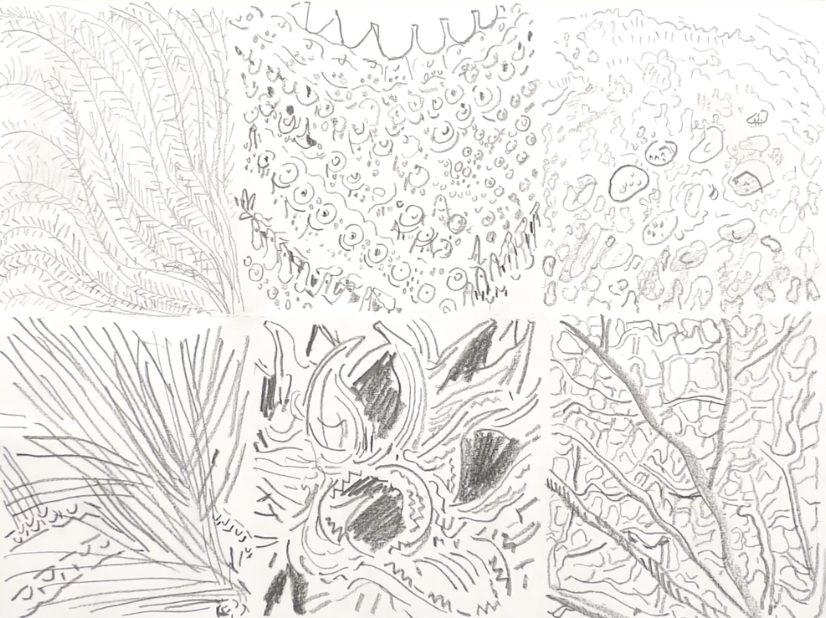
Turn your paper over so that your mark exploration is on the back. Fold it once horizontally. Then, fold one edge in towards the middle and the other side over on top of it. Unfold your paper. Your paper should be folded into 6 rectangles.
Now it’s your turn to draw the textures of 6 different objects in the grid that you’ve made. Don’t worry about drawing the shape of the object, just zoom-in to look closely at each texture. What marks, lines or shapes do you see?
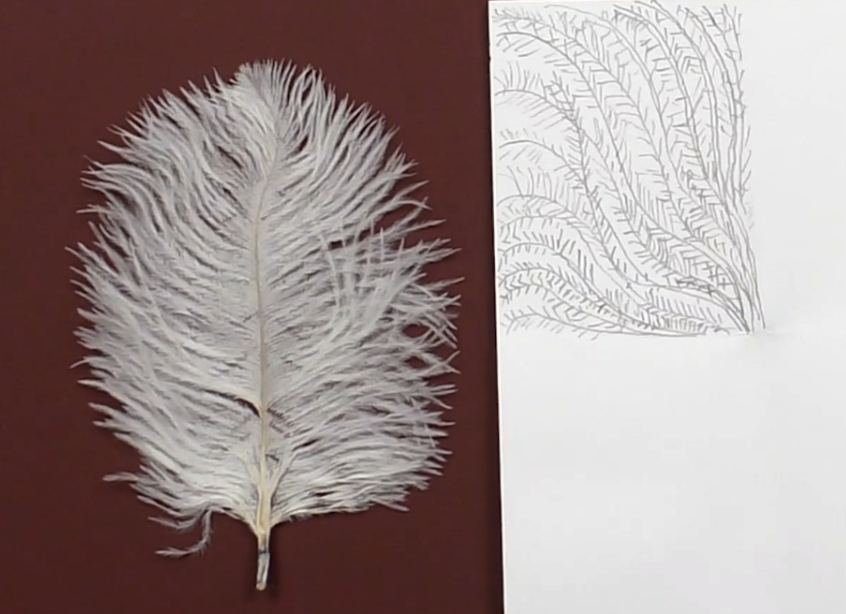
Fill each box entirely with the texture that you see.
(Have students use objects OR the photos on slides #10 – 17, and magnifying glasses if available.)
Step 5: Reflection Questions for Discussion (10 minutes)
Questions for Individual Artists
Choose one of the textures in your drawing.
- What did you notice about the texture of this object?
- How did you draw this visual texture?
- What marks, lines or shapes did you use?
- Did any of your textures become a pattern?
Questions for Whole Group
- How can you describe the different textures that you see in this artist’s work?
- How do you think the artist created this texture? What marks, lines or shapes did they use?
Vocabulary
Marks
Texture
Visual texture
Repeat
Observation
Texture names: smooth, rough, bumpy, soft, hairy, fuzzy, sharp, prickly
Resources

Examples of Textures of Natural Objects
Matsumura Keibun. Kinkadō’s Album of Drawings by Keibun. 1898, Woodblock printed book (orihon, accordion-style); ink and color on paper, 9 15/16 x 7 1/16 in. The Metropolitan Museum of Art, New York. https://www.metmuseum.org/art/collection/search/78655
NY Times article and scavenger hunt on real and implied texture in objects and art:
https://www.nytimes.com/2016/10/13/learning/lesson-plans/analyzing-the-elements-of-art-seven-ways-to-think-about-texture.html
Adaptations
For Multilingual Learners
Create vocabulary cards with different texture names, have students feel textures and match name cards to textures.
Have students use hands to show the gestures of making different marks and textures during demonstration and reflection.
Match textured objects with texture drawings to make the connection clear.
Extensions
Making Marks in Reverse
Try making a shaded area using your pencil, then use your eraser to make different kinds of marks.
Texture Walk
Take a texture walk and see how many different textures you can find. Take visual notes (quick sketches) of what you see. This can help you to not only notice textures, but give you ideas for textures that you can incorporate into your own work.
Texture Words
Think of as many different words as you can to describe the textures around you: coarse, slimy, bristly, furry, matted, twisted, scratchy, wrinkly
- How would you draw these or portray them visually?
Explore Texture in Other Media
Use a variety of papers to explore texture in a cut and torn paper collage.
Use paint to explore color and pattern.