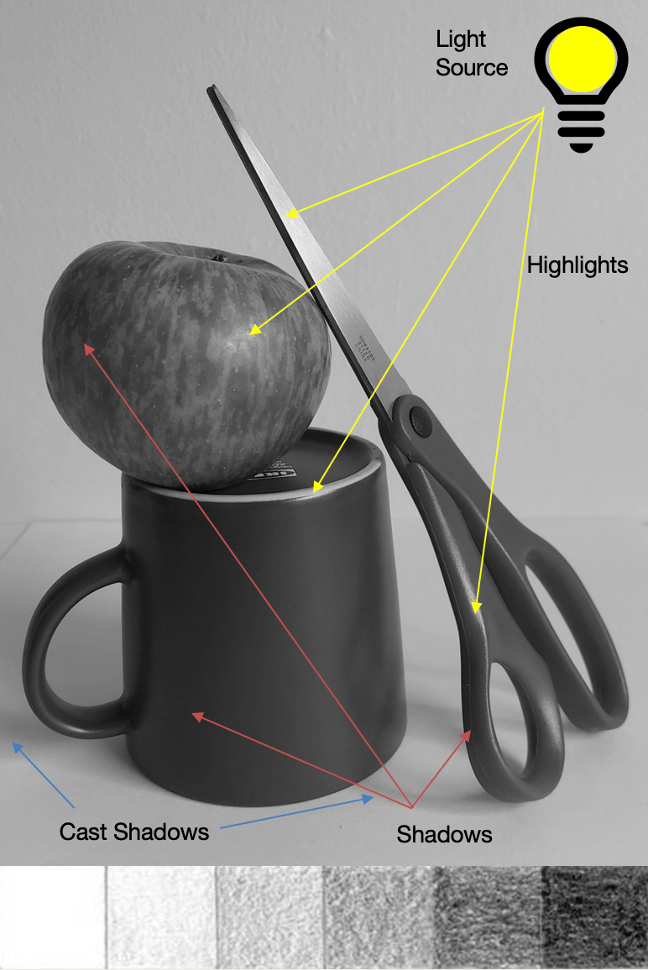
Overview
Students will begin to add value to their still life drawing.
Materials and Tools
- Pencil
- Paper
- 3-object still life arrangement
- Scaled drawing
- Value Scale
Objectives
Students will understand that:
- Adding a full range of value can make artwork look realistic.
Students will be able to:
- Use a full range of value to create volume in their still life drawing.
Activities
Introduction:
Value describes how light or dark a color appears, and volume is the appearance of 3-dimensionality in a 2D artwork.
How can we use value to create volume in our still life drawings?
Look at the still life you’ve been using as a group and ask students to identify highlights, mid-tones, shadows, and cast shadows, using a value scale.
Point out how cast shadows fall on the opposite side of a light source.
- Demonstrate beginning to add accurate values to your still life, working from dark to light.
- Demonstrate adding the mid-tones to your objects. Identify and add the shadows to your drawing.
- Demonstrate blocking in shadows and cast shadows, asking students to identify as you go.
Work Time
Have students use their value scale from the last lesson to determine where values belong in their drawings.
- Where do you see highlights? Can you see more than one?
- Where do you see shadows?
- Where are the cast shadows?

Encourage students to start with the lightest values and build up darker values gradually, adjusting as they go.
Reflection Questions for Discussion
- What was a strategy that you used to add value to your drawing today?
- How did adding value change your drawing?
- What is one way that you plan to finish your drawing?


Vocabulary
Value: how light or dark a color appears
Volume: the appearance of 3-dimensionality in a 2D artwork
Light Source: the place where light comes from
Highlights: areas on an object that catch the most light
Mid-Tone: areas with little highlight or shadow
Shadow: the darkest areas on an actual object
Cast Shadow: the shadow made by the object
