
Overview
In this lesson, students will create sculptures using paper.
Materials and Tools
- Paper shapes from previous lesson
- Colored construction paper (three sheets of the same color)
- Scissors
Objectives
Students will understand how to:
- Paper can be transformed and arranged in different ways to create a sculpture.
- A sculpture stands up, is three-dimensional (3D), and looks different from all sides.
- A life-sized sculpture has a relationship with a viewer’s body and can be interacted with in different ways.
Students will be able to:
- Demonstrate cutting and changing paper by making 3D shapes.
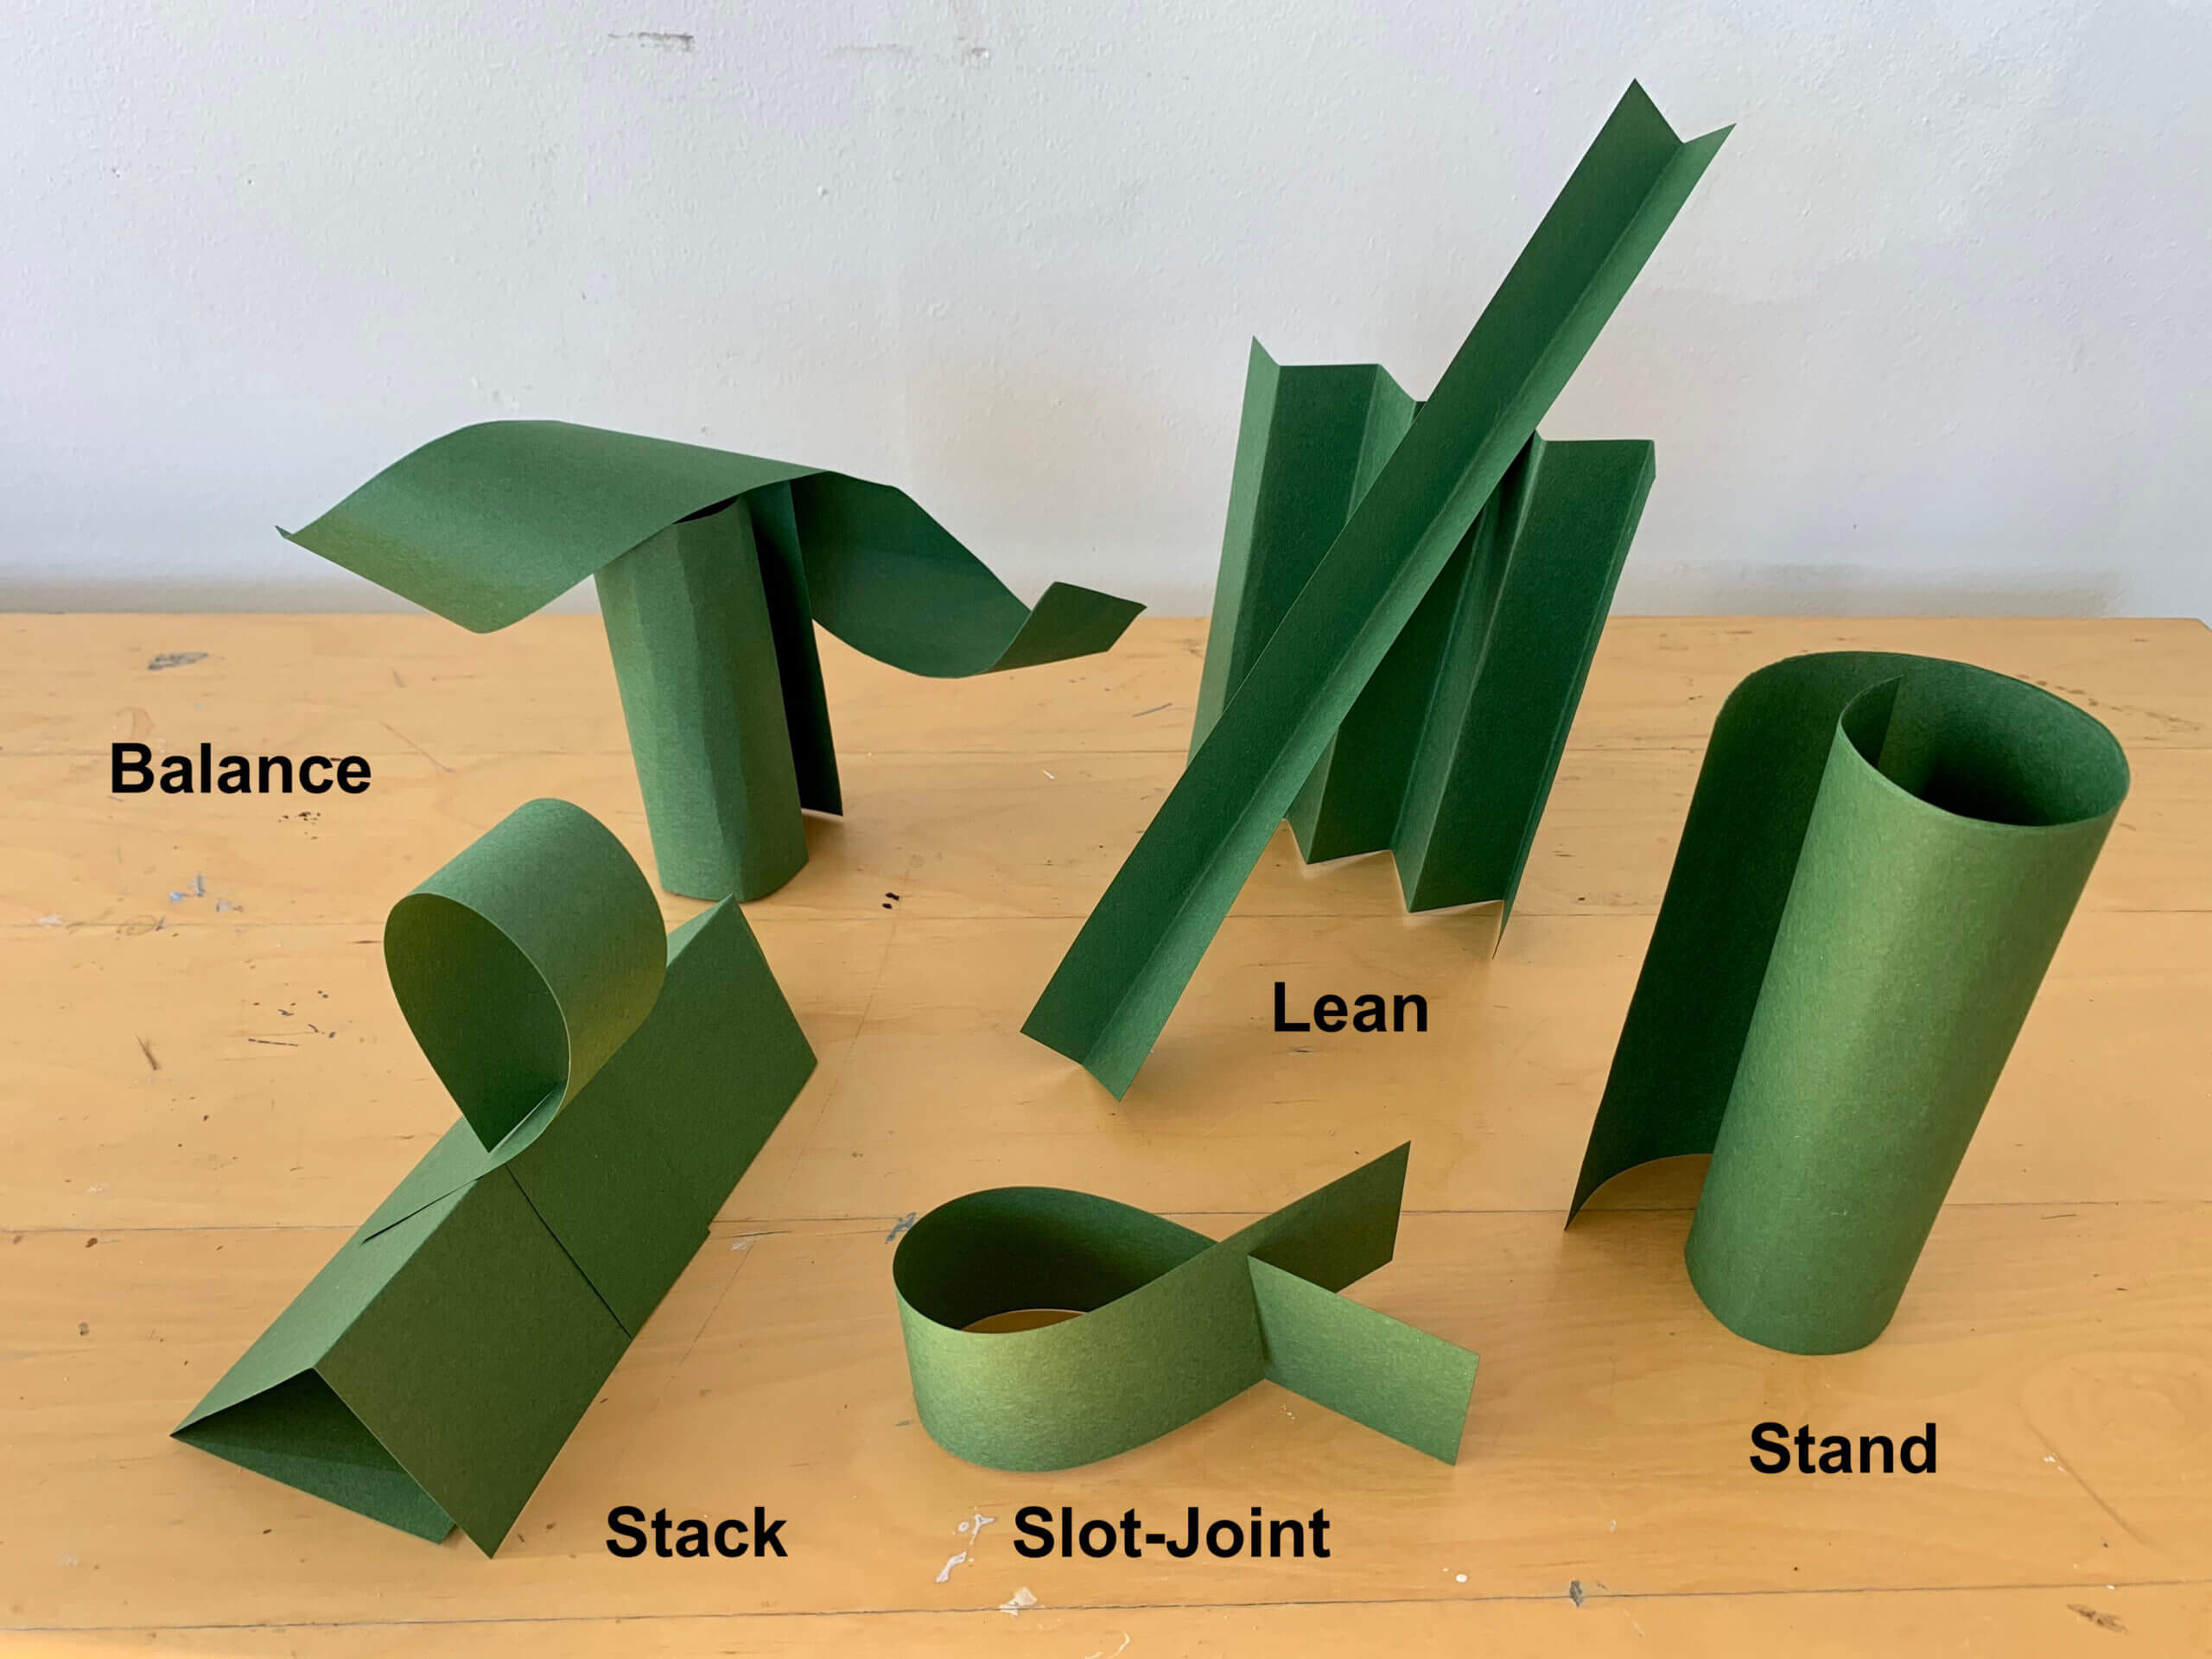
- Demonstrate building with paper by standing, stacking, leaning, and balancing.
- Create a sculpture by attaching shapes together using slot joints.
Activities
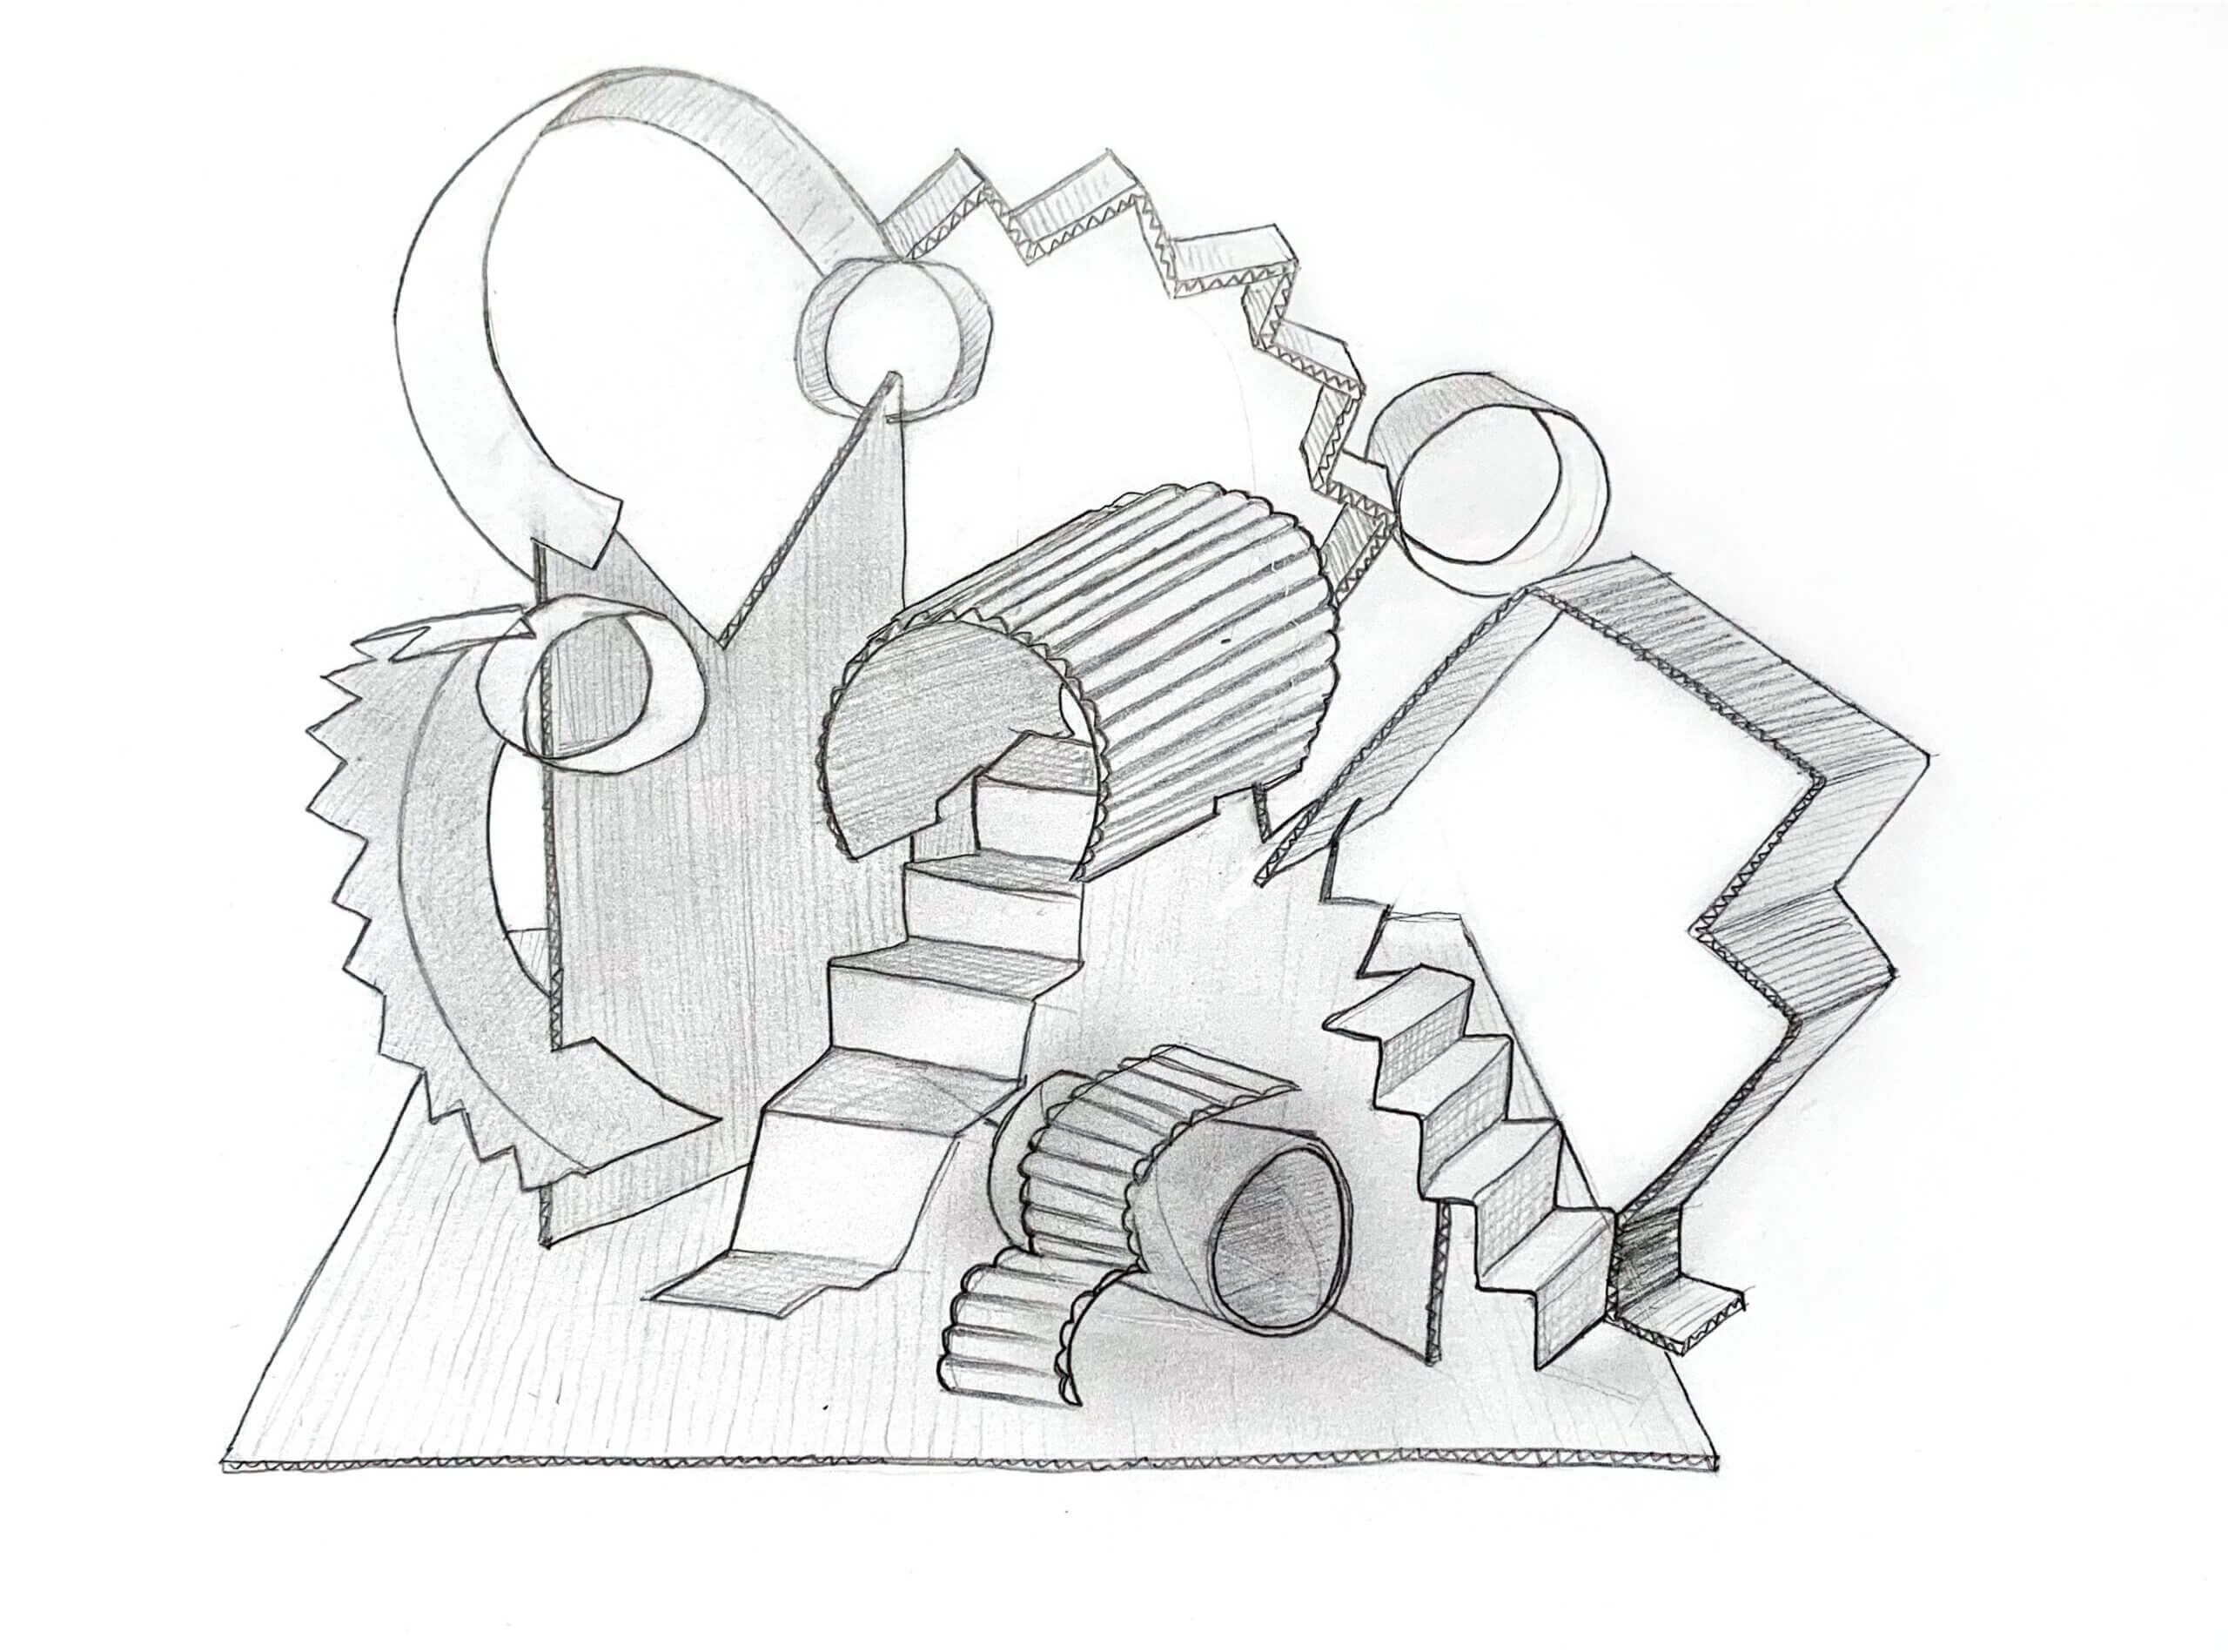
We will create an imaginary structure out of paper. What is a structure? A structure is something 3D that is built by joining different parts together. Some examples include bridges, columns, walls, tunnels, archways, or buildings. An imaginary structure is something new that is made from an artist’s imagination.
Close-Looking
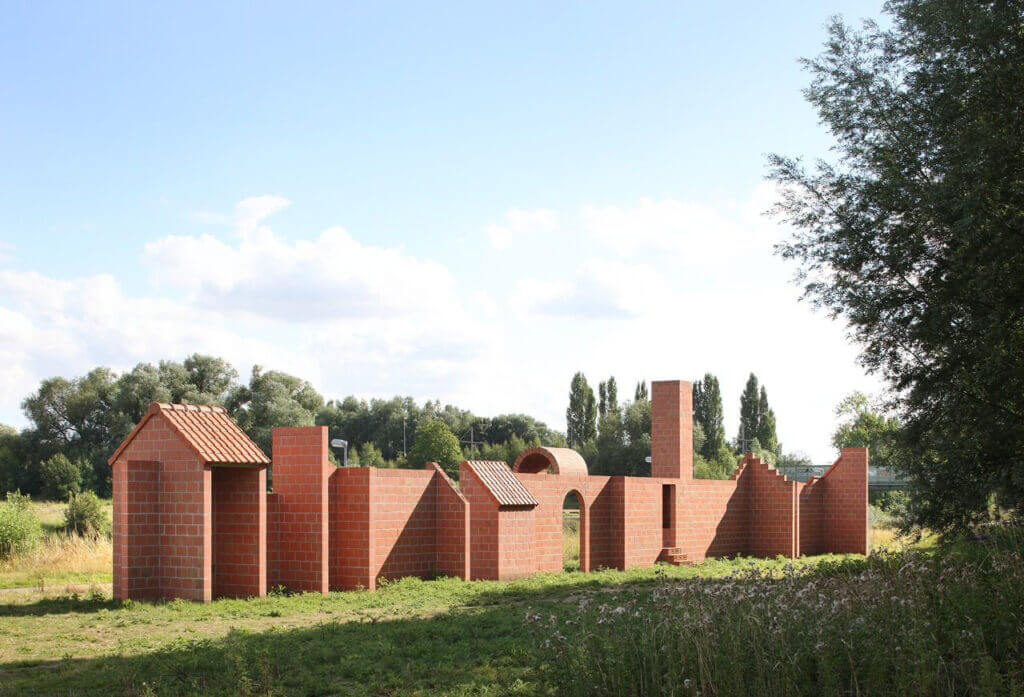
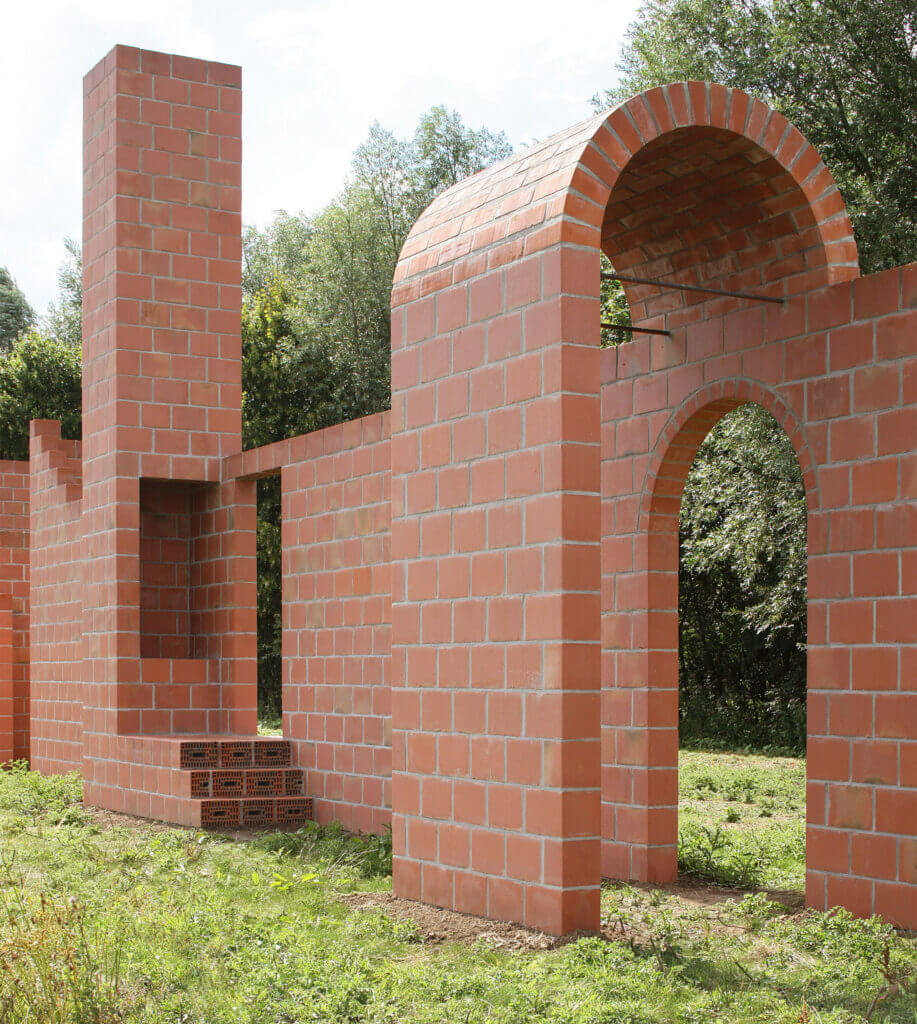
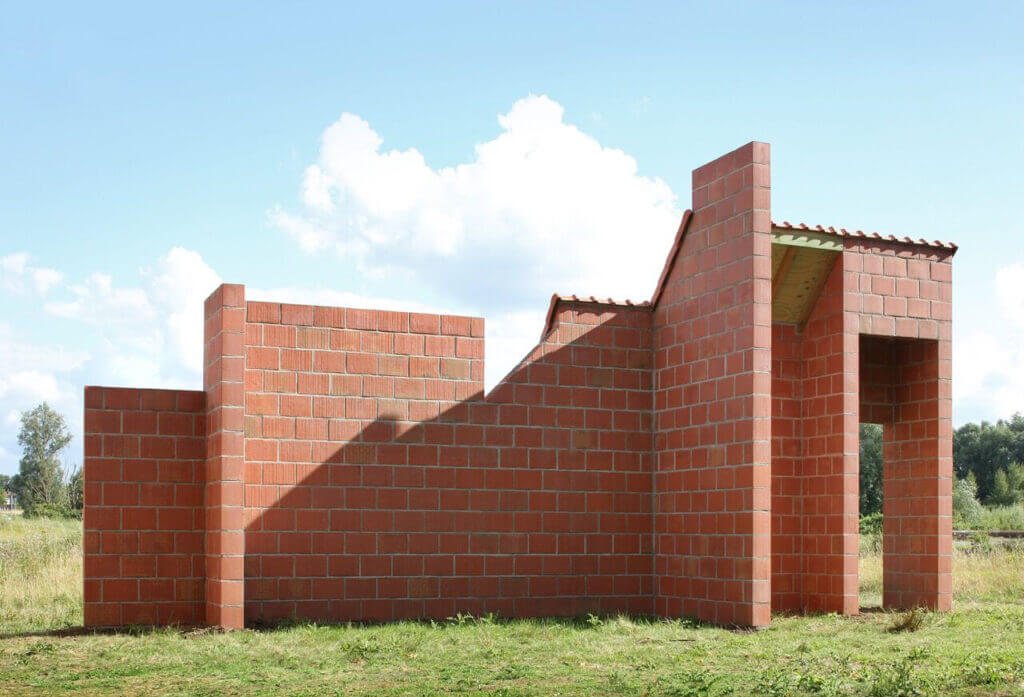
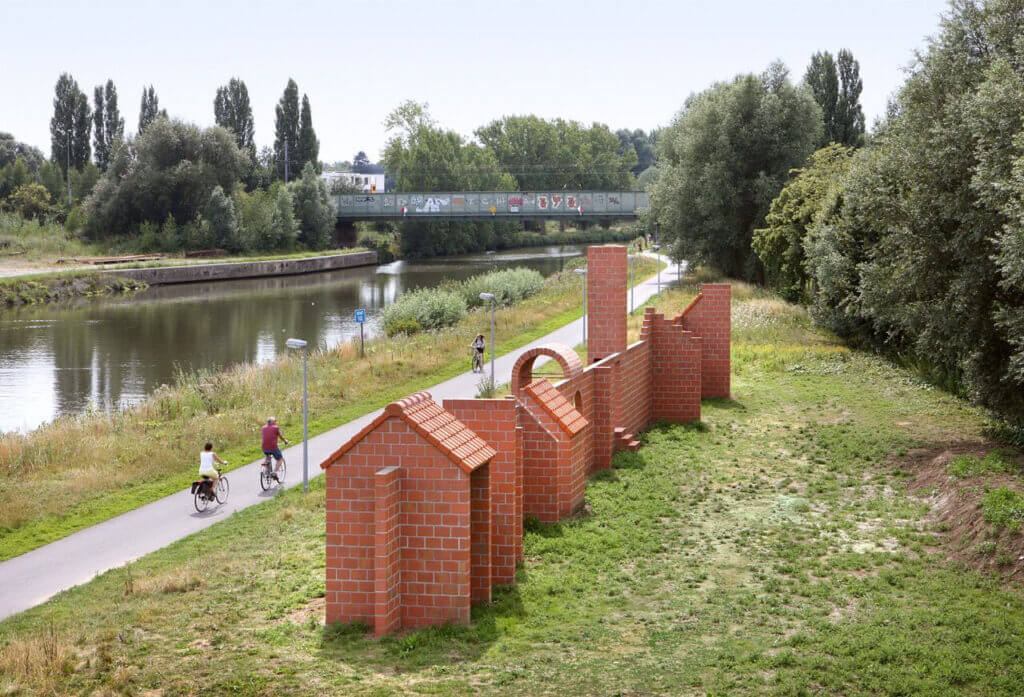
Filip Dujardin, Sequence no. 1, installed along the banks of the Leie River in Kortrijk, Belgium, 2015. 40 meters (131 feet) in length.
This is a temporary site-specific sculpture that was located along the banks of the Leie River in Kortrijk, Belgium. It draws inspiration from the houses and buildings in the city of Kortrijk and is arranged in a straight line to follow the flow of the river.
- What do you notice?
- What do you notice about the size or scale?
- What shapes do you see?
- How did the artist arrange the shapes?
- How do you imagine interacting with this sculpture?
Background Information
From Filip Dujardin:
“What I did with this intervention was to make a gesture towards the city by building a structure that places several architectural architypes [sic] into a certain sequence. By doing so, there evolves a suggestion of a silhouette of a street or an unfolded house. In fact, it is an action to pull the city towards the water.”
Work Time:
Students will gather their torn paper shapes from the previous lesson and use scissors to create more shapes.
They will cut two pieces of papers in half, and the third piece of paper into wide strips. They will use rolling, folding, twisting, crumpling, or fringing to create additional shapes that stand up.
- How are the cut shapes different from the torn shapes?
Students will look closely at their shapes.
- How do they remind you of a structure?
- What can they become (for example, stairs, a wall, a roof, column, bridge)?
Students will try building with their shapes to create a sculpture. They can stand, stack, lean, and balance their shapes.
- Will your sculpture be wide or tall?
- How would a person enter the space?
Students will stand and look at their sculpture from different directions.
- Is there anything you want to change or add?
- Where can you use slot joints to attach your shapes?
Prompts for Discussion
- How did you build with your shapes?
- If your sculpture were life-sized, how do you imagine interacting with it?
- Where do you imagine this structure being built?
Additional Discussion Prompts
- What do you want someone to know about your sculpture?
- What would you title your sculpture? Why?
Writing Activity
Imagine if your sculpture were life-sized.
- How does it feel to be inside this sculpture? What will you do here?
What are three action words that describe how you would interact with your sculpture. Write a sentence using each word or use the sentence frame below.
- Three words that describe how I would interact with my sculpture are __________, __________, and __________.
Artists often title their work to tell viewers more about their idea.
- Come up with a title for your imaginary structure.
- What kind of a place is this?
- What would you want people who view your sculpture to know about it?
Write a title for your artwork and one sentence about why you chose that title.
- The title of my imaginary structure is ___________. I chose this title because ________.
Sketchbook Activity
Turn your sculpture around and choose one side to look at closely. Make a drawing of what you see. Imagine what else you can add to your sculpture. Keep “building” it by drawing additional elements and details.
- What did you add to your sculpture in your drawing?
Vocabulary
Sculpture
Balance
Lean
Stack
Stand
Slot joint
Resources
Filip Dujardin, Sequence no 1, and Impossible Architecture, photography series.
Siah Armajani, Dictionary for Building: From First Floor to Third Floor, 1974-75, Metropolitan Museum of Art
Adaptations
ADAPTATIONS FOR STUDENTS WITH DISABILITIES
- Think about the sounds your paper shapes might make.
- Use hand and body movements to make lines seen in new paper shapes.
- Use an iPad or Google Classroom to draw lines and shapes.
- Use the “Think, Pair, Share” strategy to partner students to help with understanding, verbalize ideas, and share their process.
ADAPTATIONS FOR MULTILINGUAL LEARNERS
- Multi-modality learning
- Total Physical Response (TPR)
- Provide visual examples to support words and concepts
- Demonstrate
- Use repetition
- Paraphrase
- Chunk information
- Use equity sticks when calling on students
- Pre-teach high-utility vocabulary
Language Objectives
- Use of prepositions to describe the relationship between a viewer and the sculpture (for example, above, next to, underneath, behind)
- Use of opinion phrases to express perspective
- High-utility vocabulary: stand, stack, lean, balance
Extensions
- For elementary school students: Creating a paper sculpture of an imaginary playground or play space.
- For high-school students: Creating a paper model for a site-specific sculpture, considering the location and history.
- Exploring recycled materials, for example cardboard, to create buildings or imaginary structures. These can be exhibited together to create a street or neighborhood.
- Using found objects at home and standing, stacking, leaning, or balancing them to create imaginary buildings.
- Using paper and cardboard to create imaginary creatures or animals, exploring personality traits and emotions.
- Documenting your sculptures by drawing them from three different viewpoints.
Credits
Written By:
Traci Talasco, Artist Instructor
Lesson Development:
Julie Applebaum, Senior Director
Copyright © 2023 Studio in a School NYC LLC