Overview
Students will explore ways to use their sketchbook using materials found in the home.
Materials and Tools
- Your sketchbook from previous lesson
- Drawing tools found in the home (pencils, pens, crayons, chalk, even old lipstick or makeup)
- Interesting papers with different textures (paper bag, wrapping paper, envelopes)
Activities
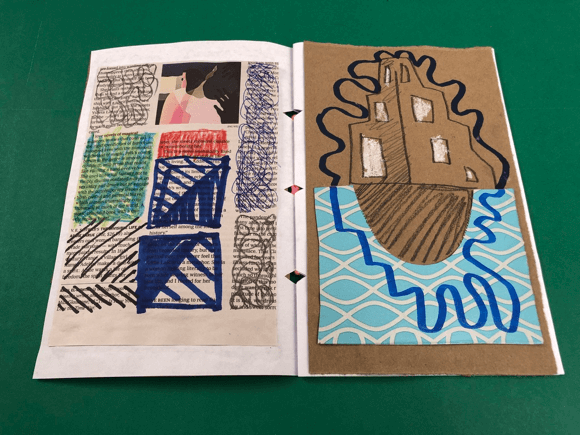
Step 1: On a page of your sketchbook, explore making marks and lines with each household drawing tool that you’ve found.
Step 2: On another page, glue down some of the papers that you’ve collected.
Step 3: Experiment with mark making on these different papers using tools you have found.
Close Looking: El Anatsui
Take a look at these two images by the artist El Anatsui. On the top is a drawing from the artist’s sketchbook, and on the bottom, a finished sculpture.
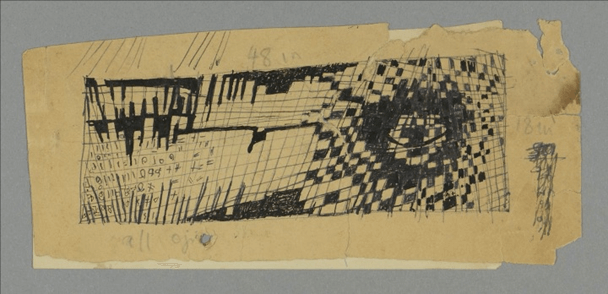
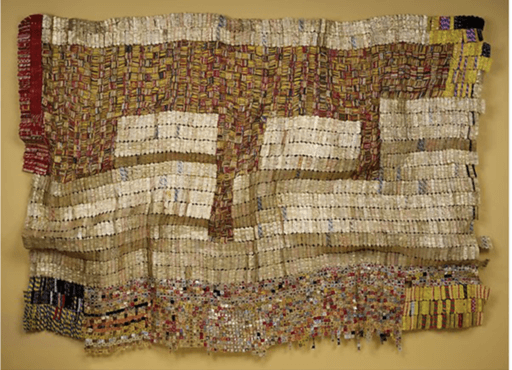
- What do you see in the sketch that the artist incorporated in the sculpture?
- What did he change or leave out?
- How does the sculpture expand on the ideas in the sketch?
Reflection Questions
- How did the different drawing tools work on each paper?
- What was your favorite combination of drawing tool and paper type, and why?
Vocabulary
Exploration
Marks
Lines
Drawing tools
Resources
El Anatsui, Untitled #56 (recto), Pen and ink on paper, 3.5 x 7.9”, Collection of the artist
El Anatsui, Between Earth and Heaven, 2006, Aluminum, copper wire, H. 86 3/4 in. × W. 10 ft. 8 in. × D. 8 in., Metropolitan Museum of Art